Microinjections
Preparation of injection solution and needle
Prepare the following injection solution, preferably the same day it is going to be used.
| Ingradient | Final Quantity in 20 ul | Volume to be added |
|---|---|---|
| Linearised construct | 100ng | Depends on construct concentration |
| gDNA | 500ng | Depends on construct concentration |
| KCl (1M) | 0.12M | 2.4 ul |
| Glycerol (50%) | 20% | 8 ul |
| Control dye (10%) | 0.25% | 0.5 ul |
| ddH2O | - | To add up to 20 ul |
Injection solution should be centrifuged for 15 minutes at max speed immediately before filling the microinjection needle.
Preparation of the needle
Be careful never to touch either ends of the needle nor the coil that heats up the glass - it is HOT! Wear gloves!
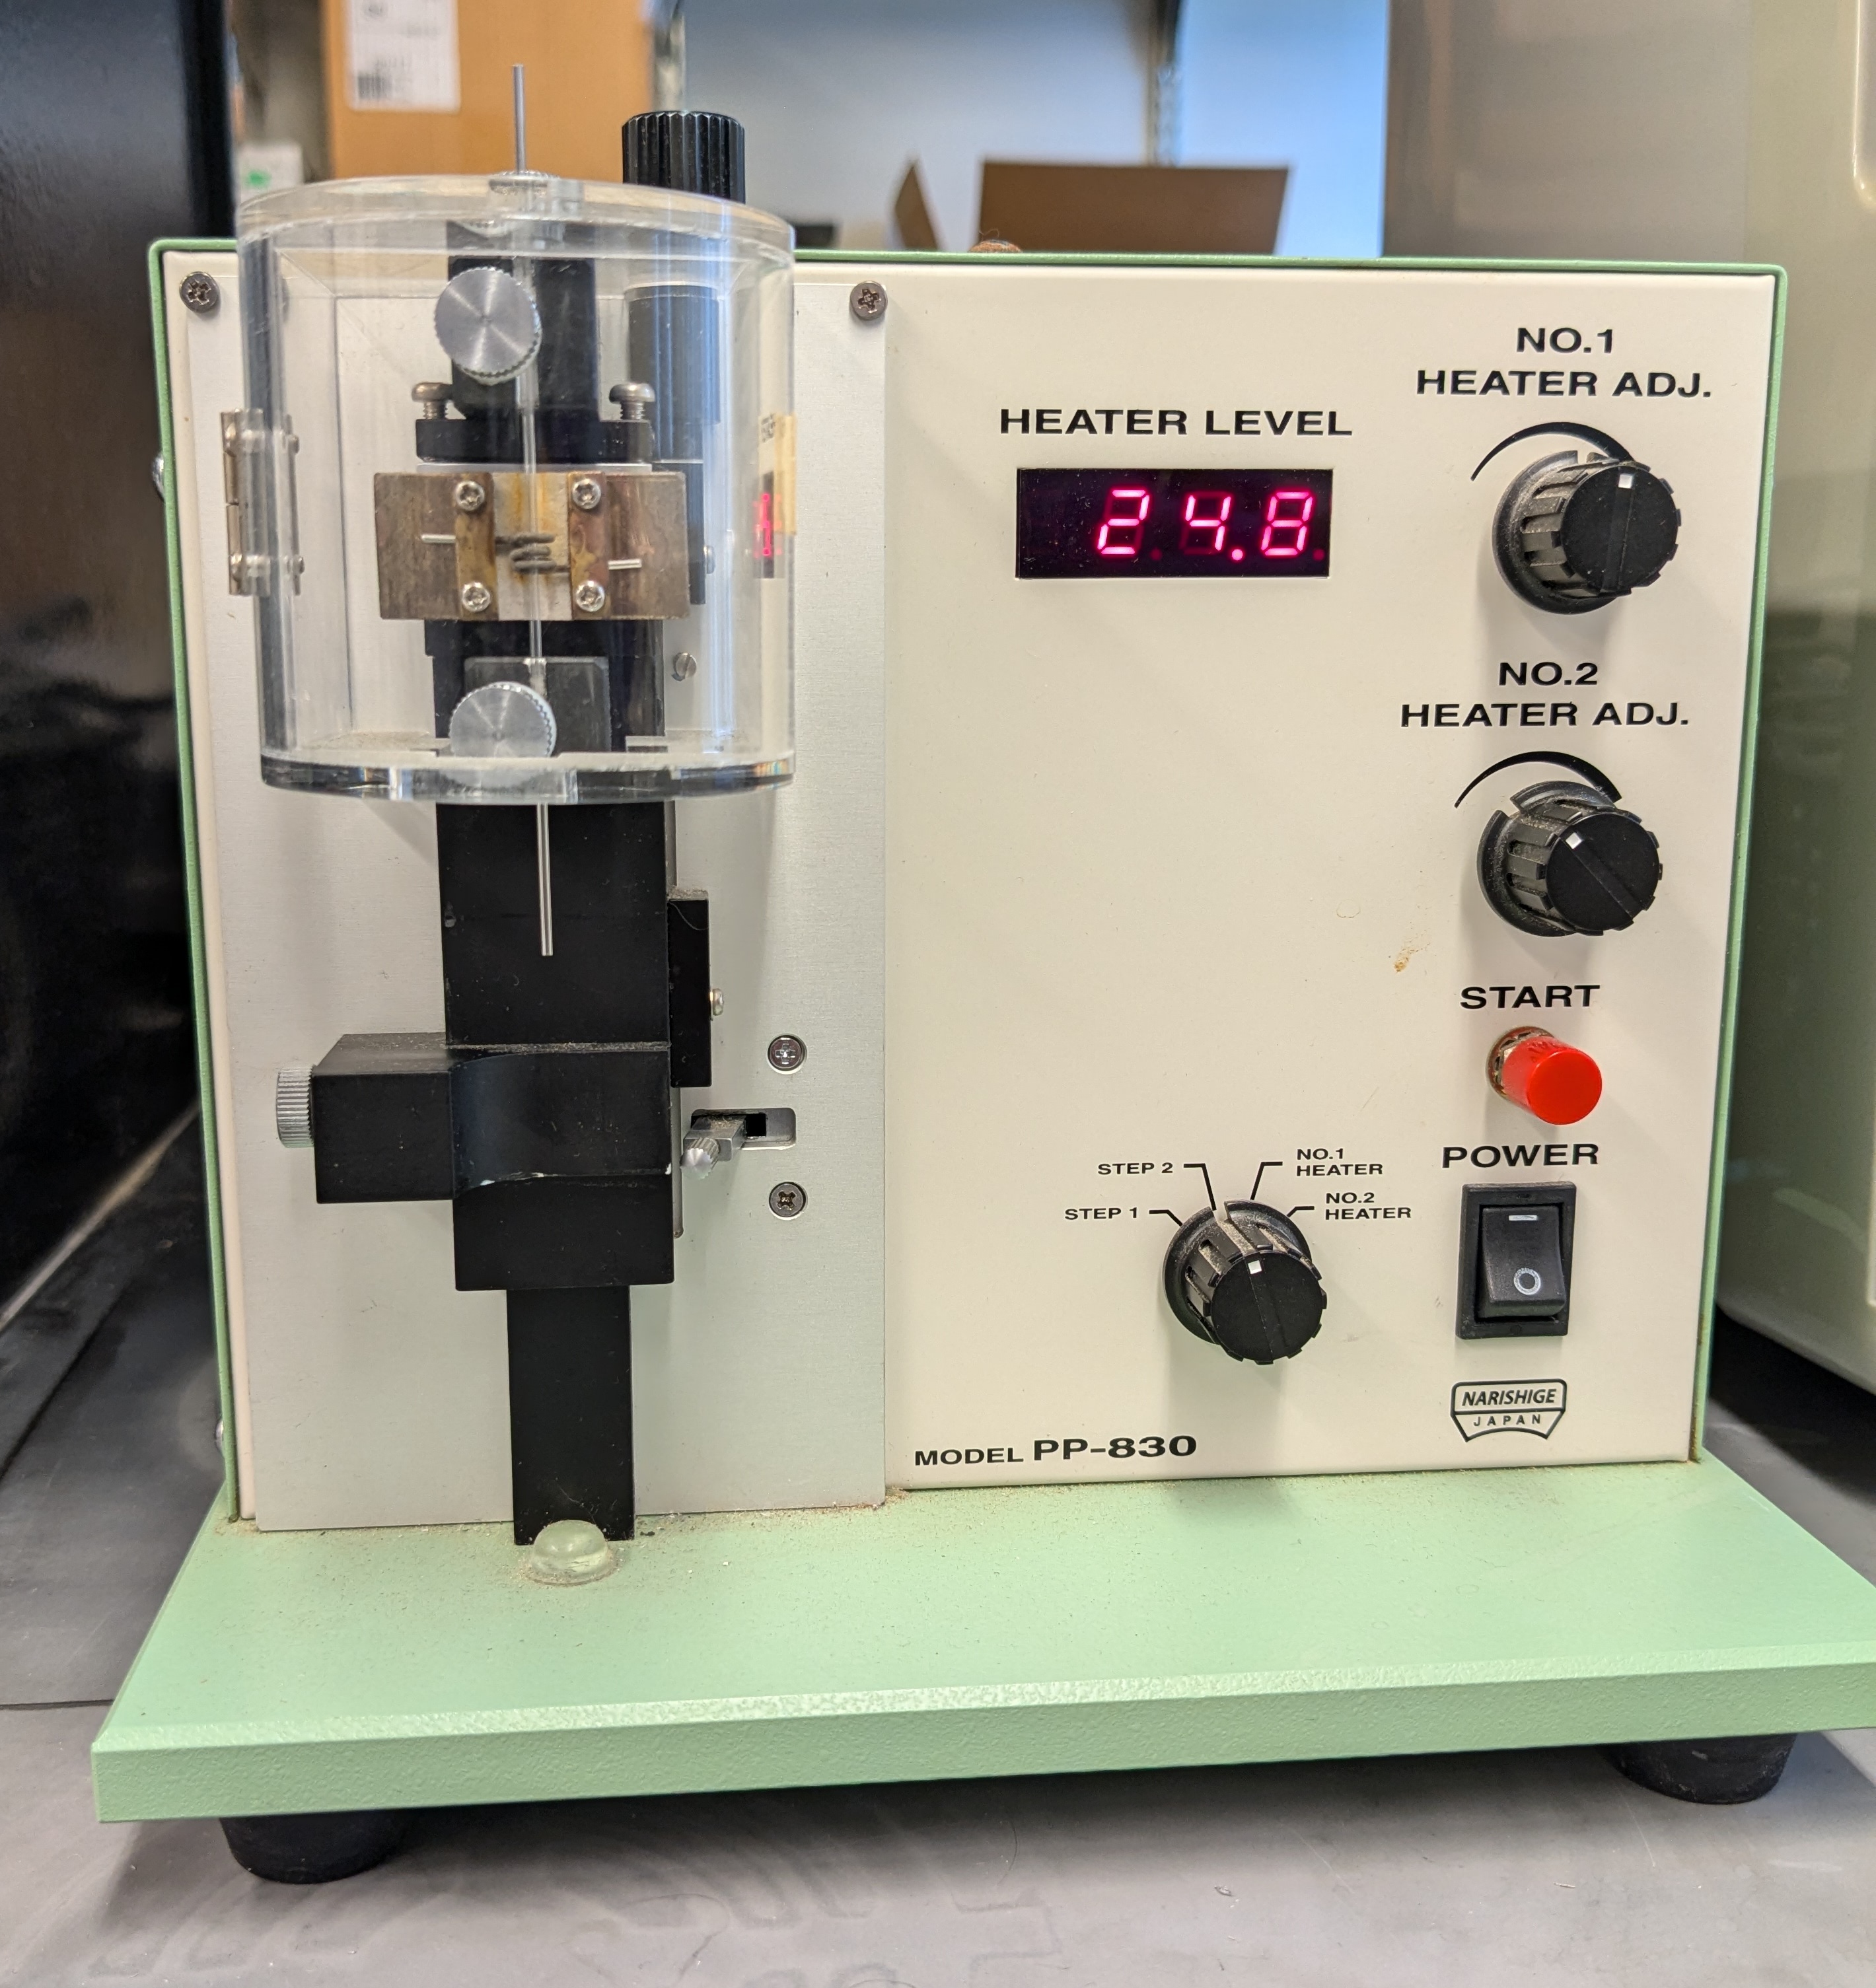
We used a Narishige puller, model PP-830 with Narishige GD-1 glass capillary with filament with the following settings:
Two stage: 67.4°C, 80.2°C.
Weight: 248.01 g.
Setting of the height on the side, next to the stopper: 6.
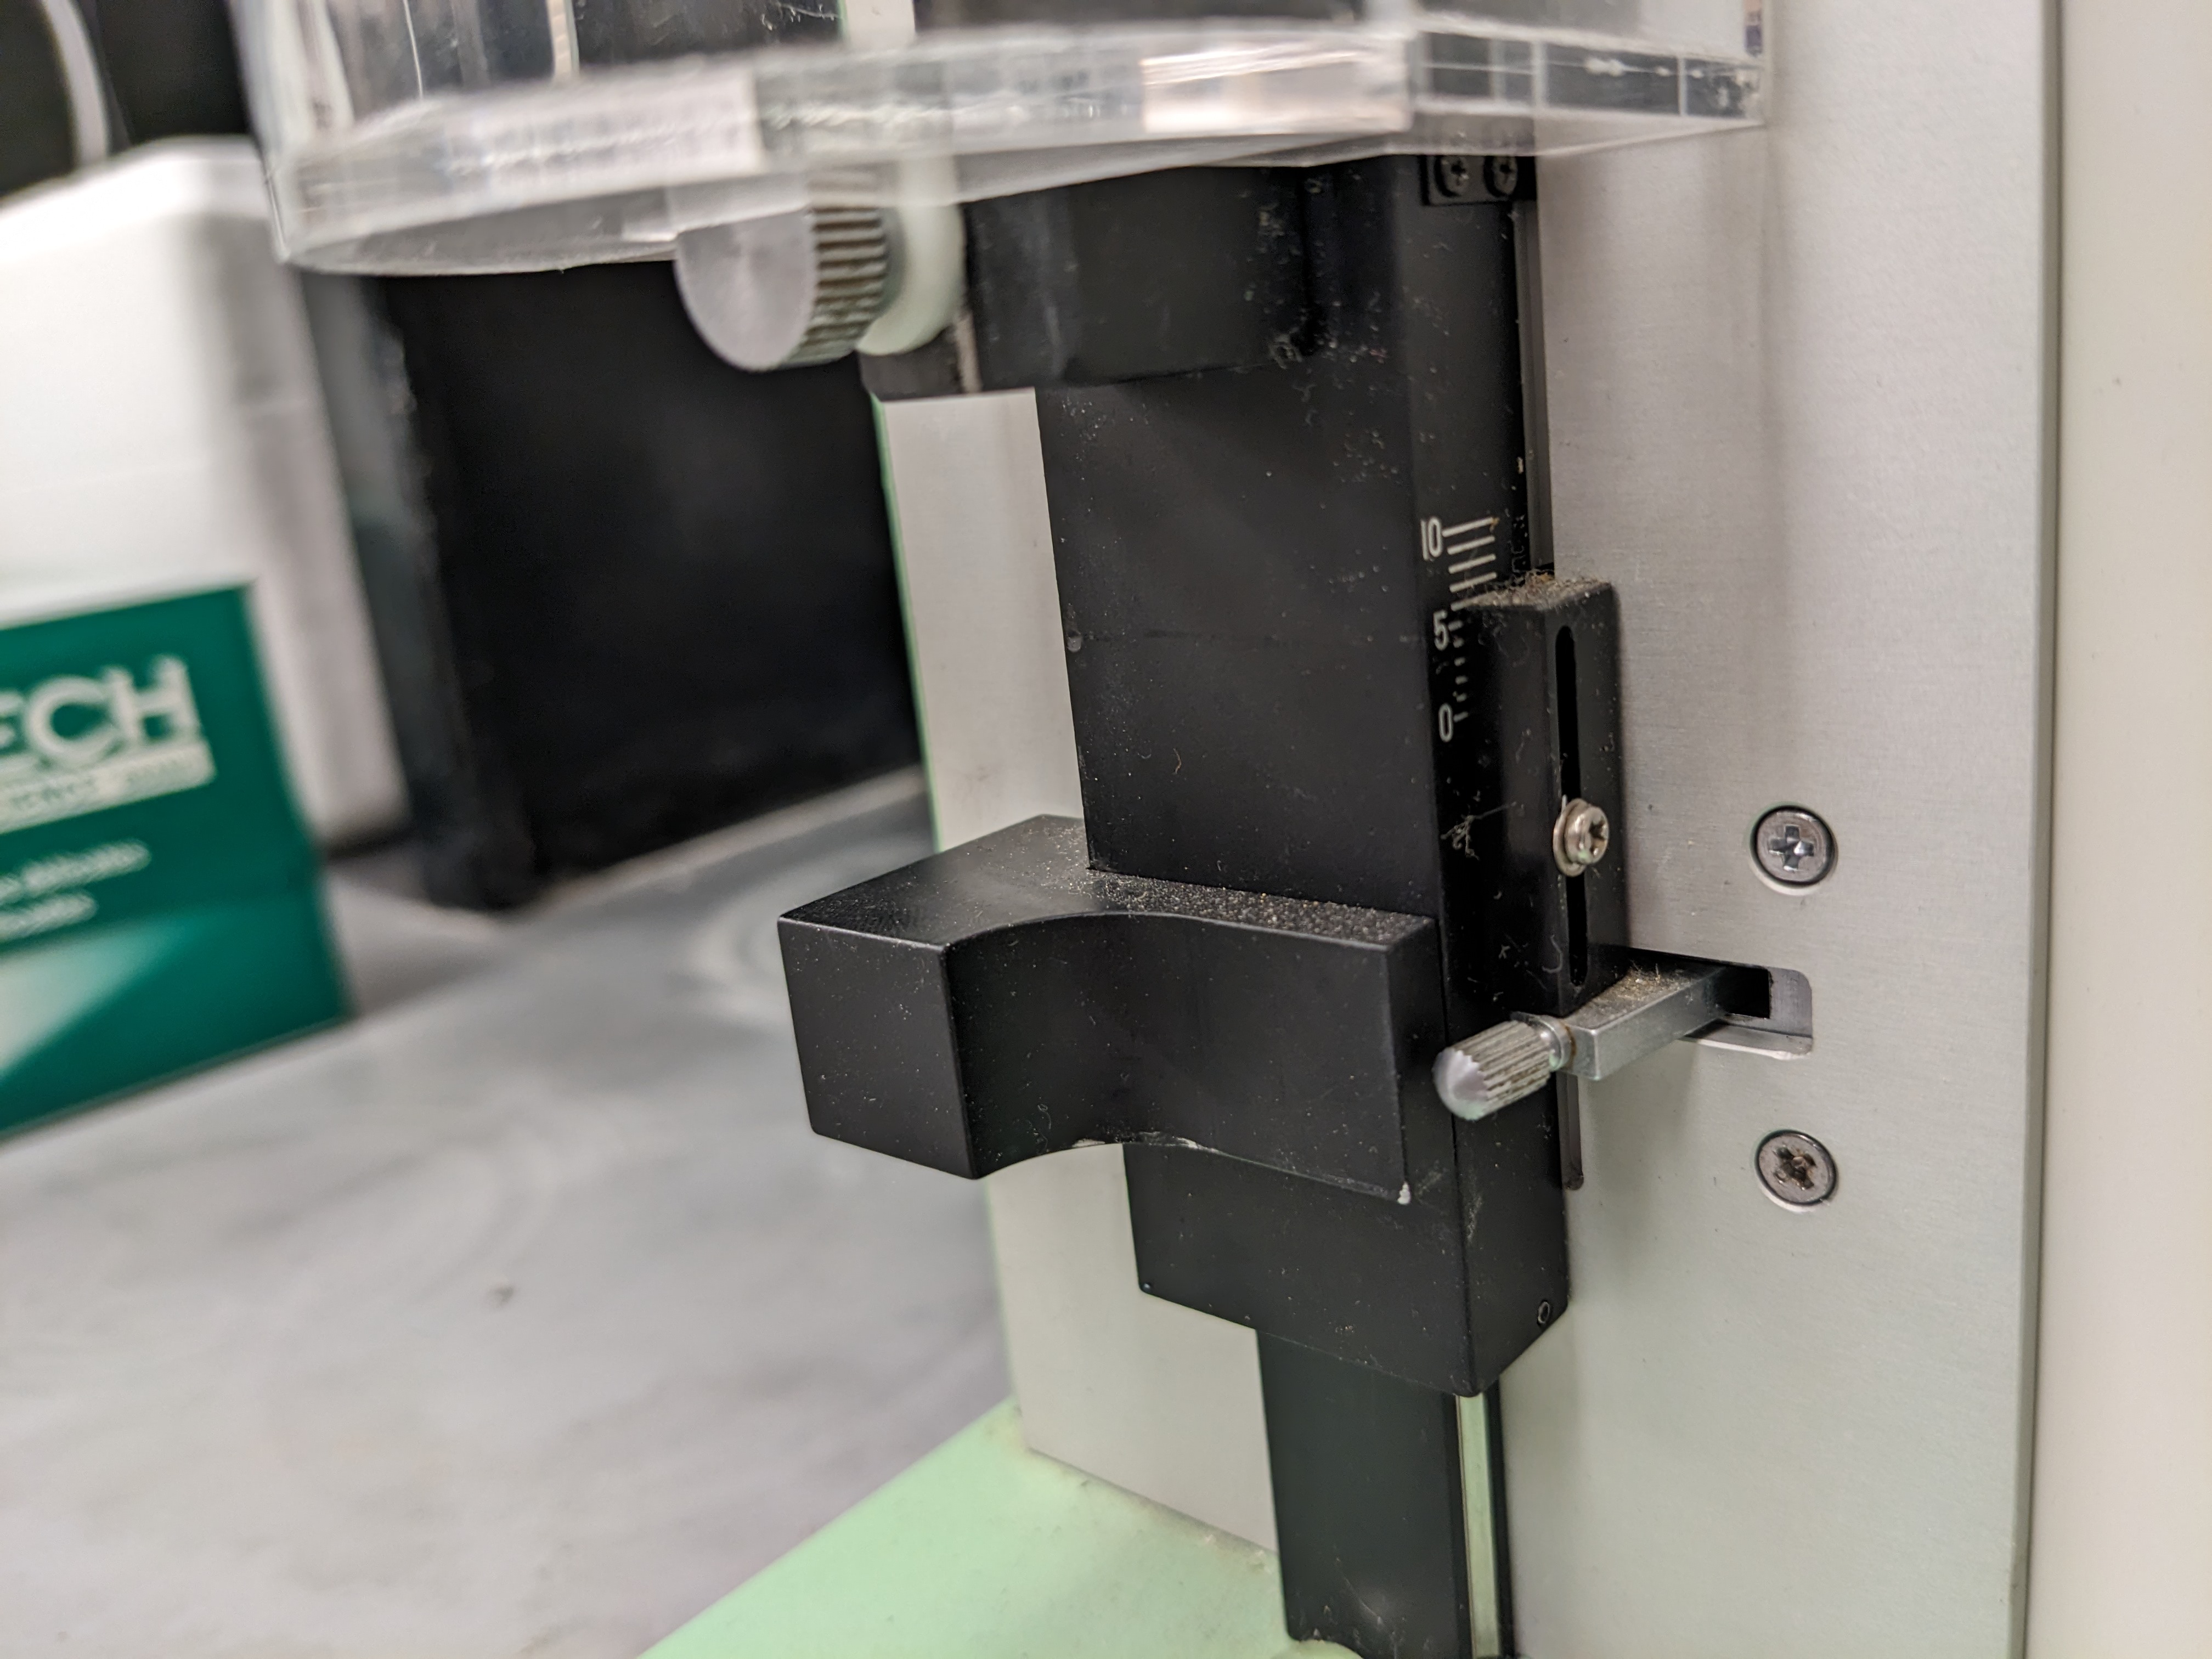
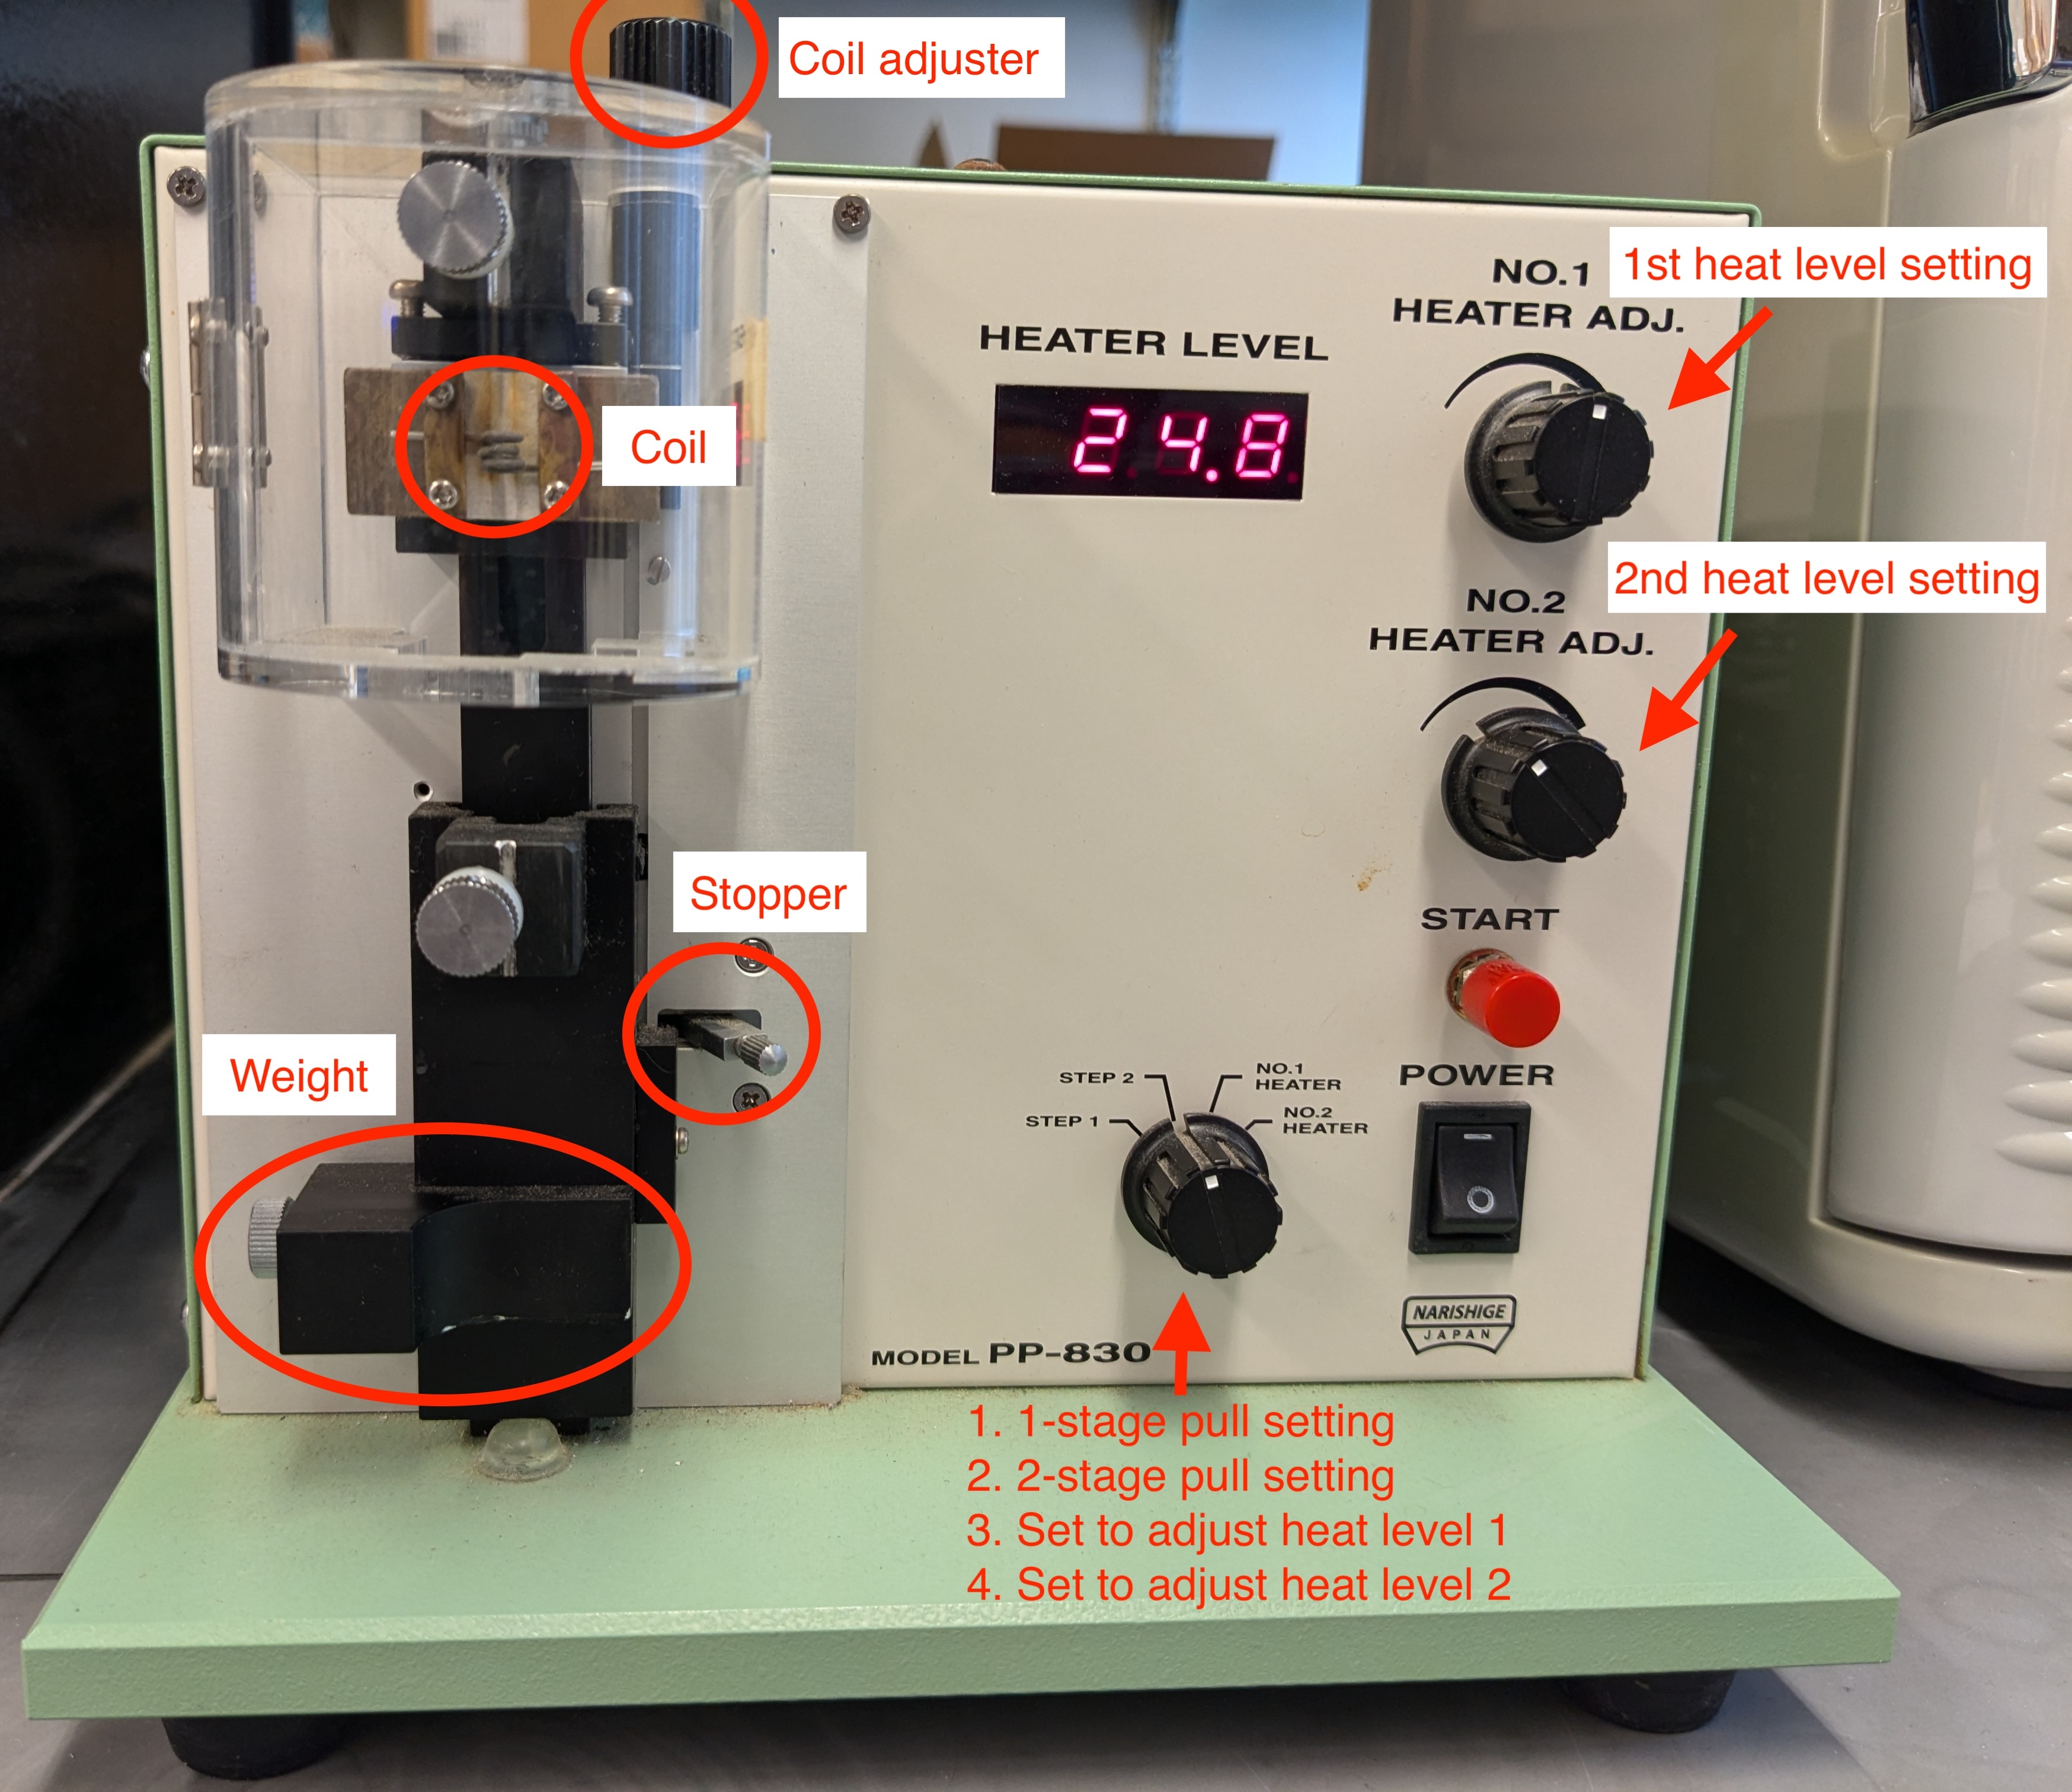
Step 1: Make sure that the coil adjuster is set to the maximum - the coil is the upper most position possible.
Step 2: Place a glass capillary through the coil and tighten the top screw. Then, push up the bottom part with the weight and screw in the bottom screw. For a two-stage pull (used in this protocol), the bottom part of the needle puller with the weight should not be touching the stopper. That is where the apparatus will arrive at the end of the first pull. See video below.
Step 3: Make sure that the coil is approximately at the middle of the capillary. This is important to end up with equal length needles. Adjust capillary position if needed. Do not adjust the position of the coil. Set up at the end of this step:
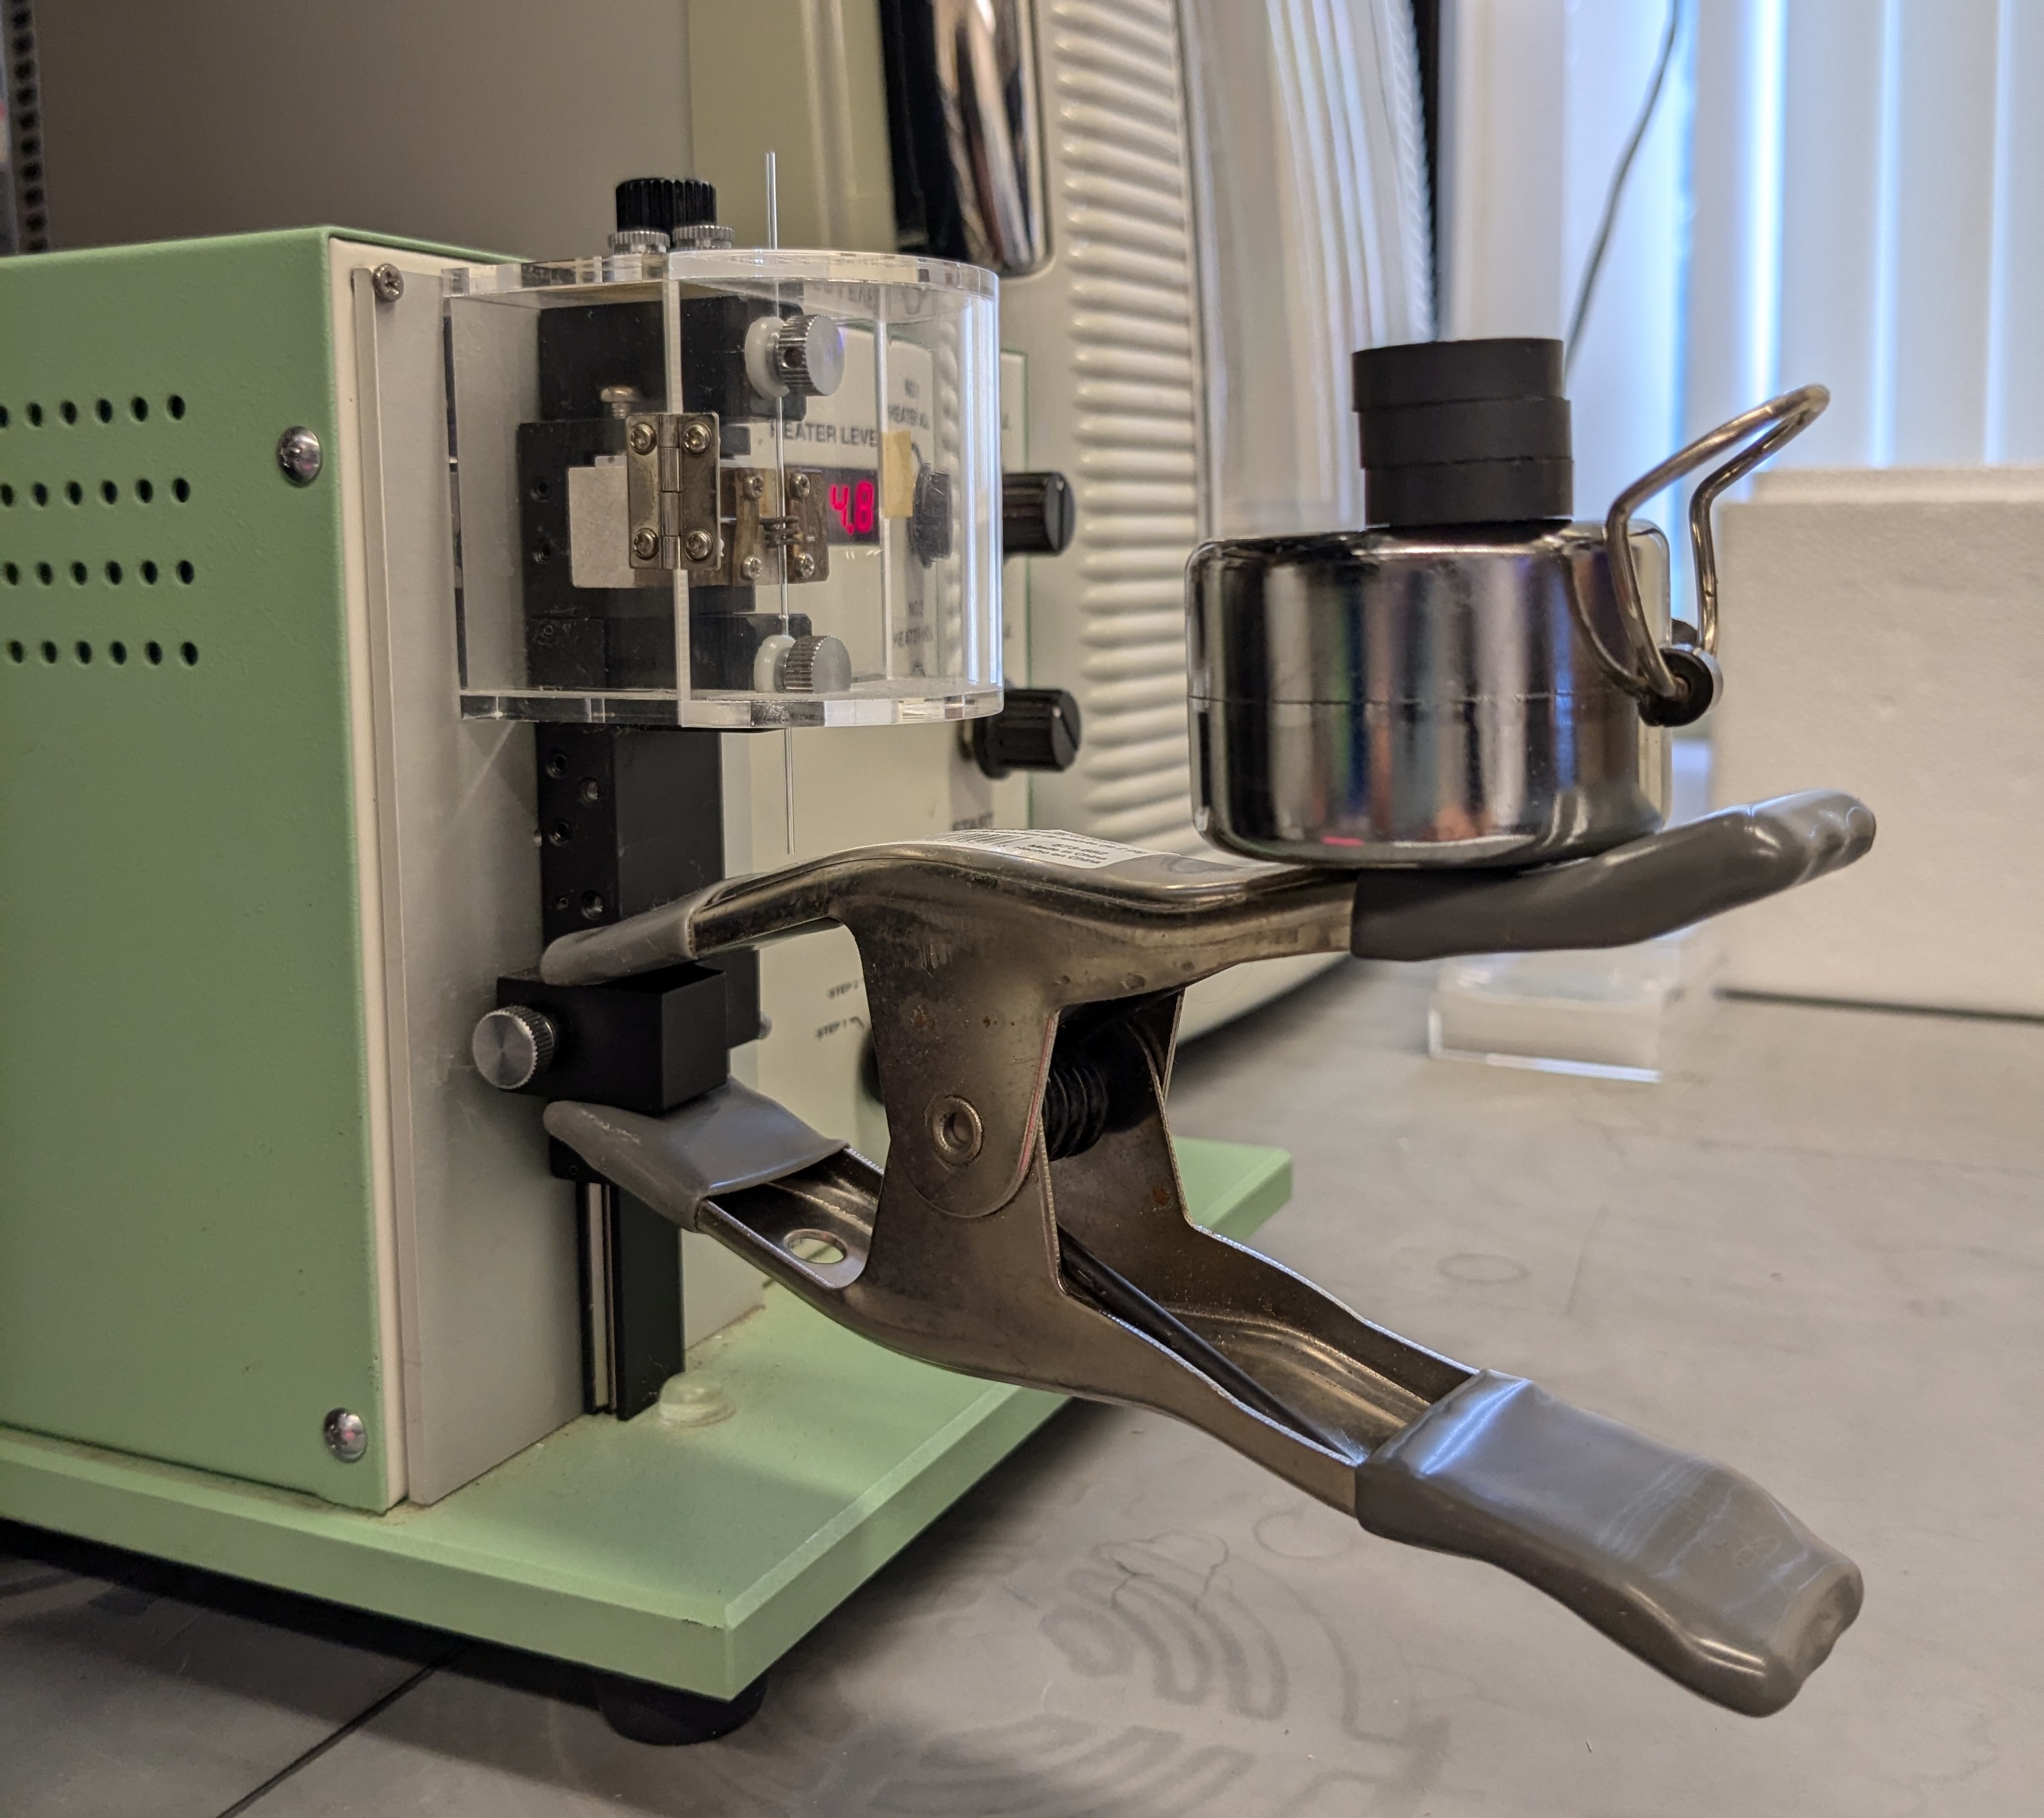
Step 4: Add the correct amount of weight to the bottom of the puller, 248.01 g in this protocol. We used the items below to achieve this weight.
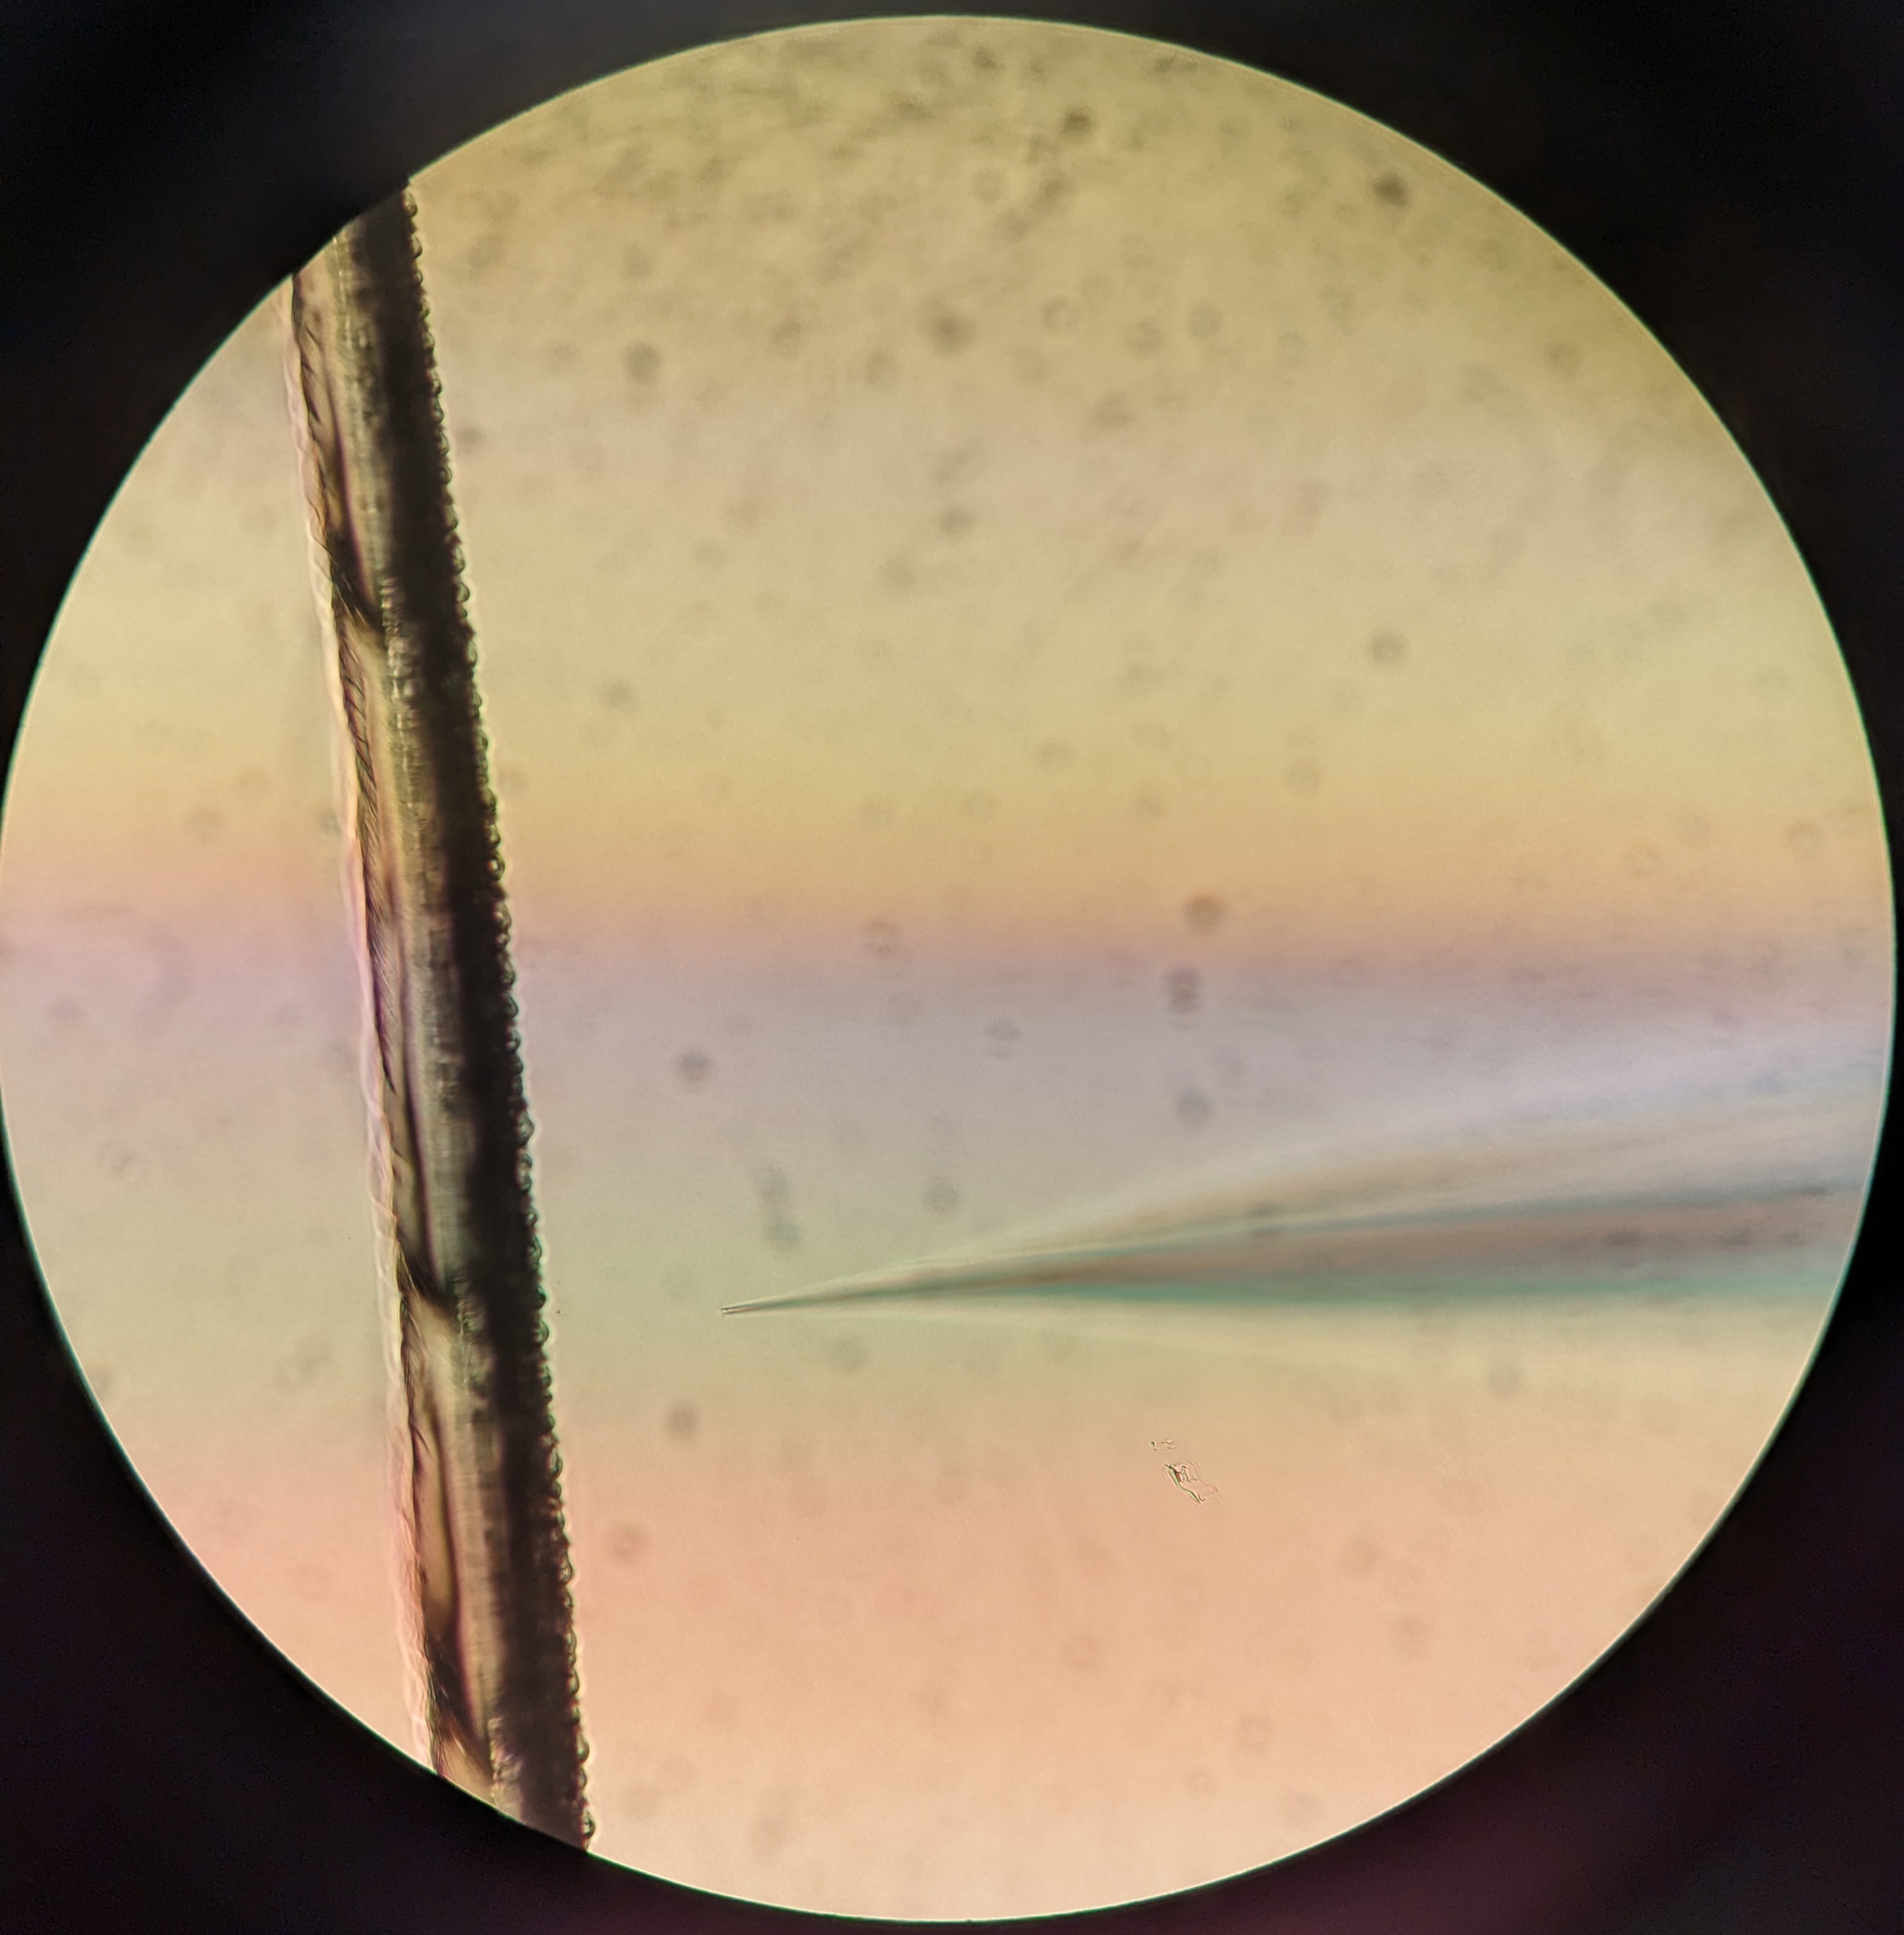
Step 5: Push the red start button. The coil will heat up and the bottom of the puller will slowly drop onto the stopper. At this point, adjust the coil to be in the thinnest (melted) part of the capillary. This has to be precise! Remove the stopper and press the red start button again. The bottom of the puller will drop to the bottom and you’ll end up with two needles.
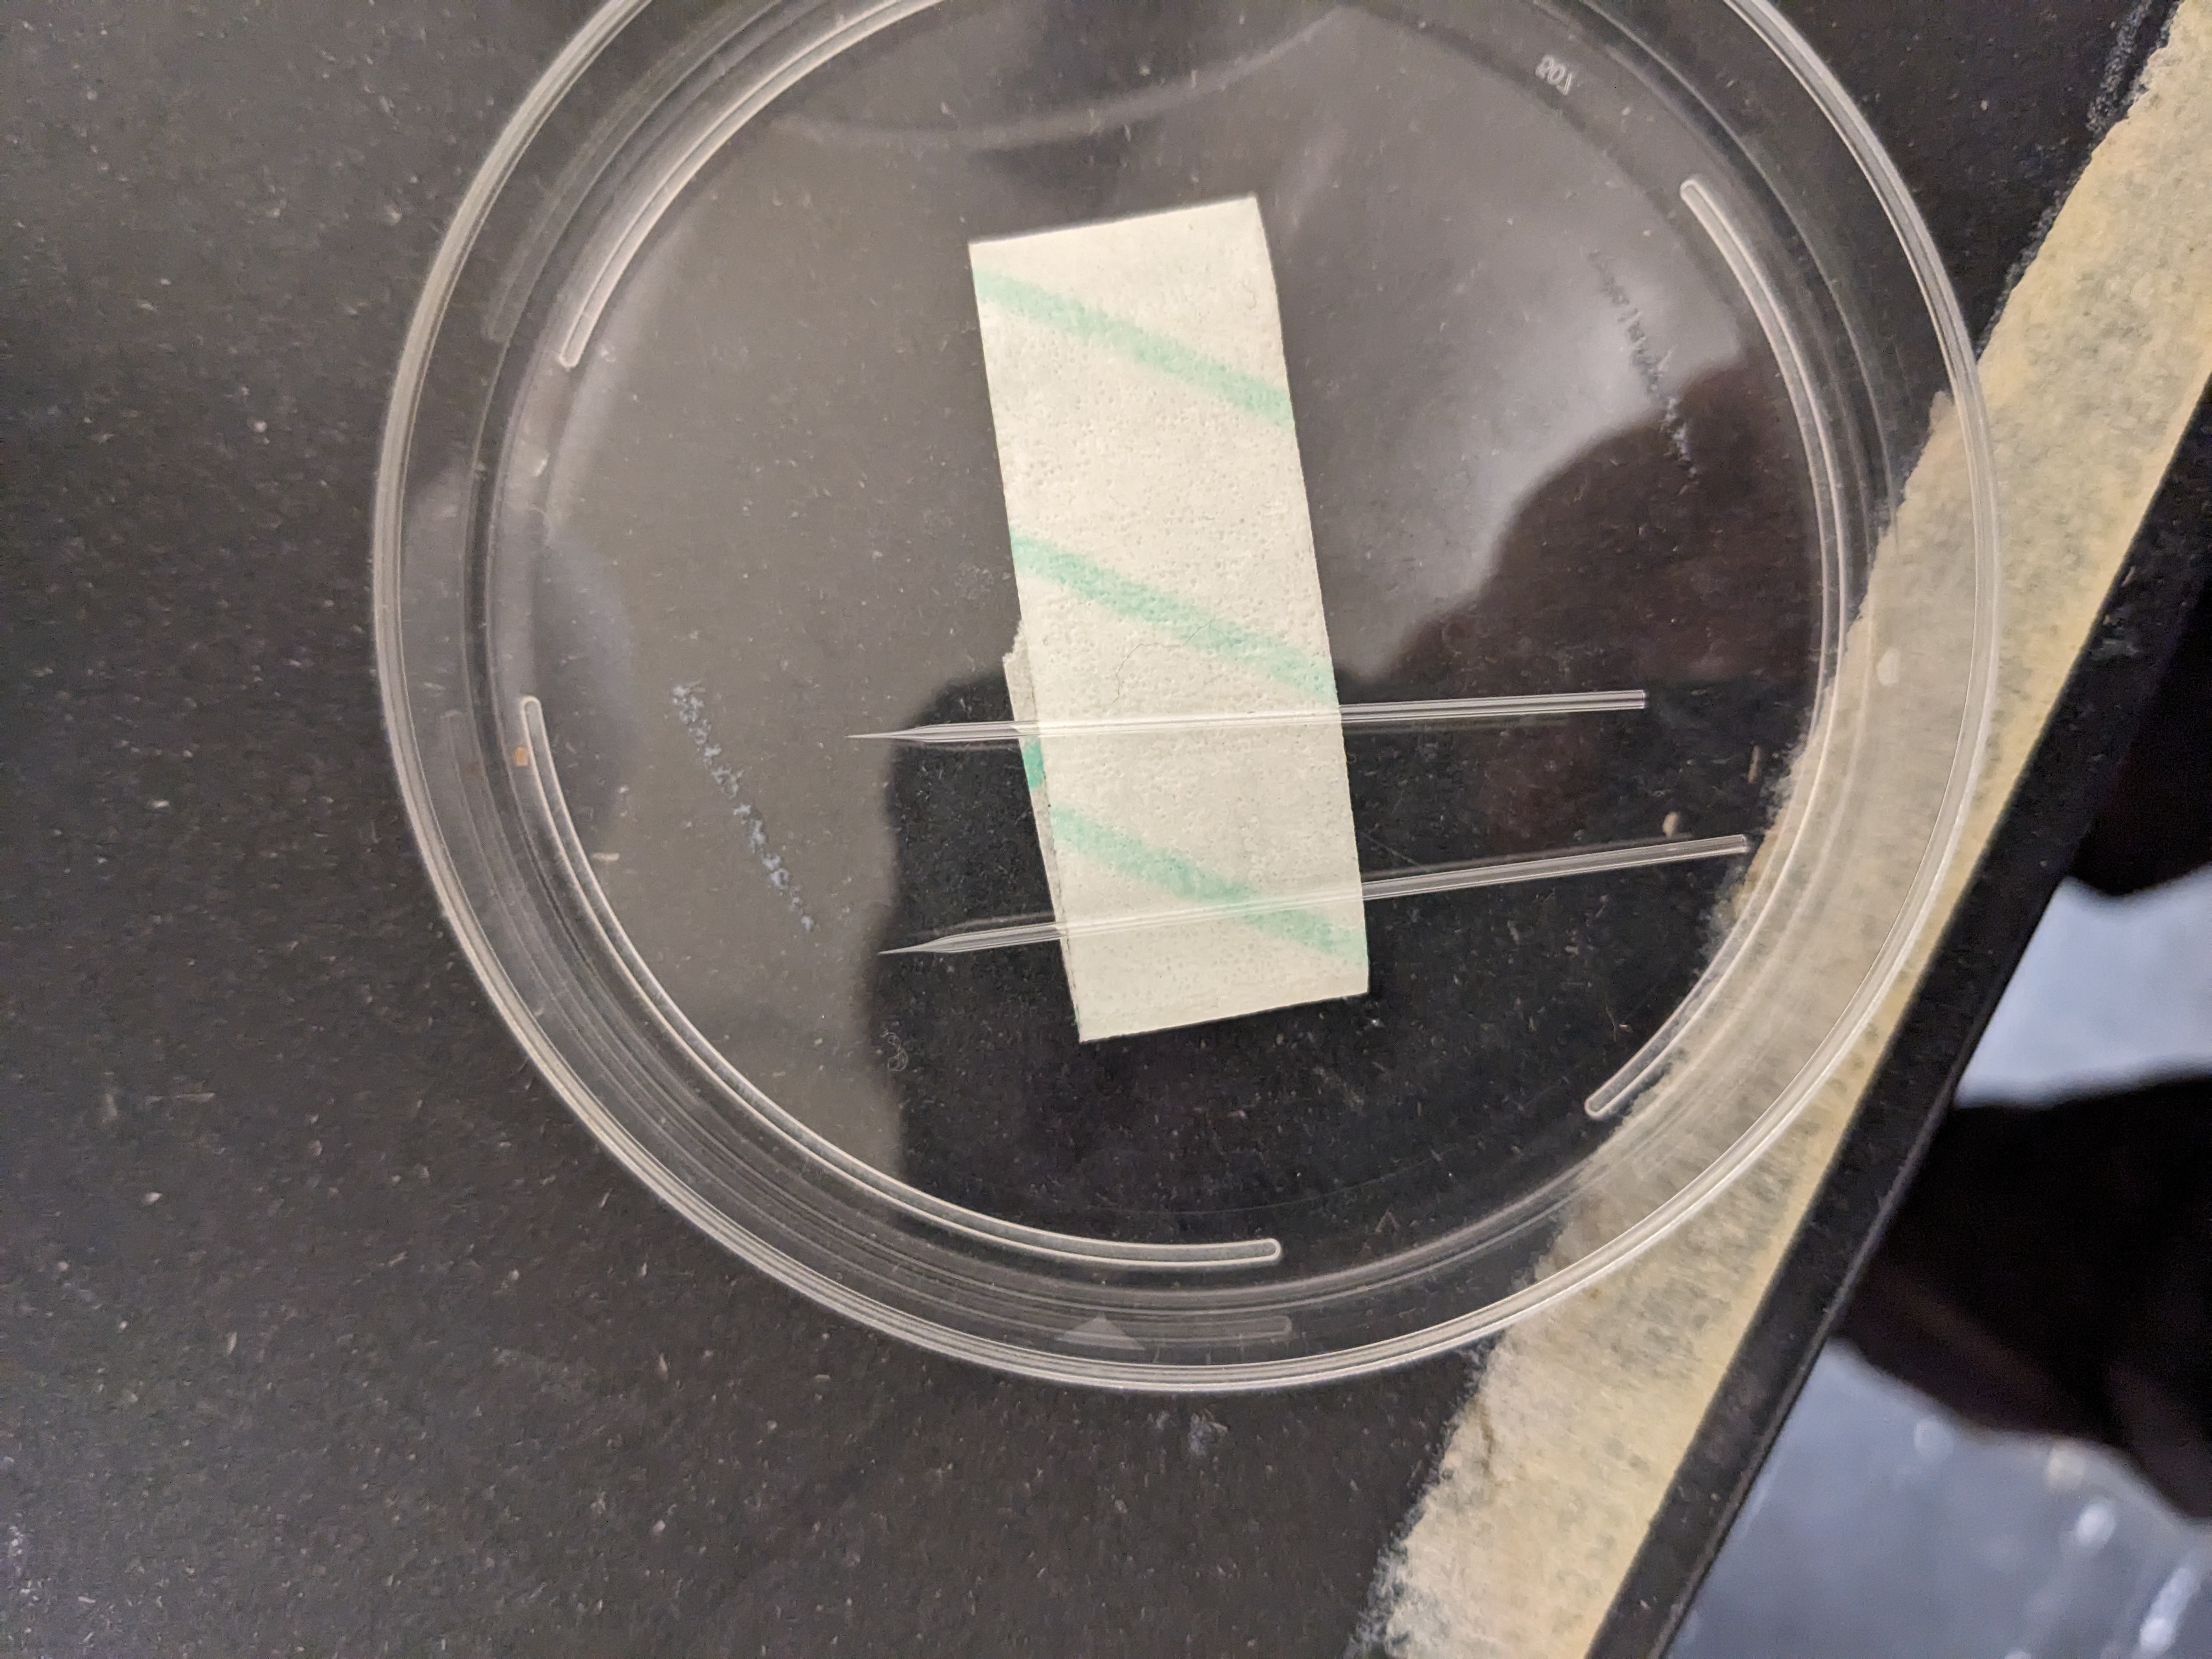
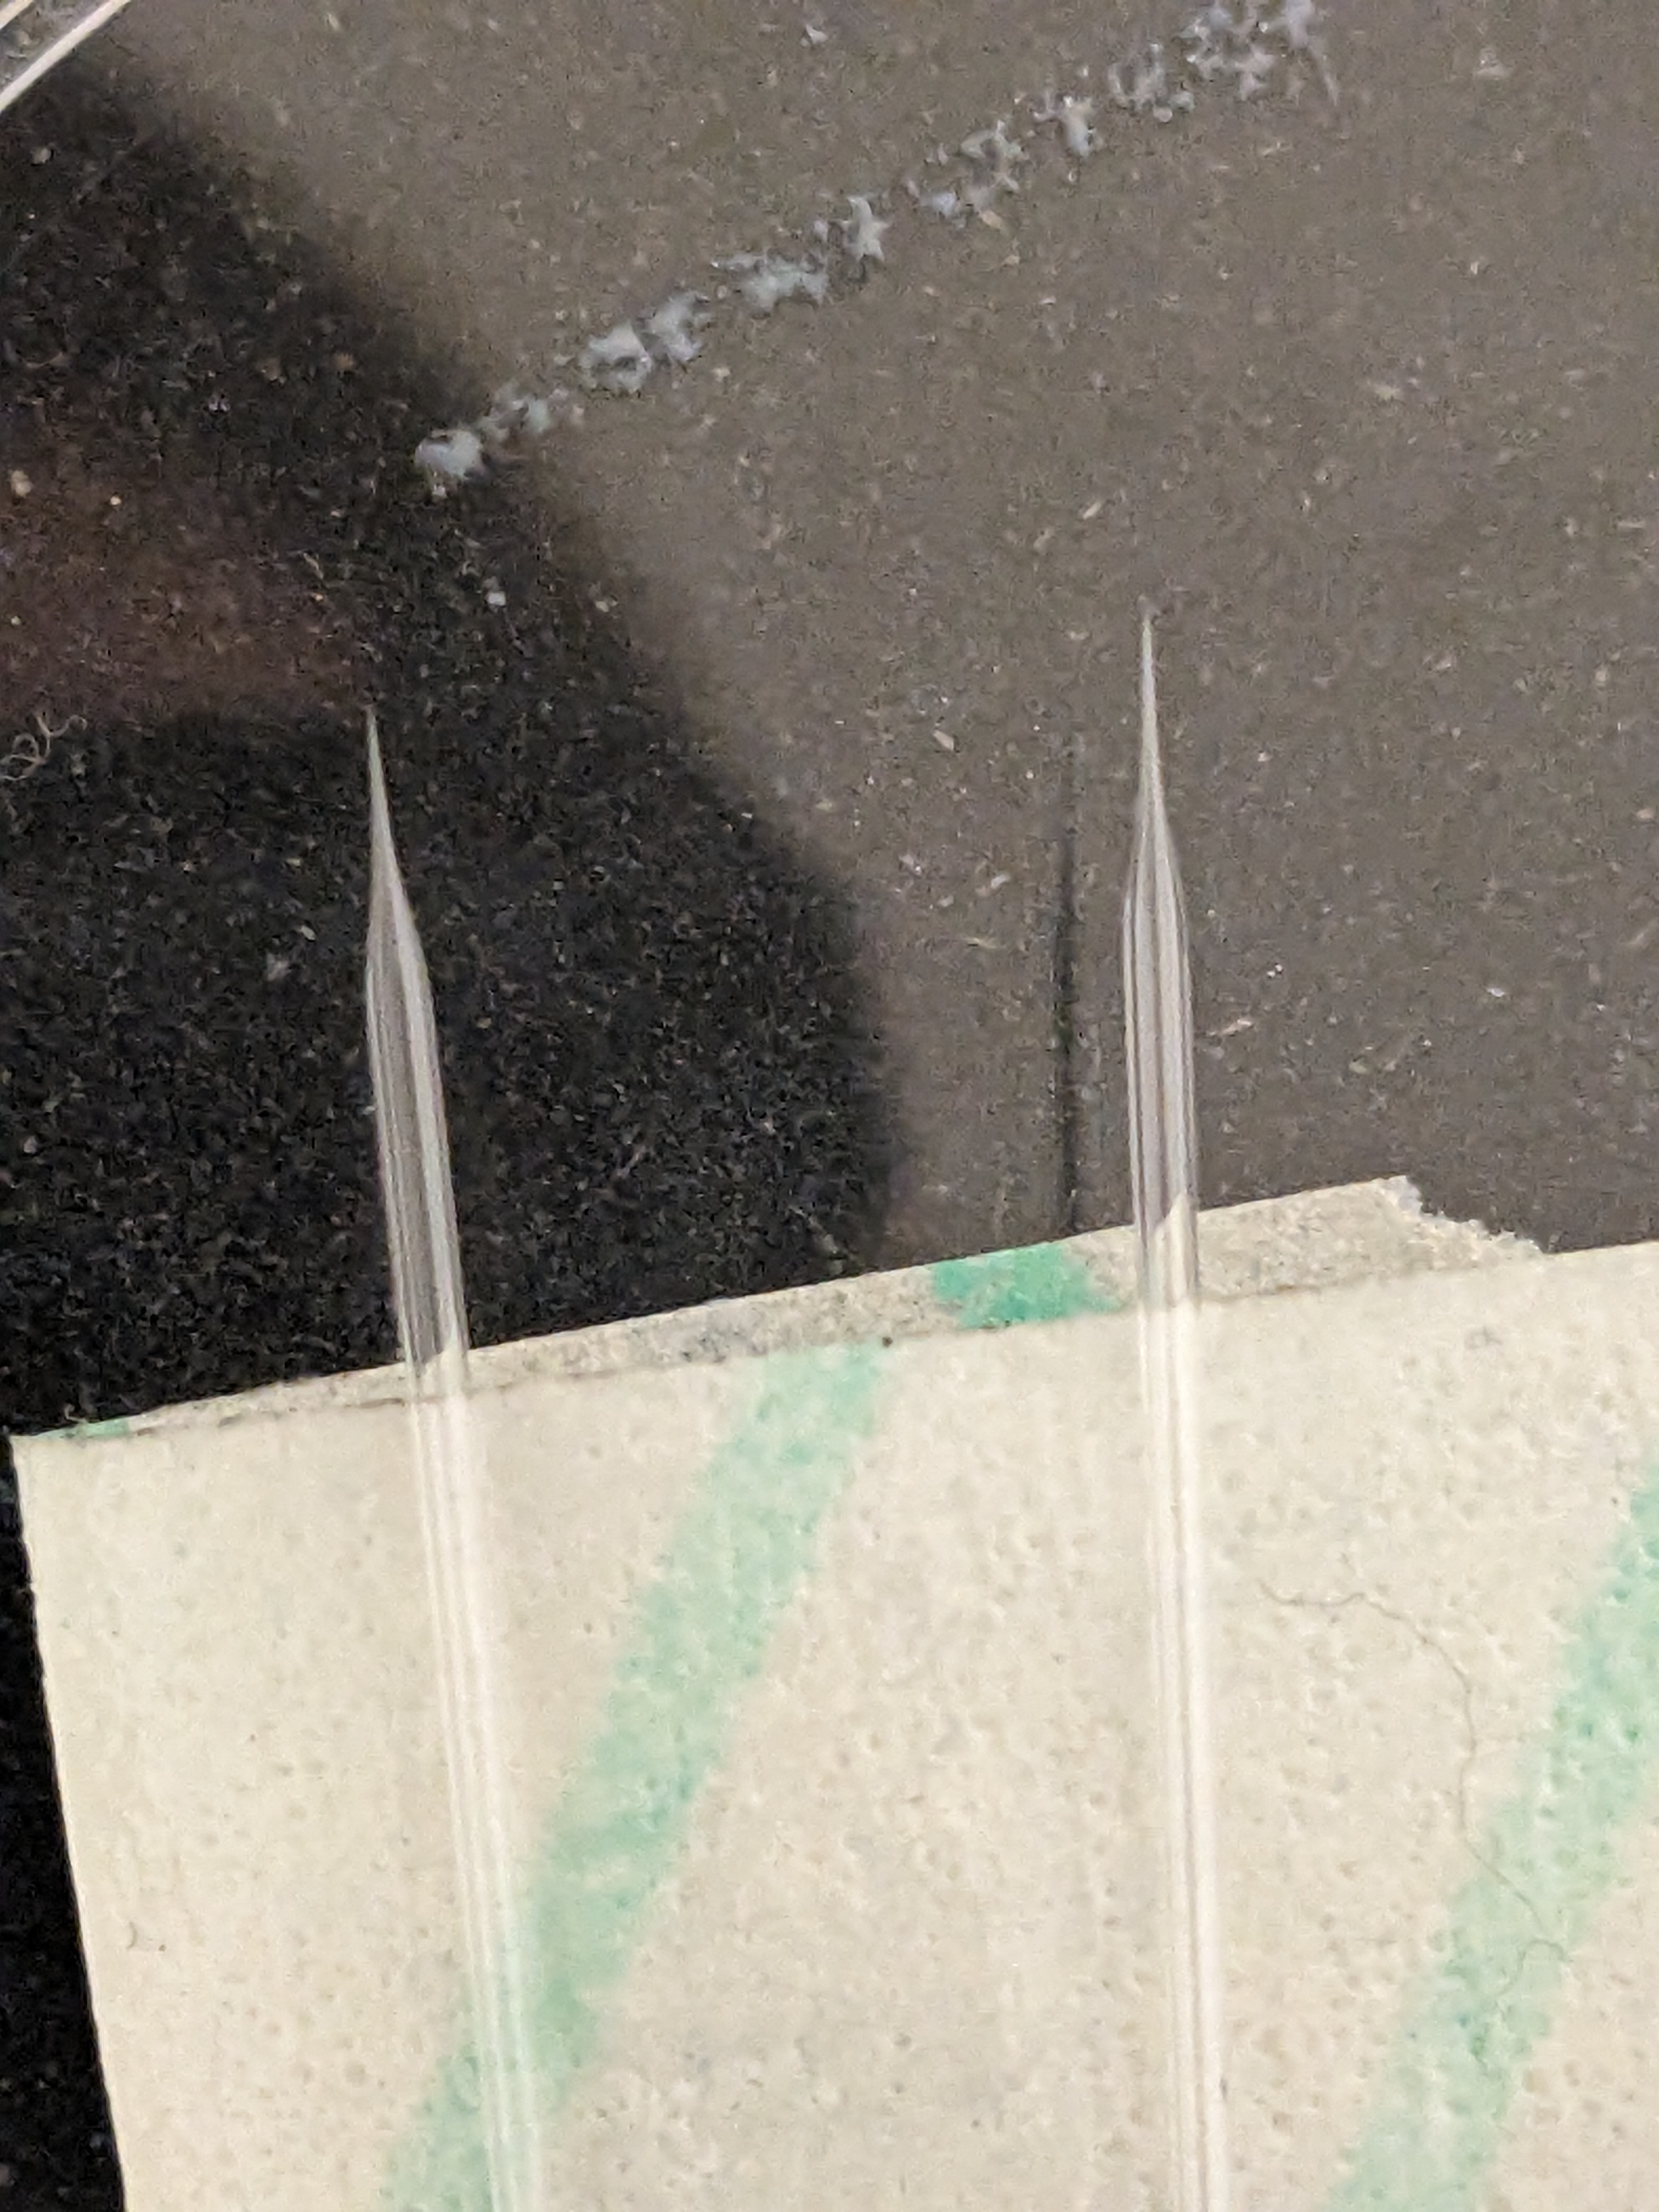
Step 6: Carefully remove the two needles by loosening the screws and taking them out sideways to avoid touching anything with the needle (it will very likely break due to the slightest touch). Place the needles in a petri dish with a folded tape on the bottom.
Filling the needle
To fill the needles, pipette up 0.5 ul of injection solution. Use a 10ul pipette tip. Make sure to get the liquid from the top/middle of the tube in order to avoid any precipitate stuck to the bottom/sides of the tube during the centrifugation.
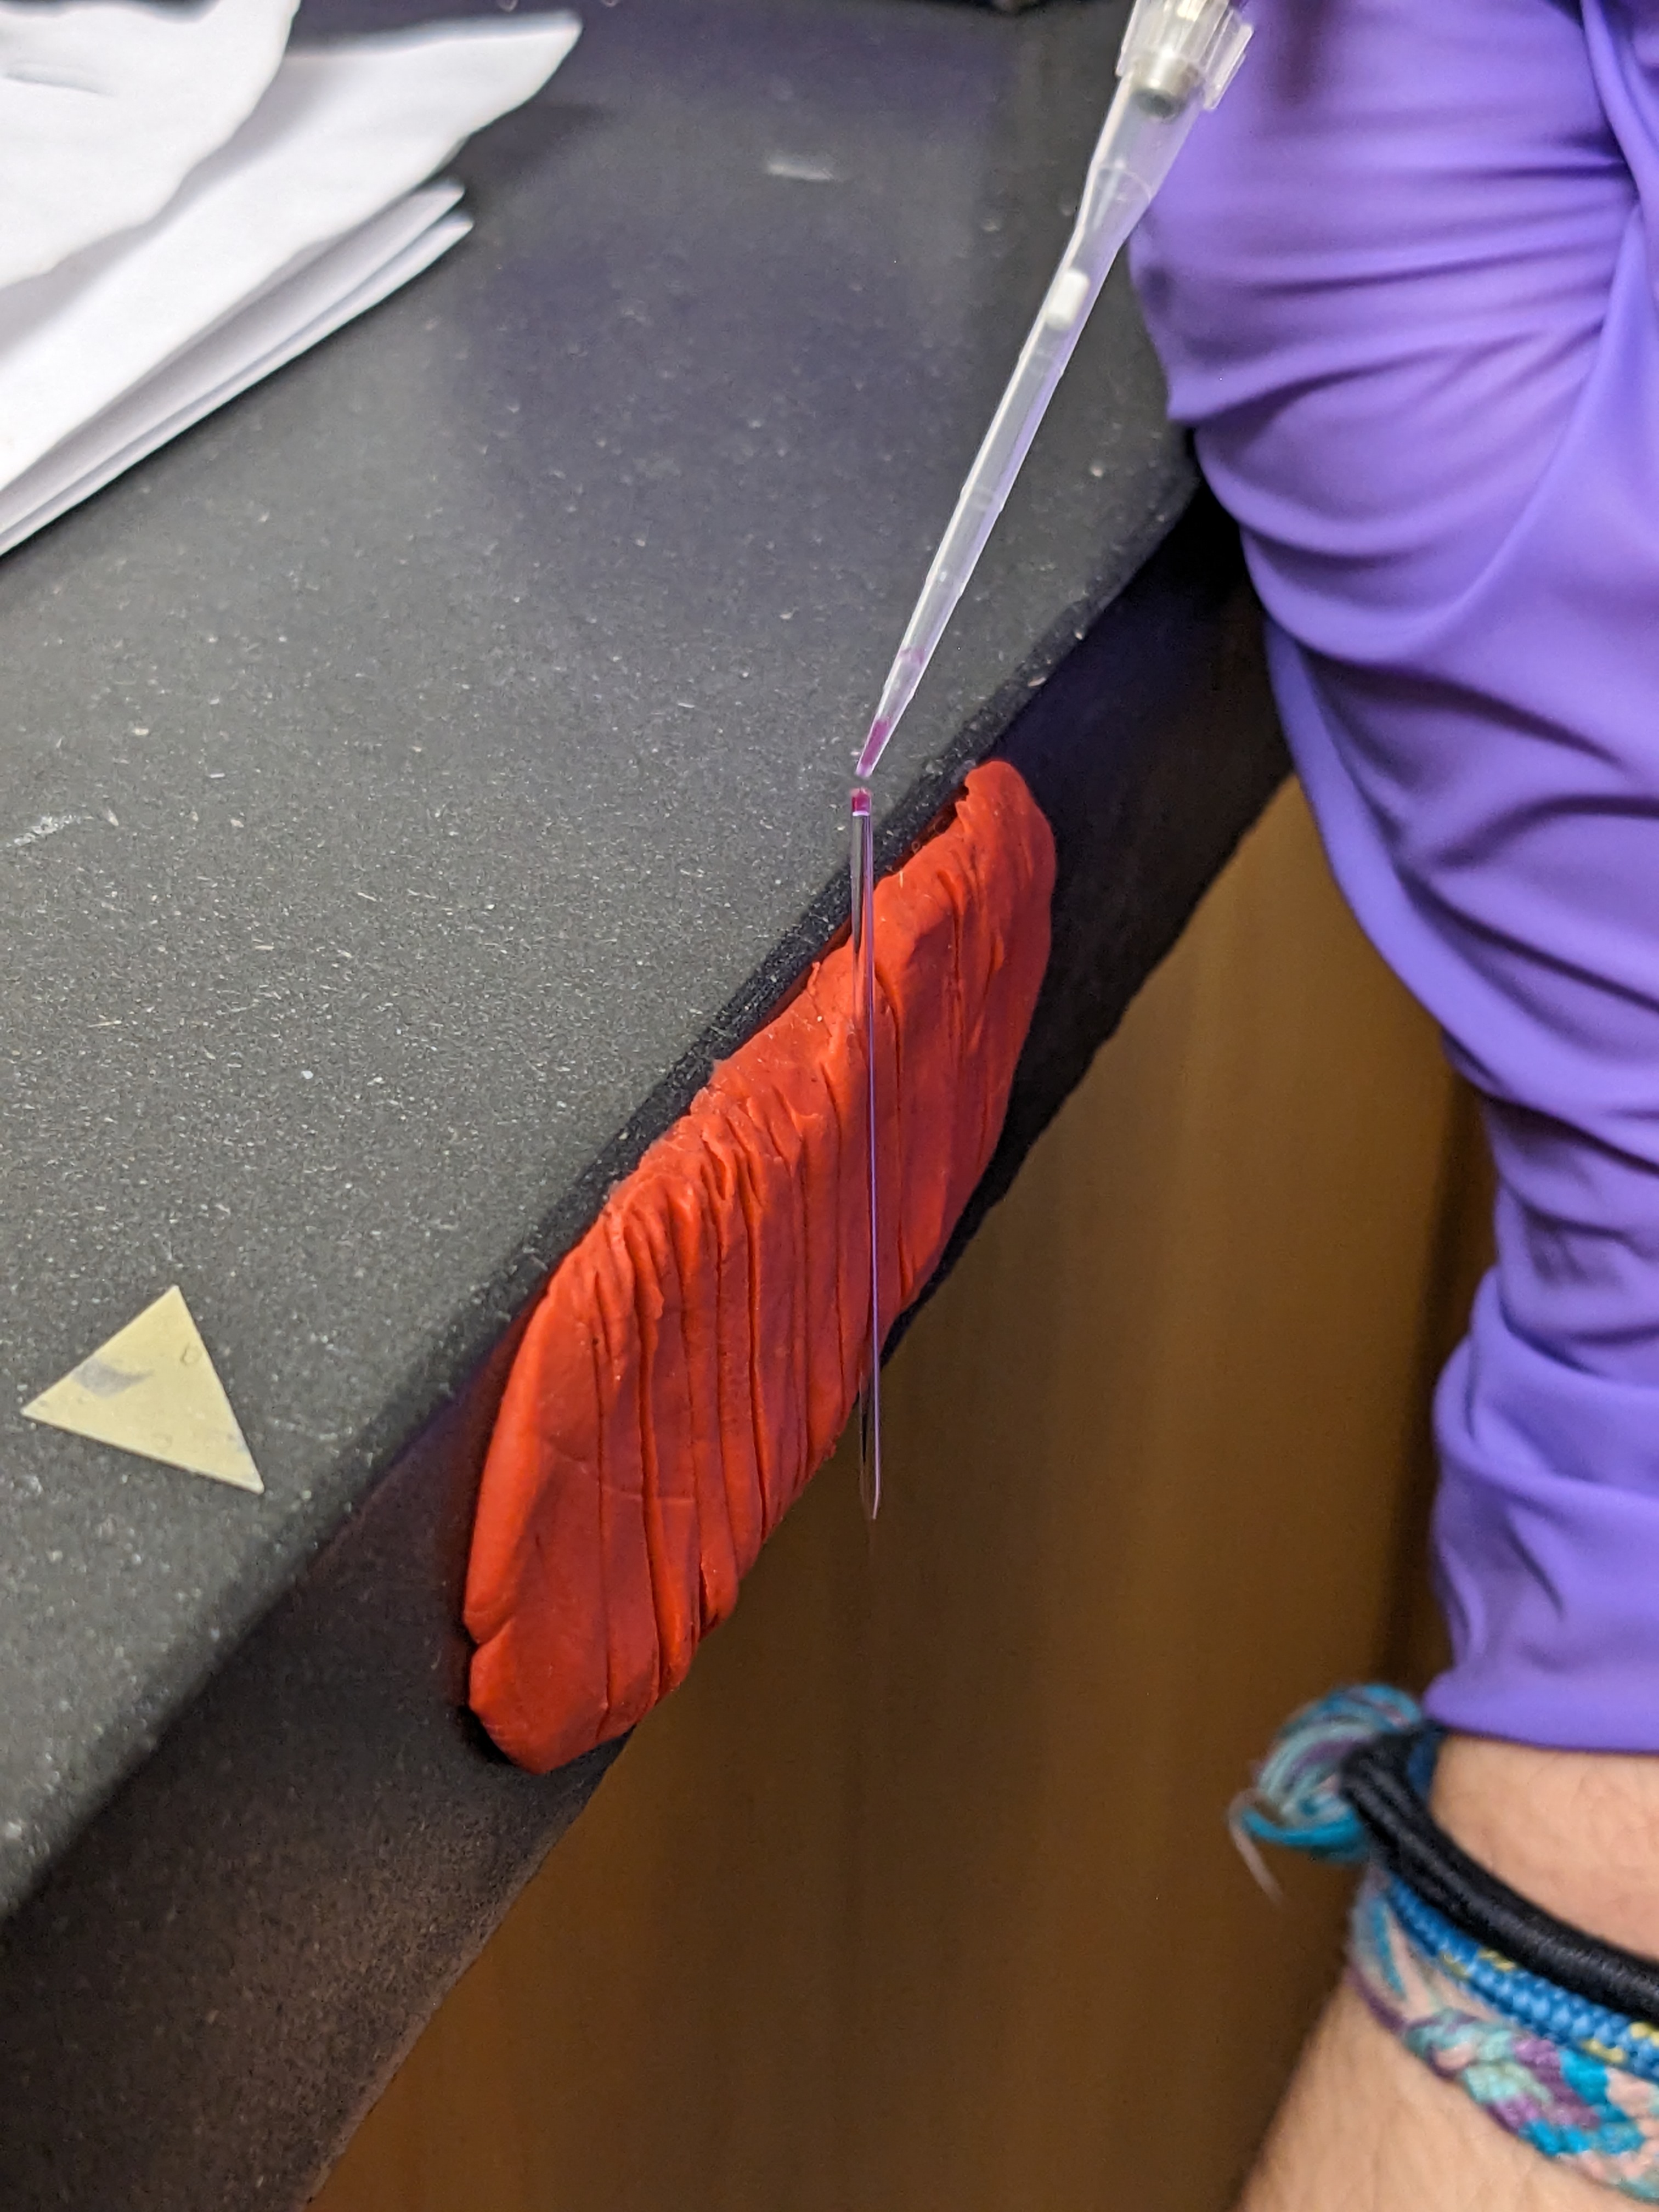
Put a piece of clay on the side of a table and push the needle upside down into it. Fill needle by touching the end of the needle with the tip of the pipette and pushing out the liquid with the pipette. Make sure that the liquid enters the needle instead of just sitting on top. Wait a few minutes for the solution to reach the bottom of the needle.
Mount needle onto the macromanipulator:

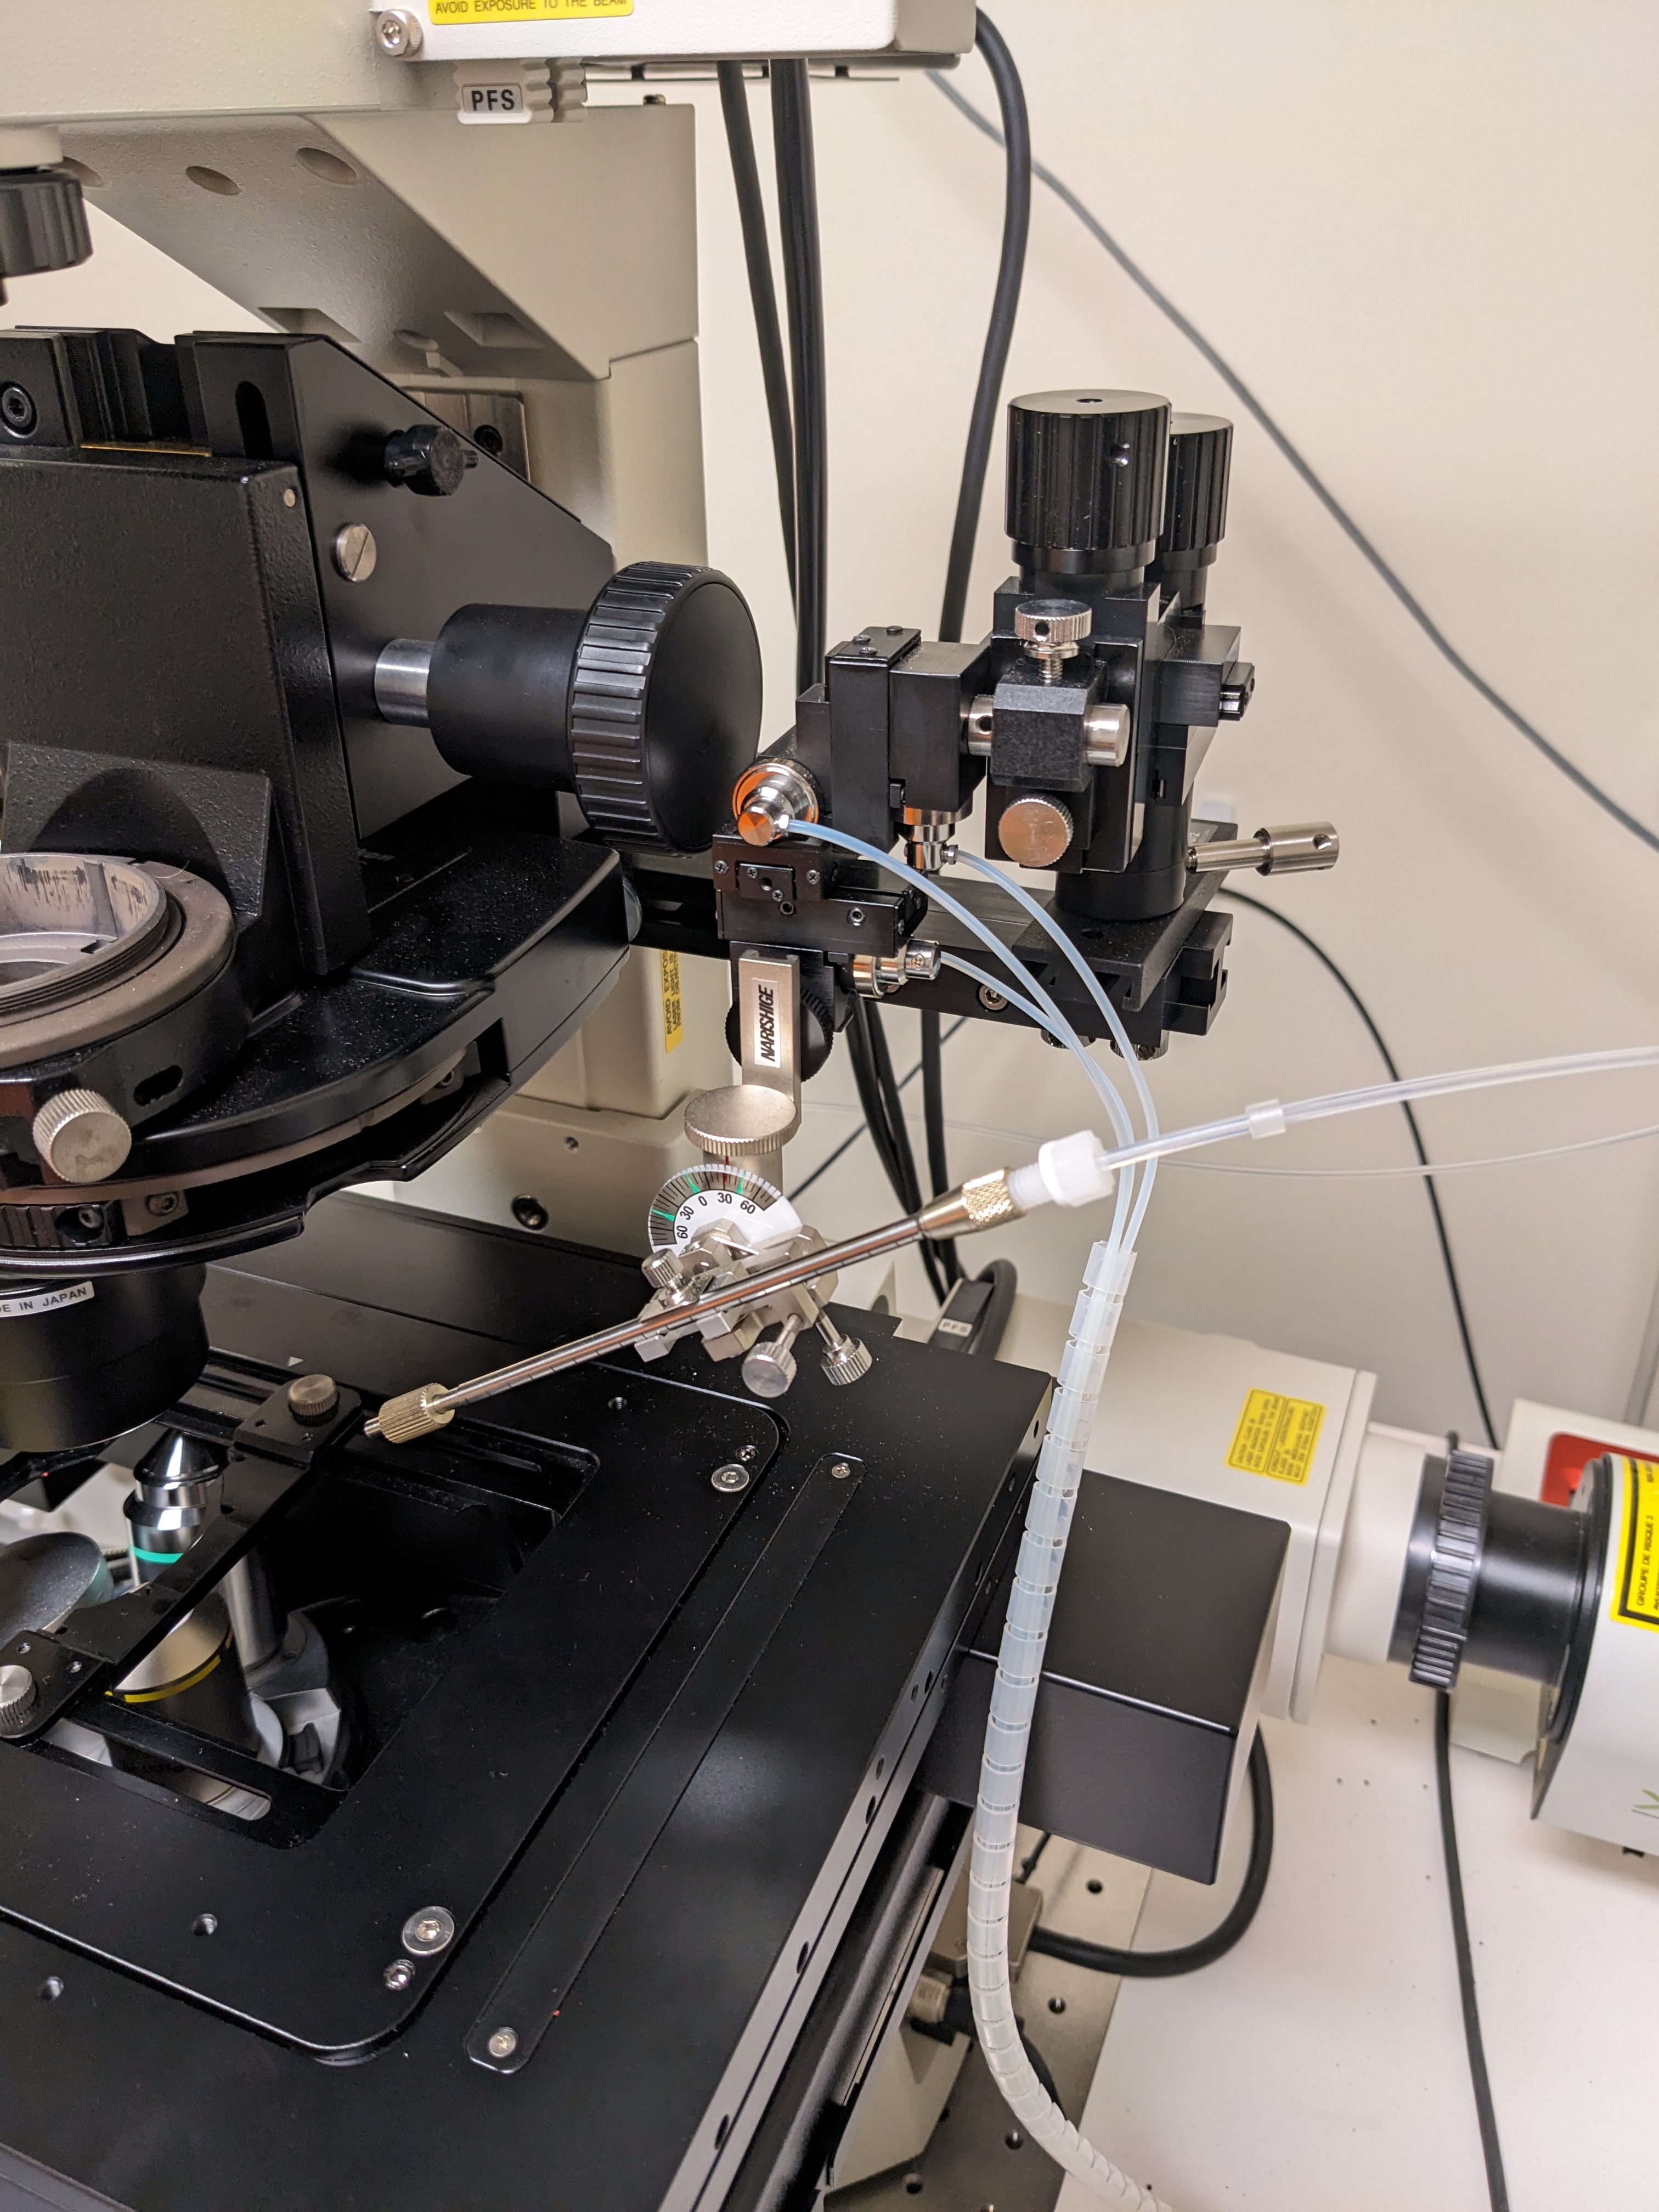

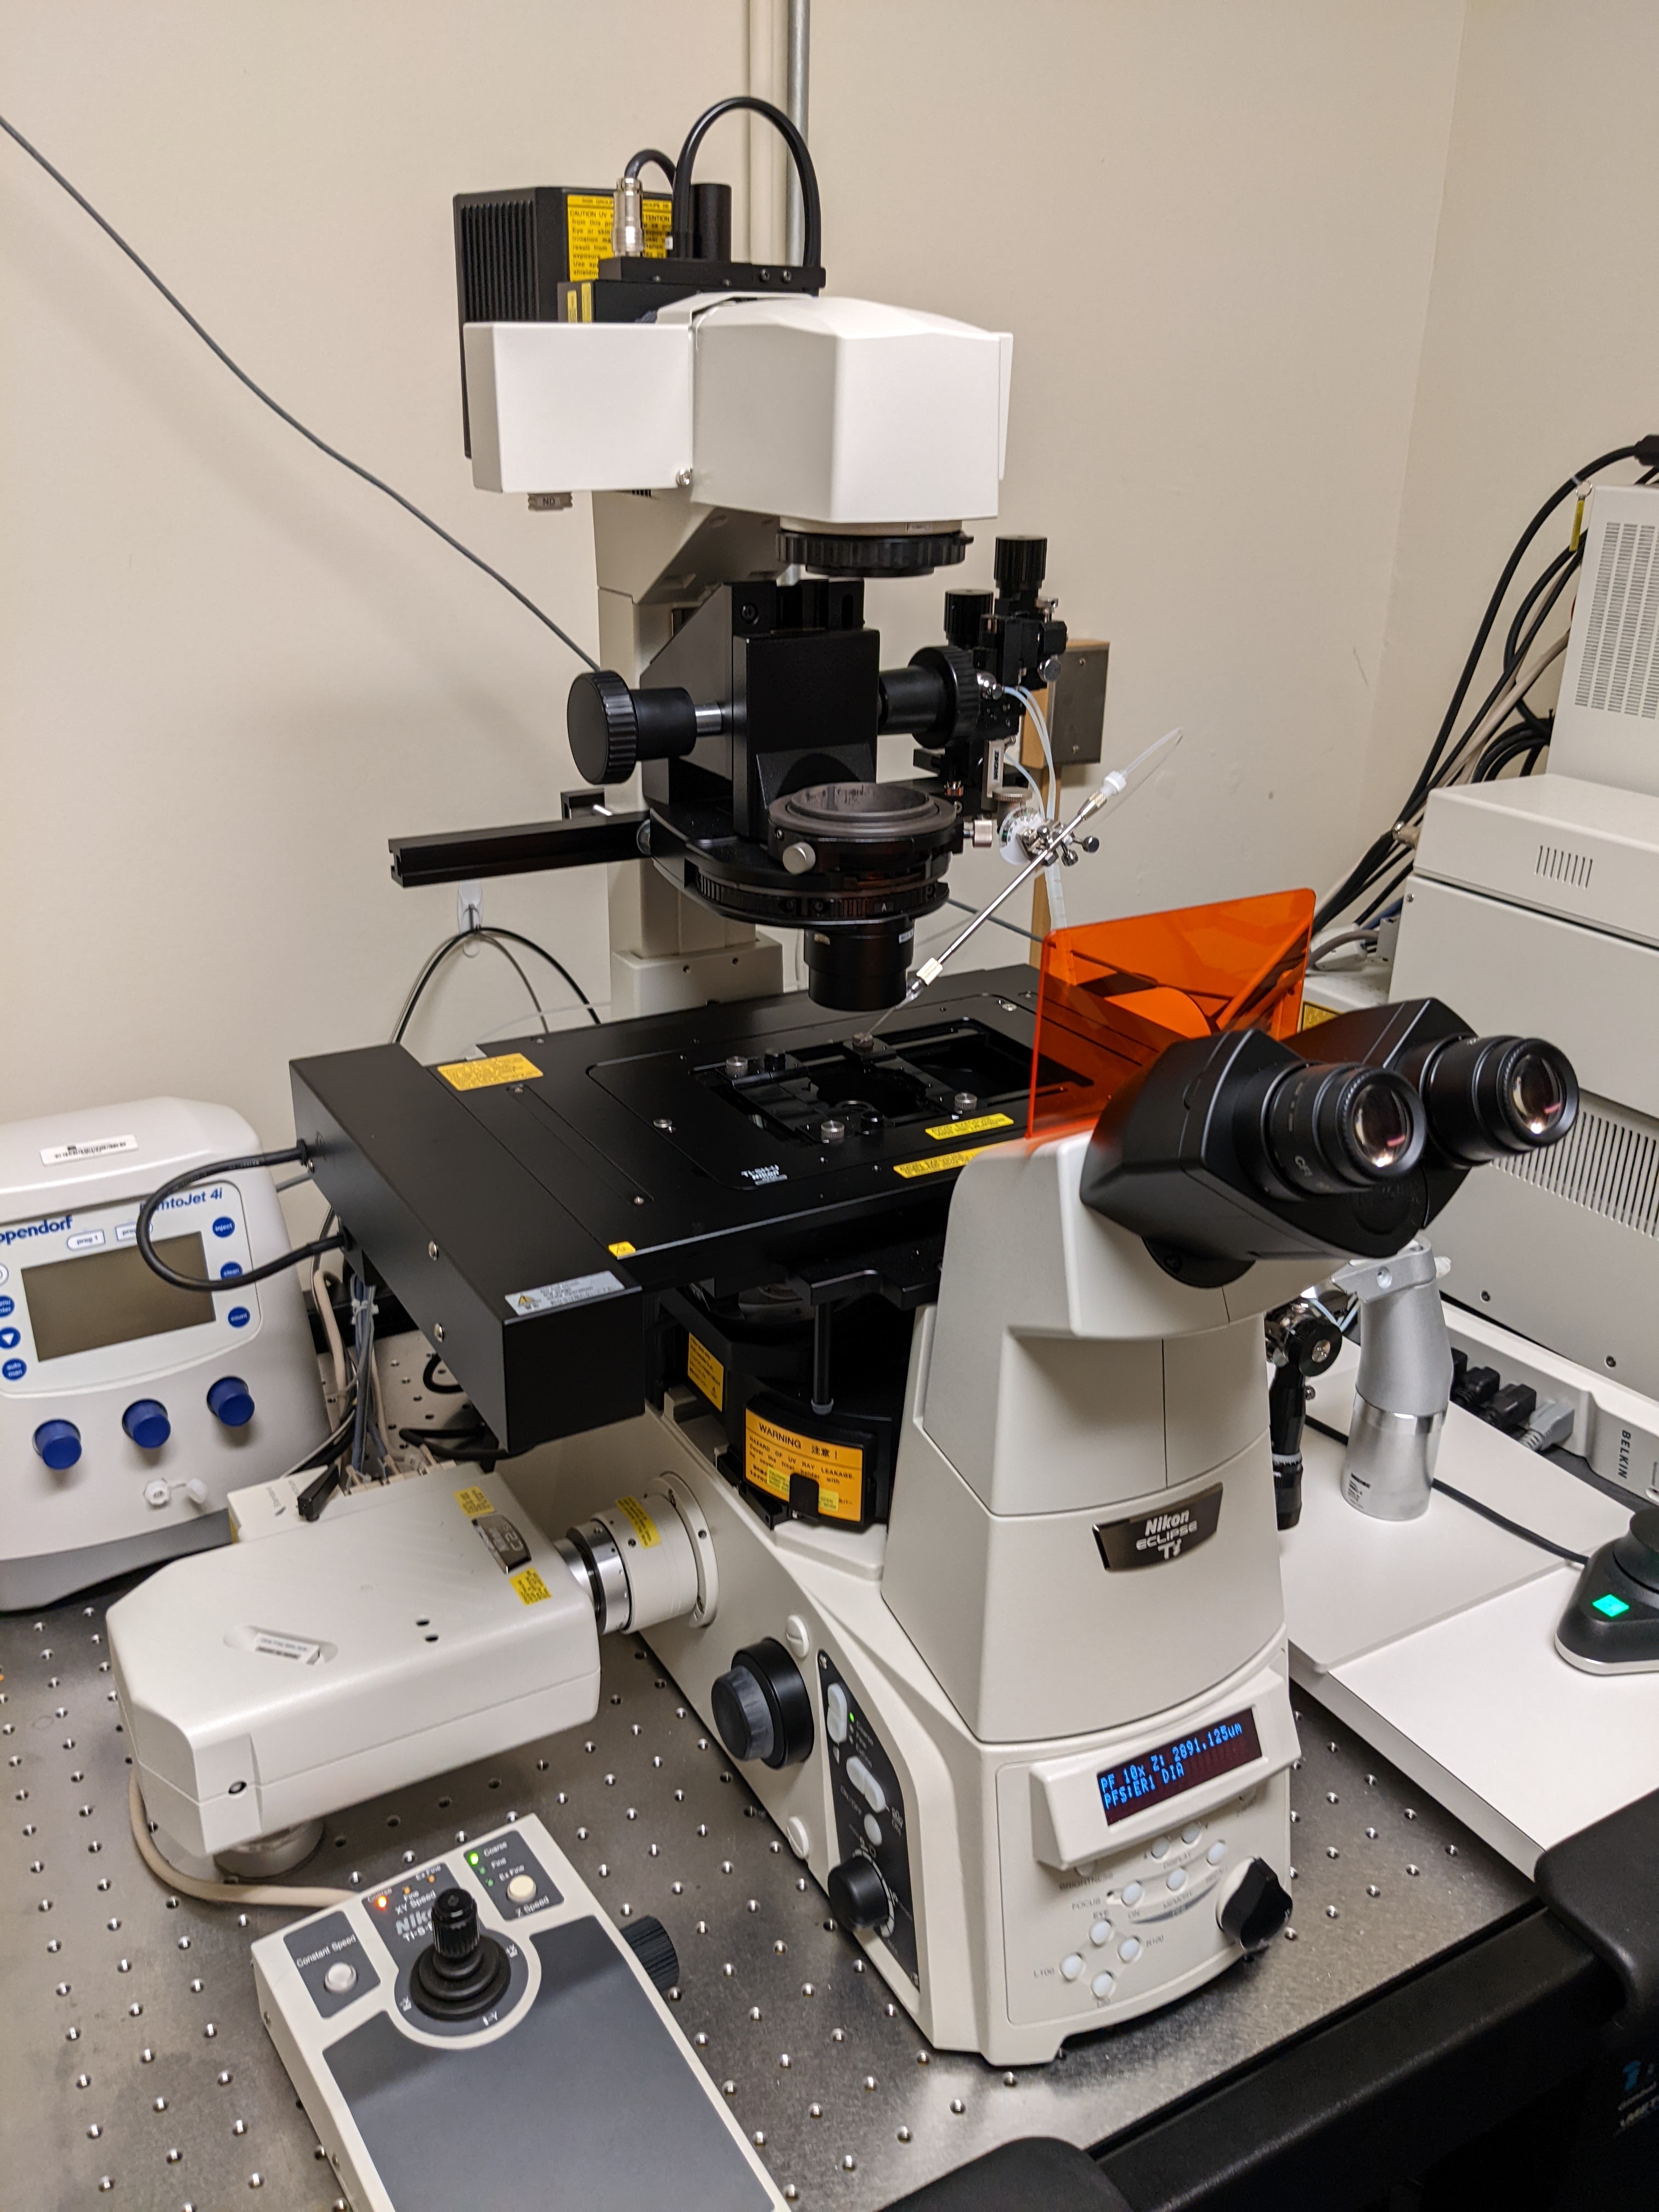
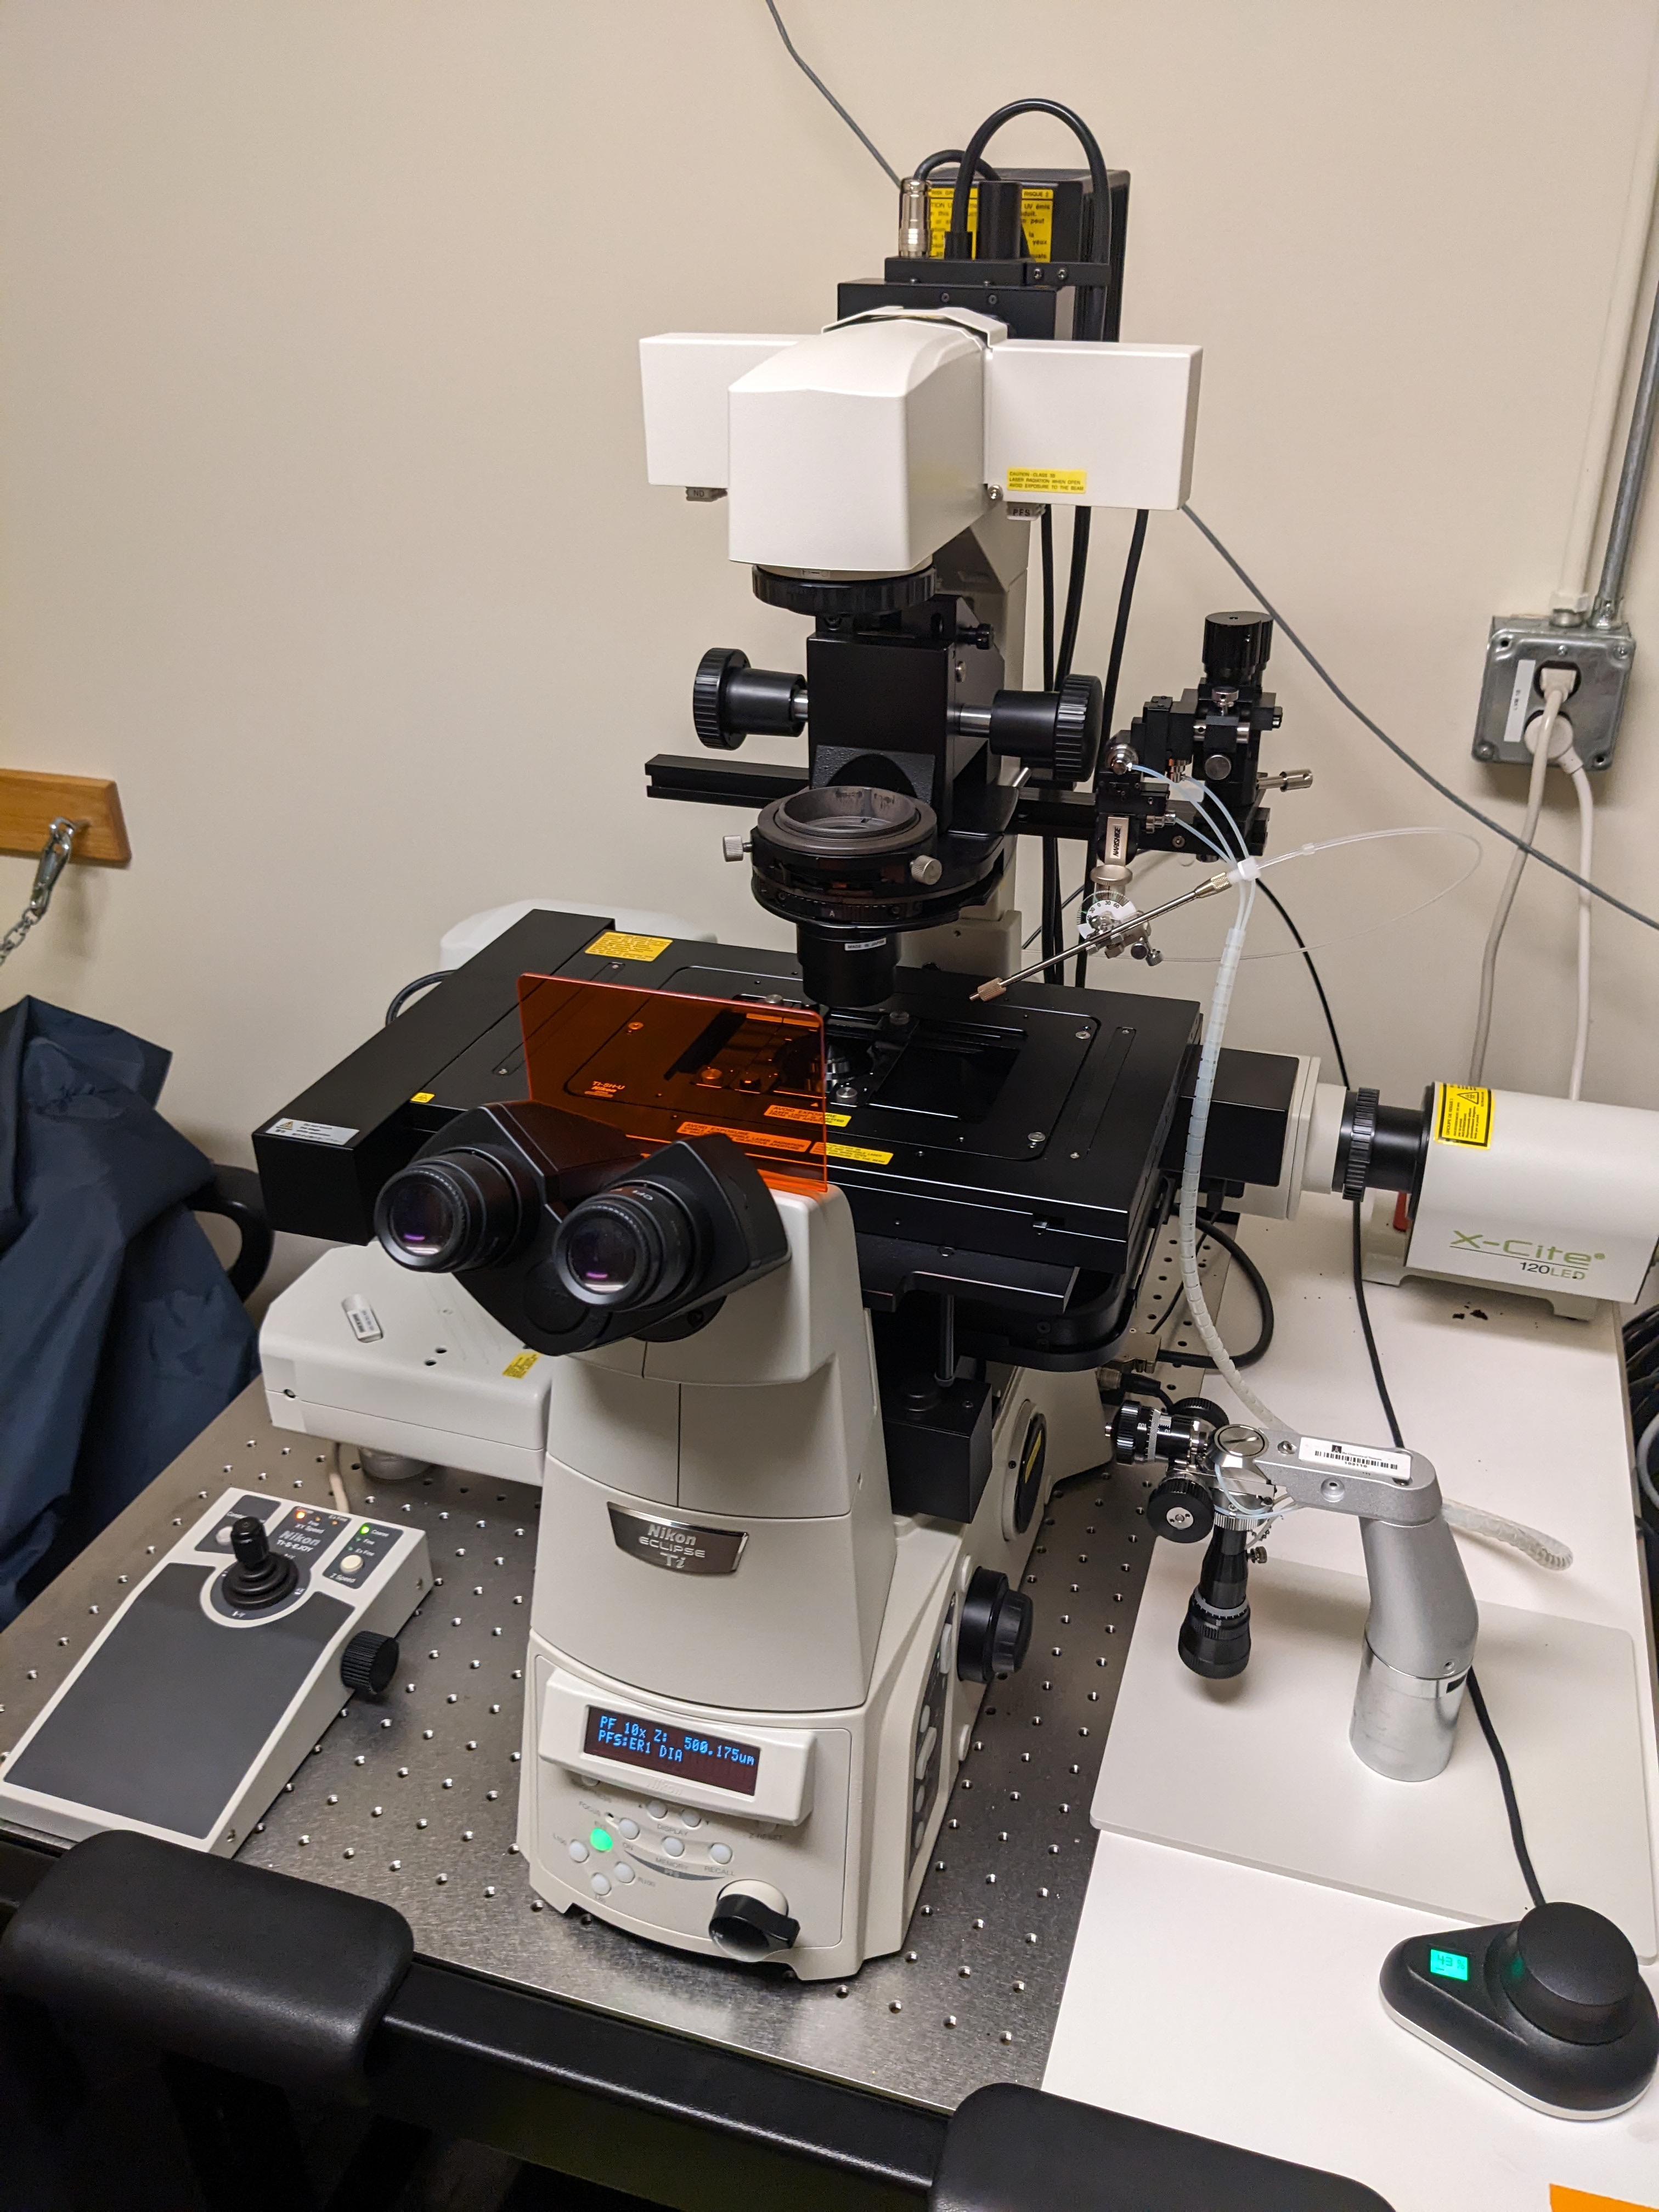
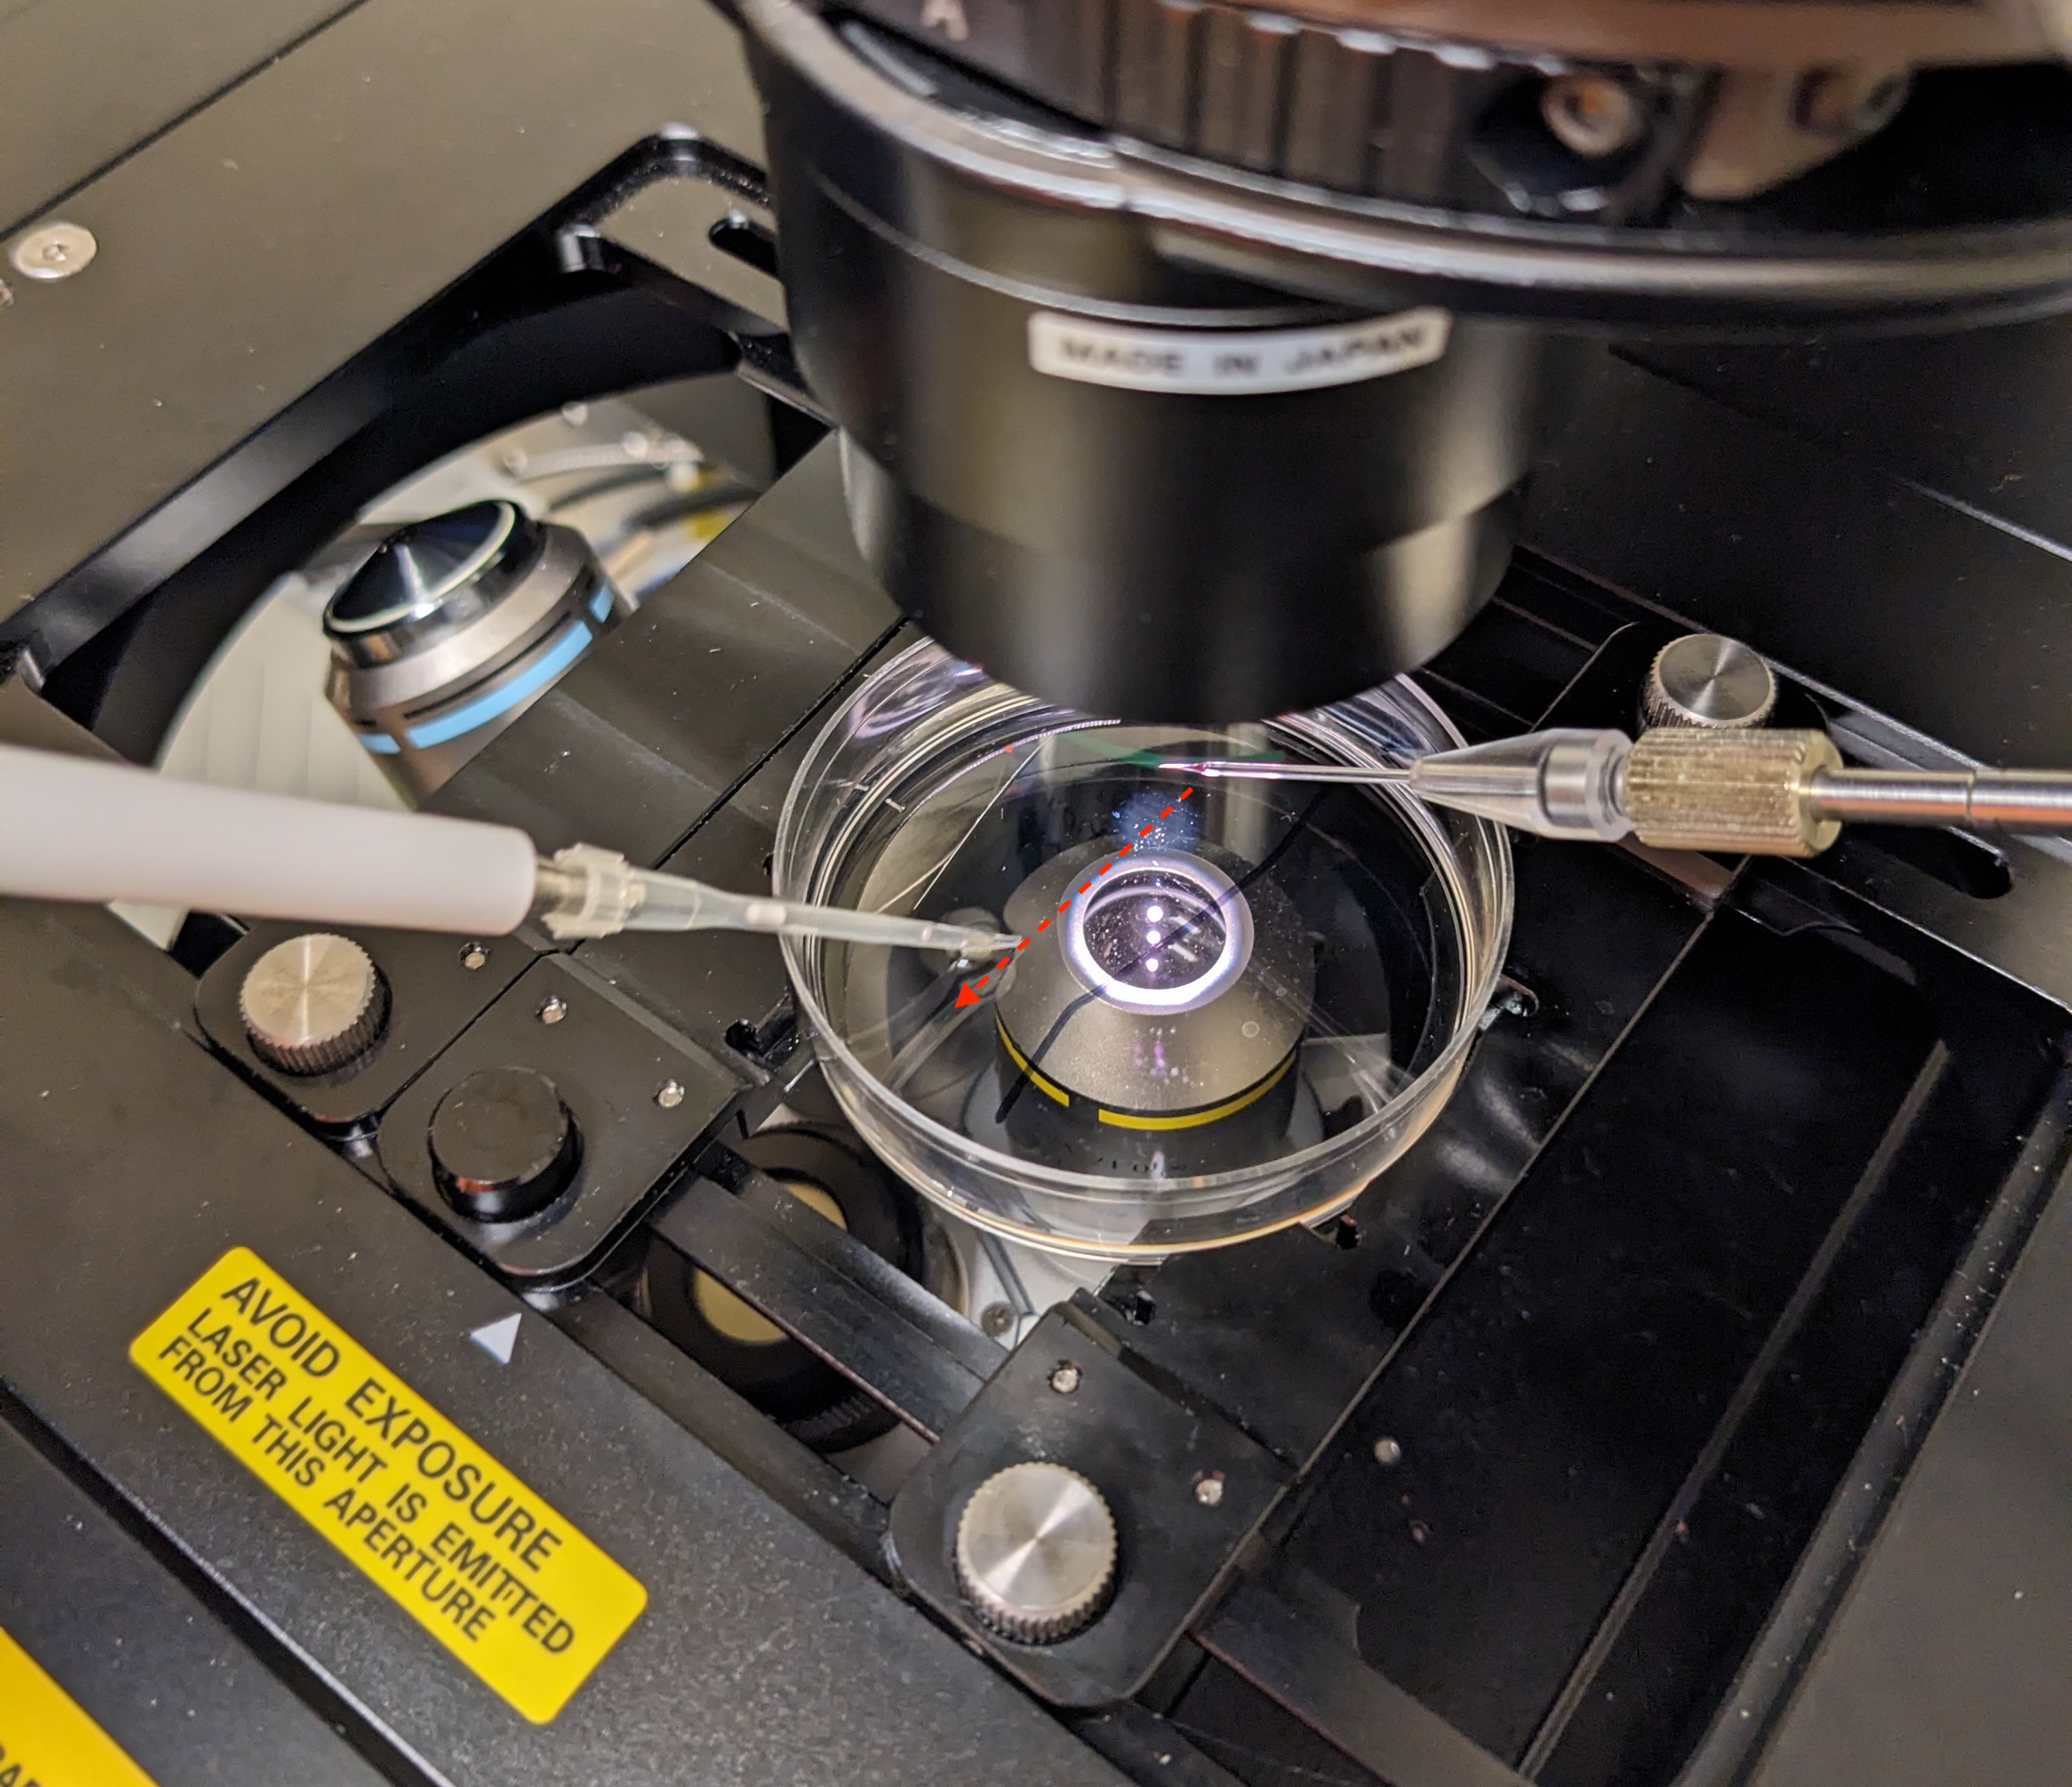
The microinjection setup
Preparing sea water
For embryonic development:
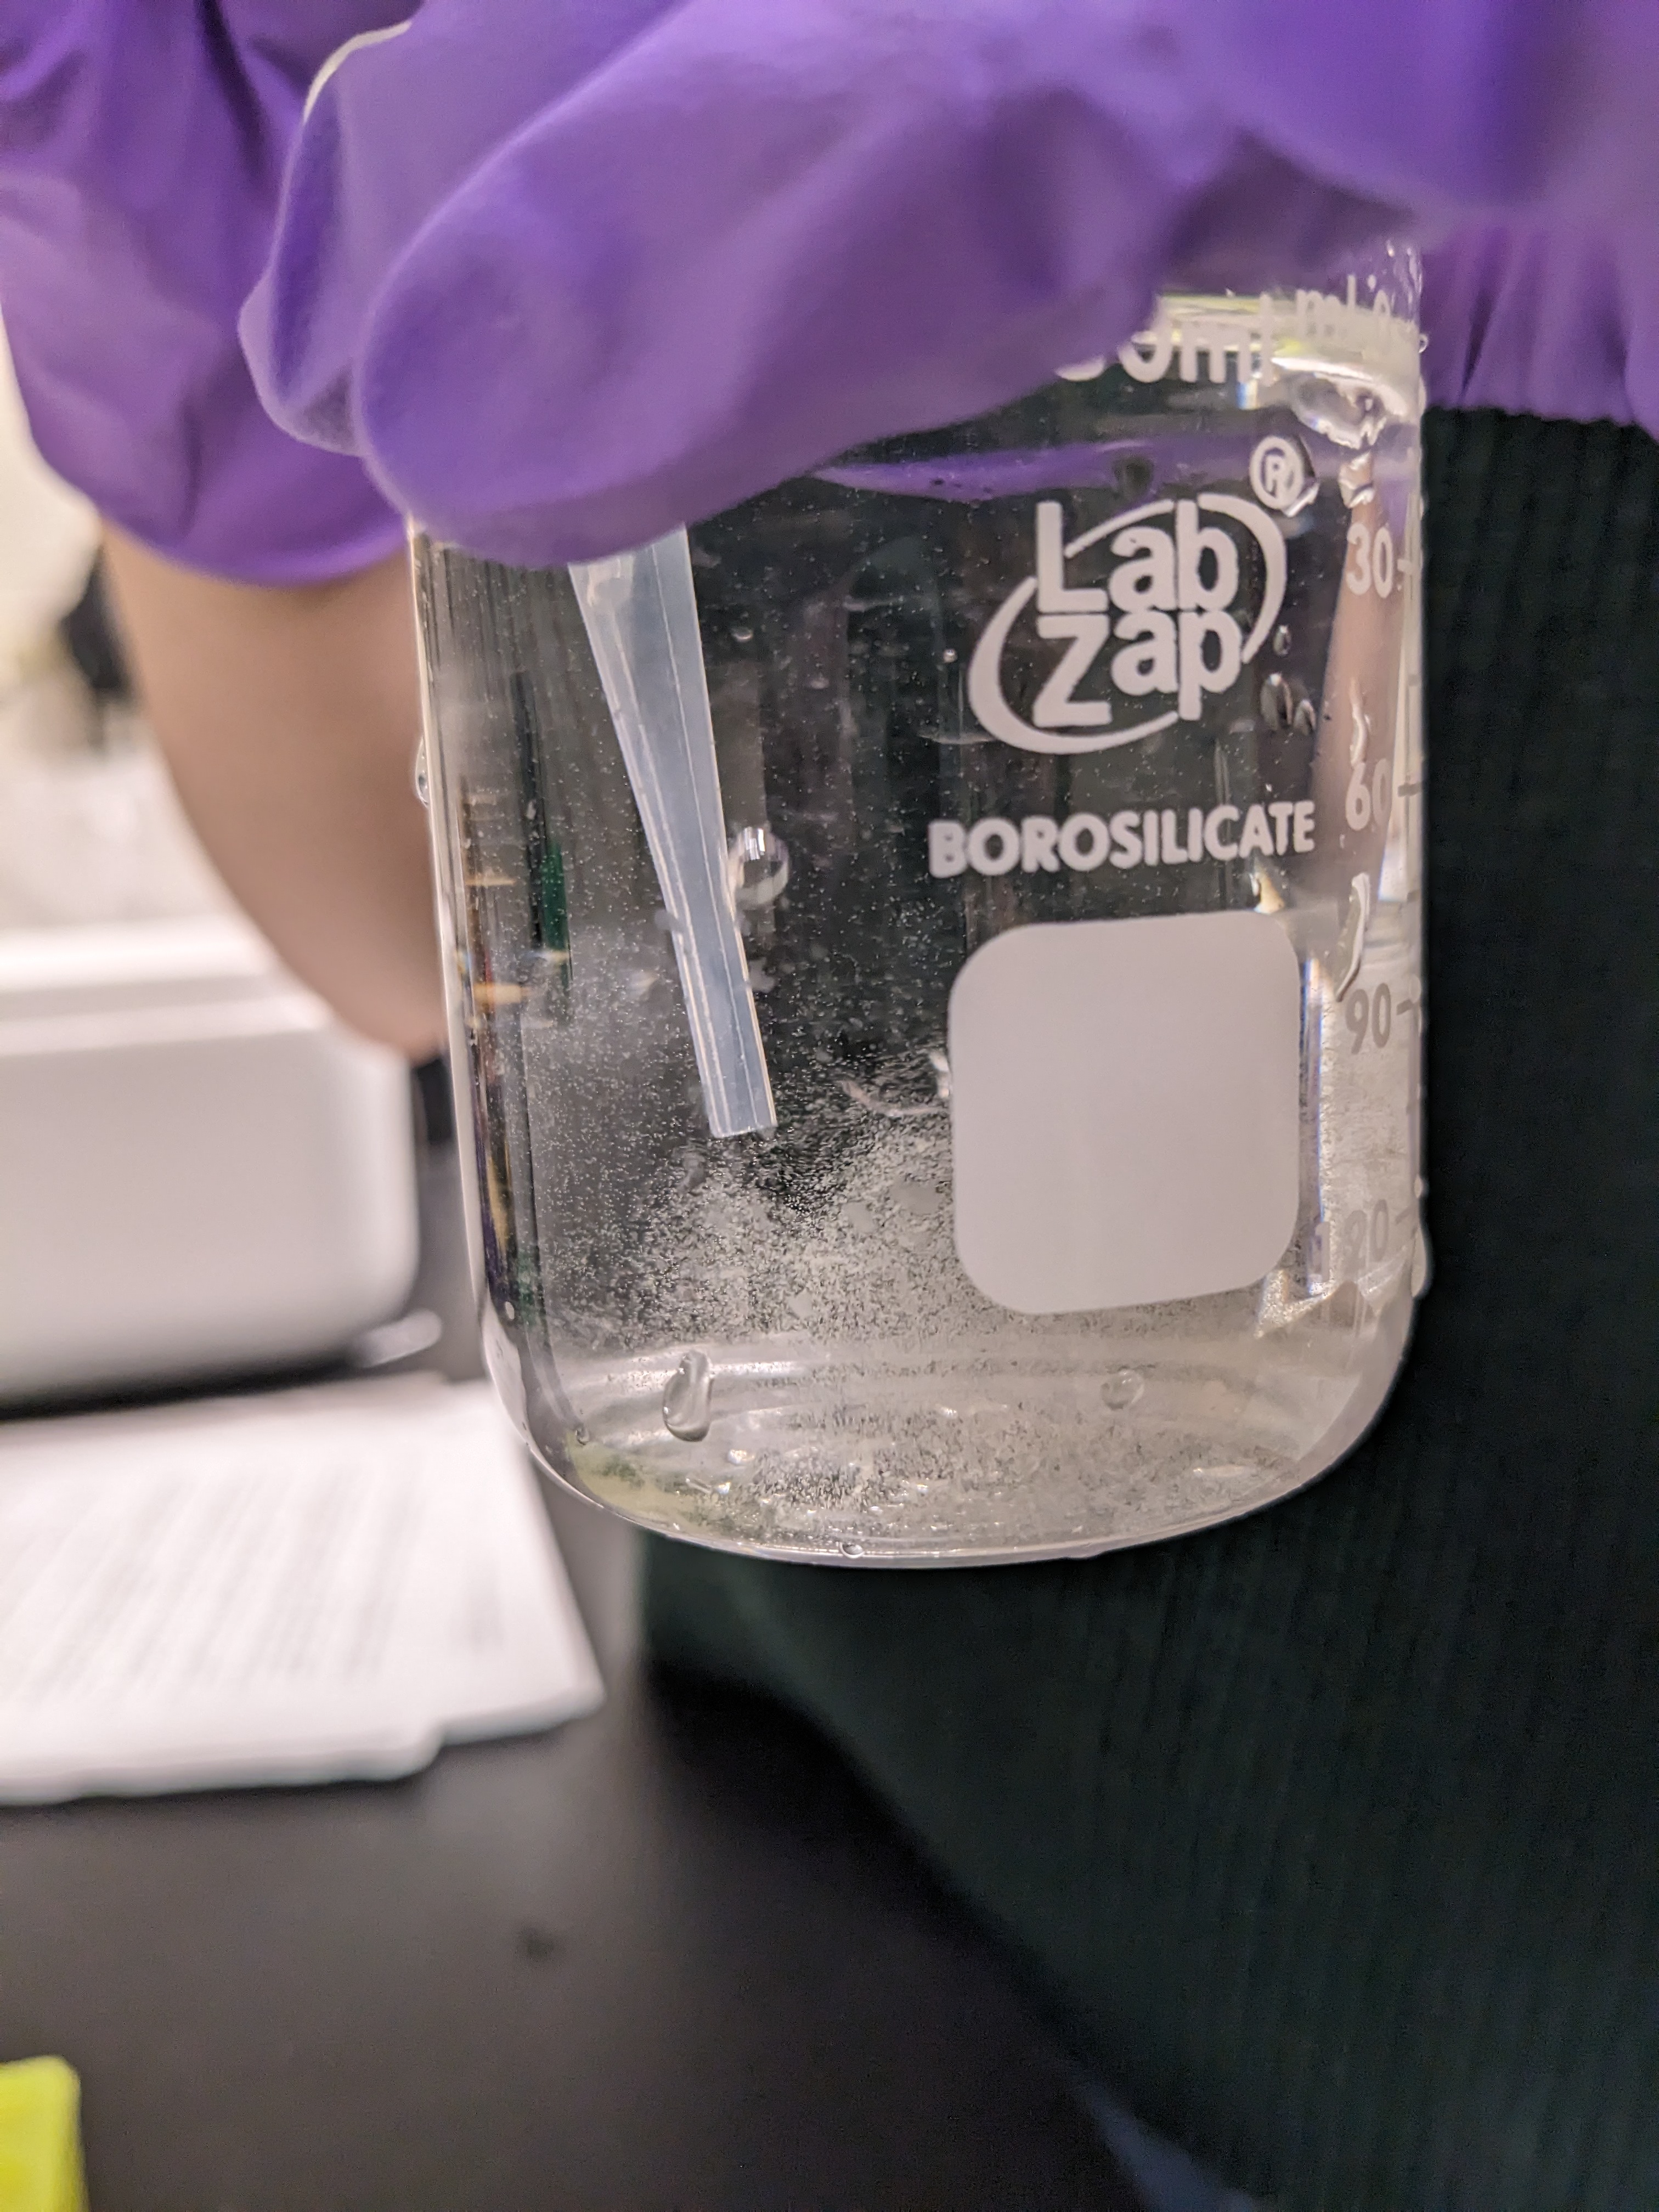
Prepare a beaker (1000 ml) with sea water (12°C, RO + instant ocean salt). Check for correct salinity (~33%)! Adjust salinity if needed. Place in 15°C fridge.
For during the microinjection:
Pour 25 ml of the filtered sea water into a 50 ml centrifuge tube and add 25ul of 1M 3-aminotriazole (3-AT) stock solution1 to it. “Label as 3AT filtered sea water”. Place the 3AT sea water on ice.
Preparing the petri dish
Take a PS-coated petri dish2, mark middle with a straight black line with marker on the outer side of the dish. Take a razor blade and make a cut parallel to the black line halfway between the black line and the edge of the dish on the inner side of the dish. This scratch will be important to break the injection needle to adjust the flow of solution as needed.
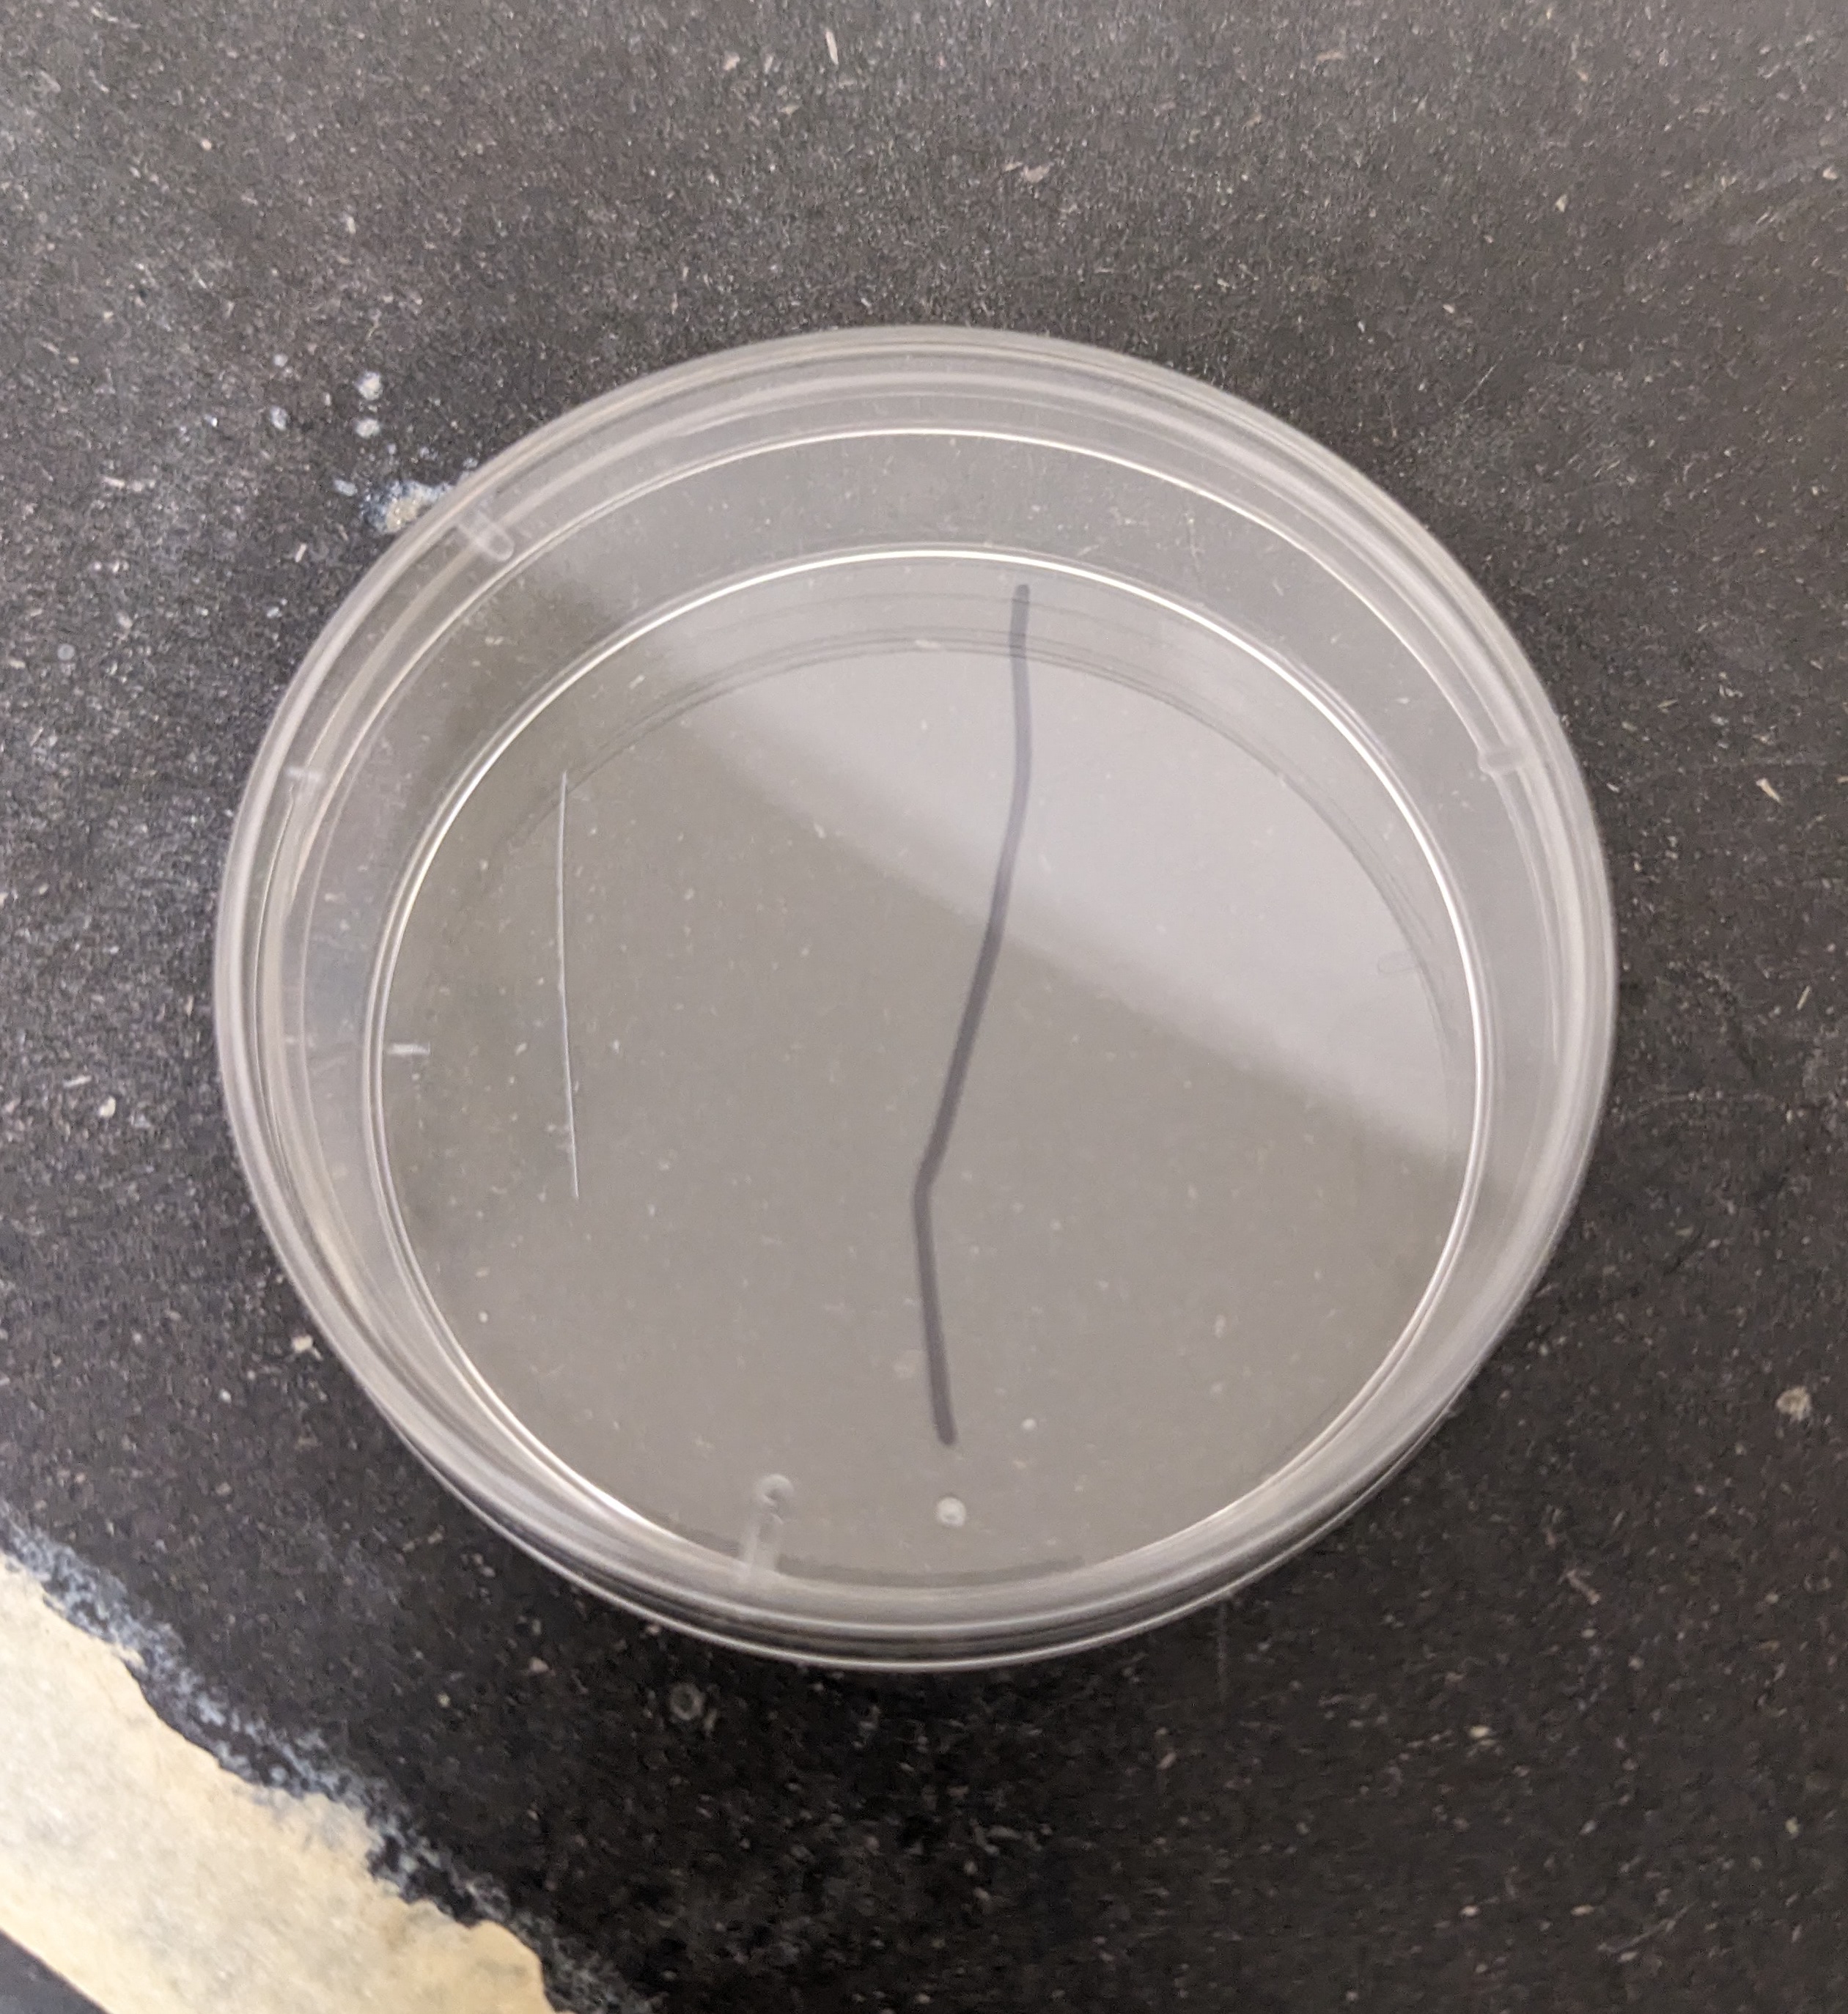
Pipette 4 ml of 1 mM 3-AT sea water (prepared in the first step of “Collecting eggs and sperm”) into the PS-coated dish using a transfer pipette.
Place petri dish under microscope, such that the scratch mark is on the left.
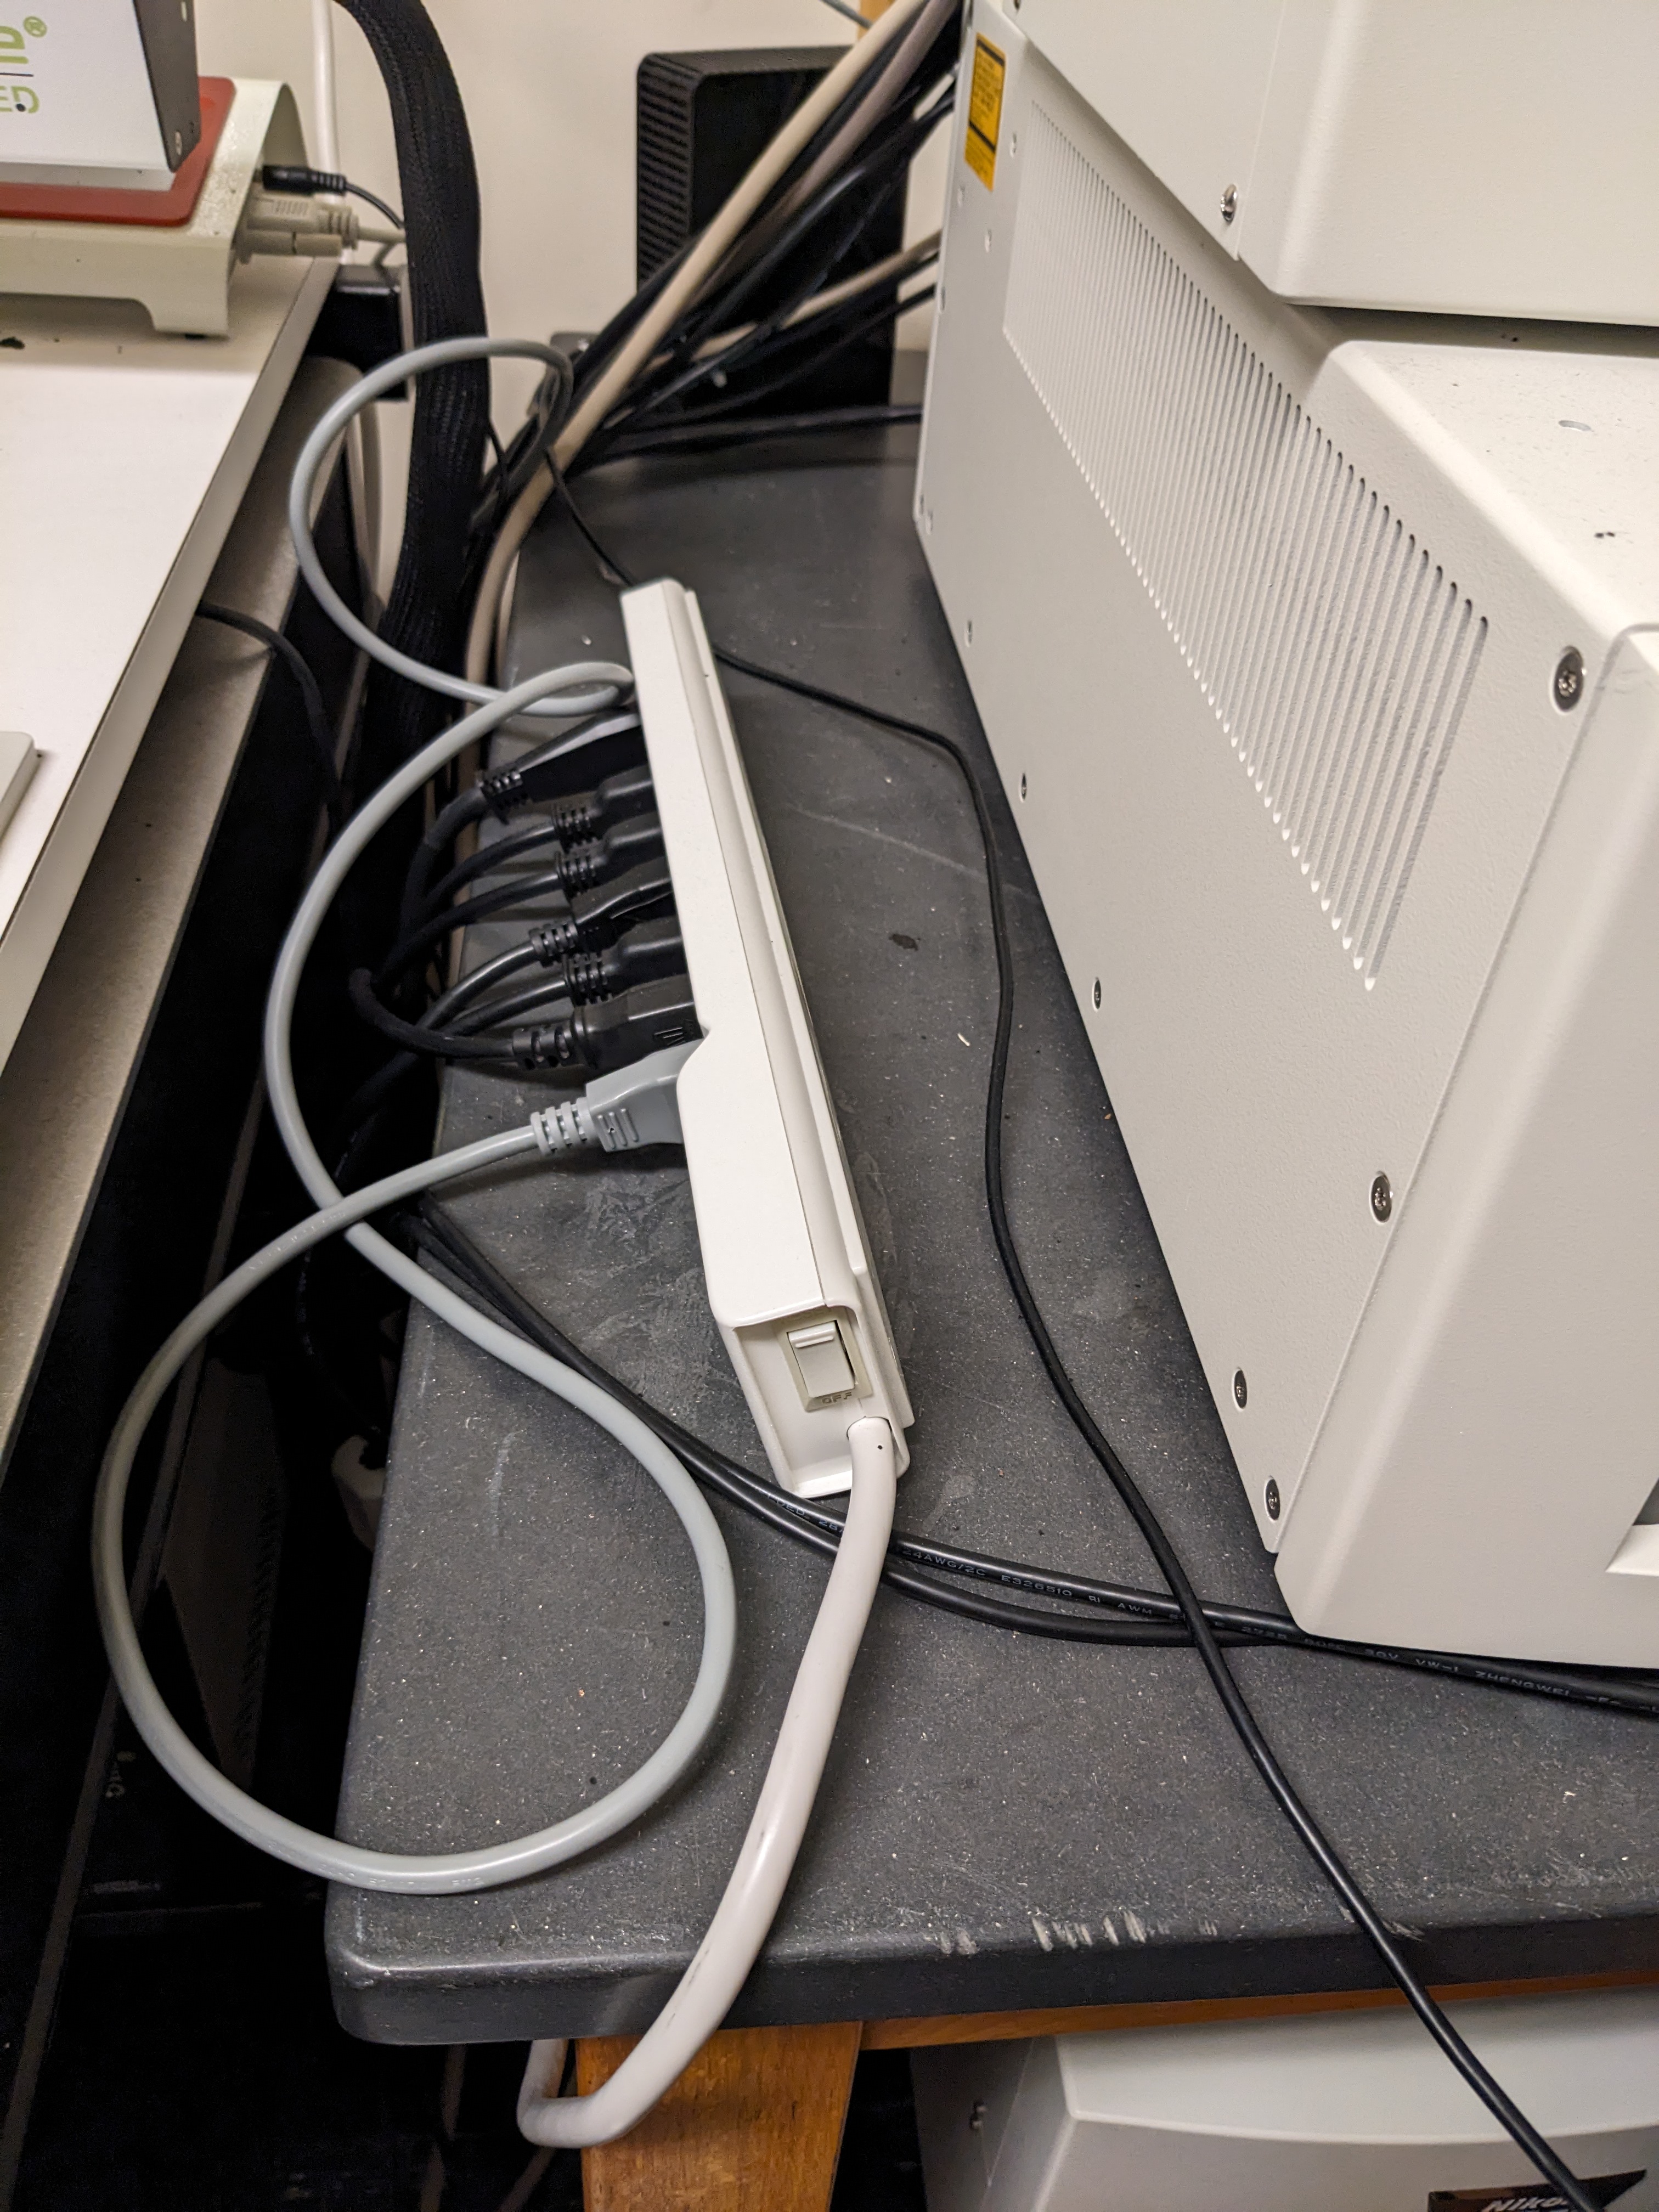
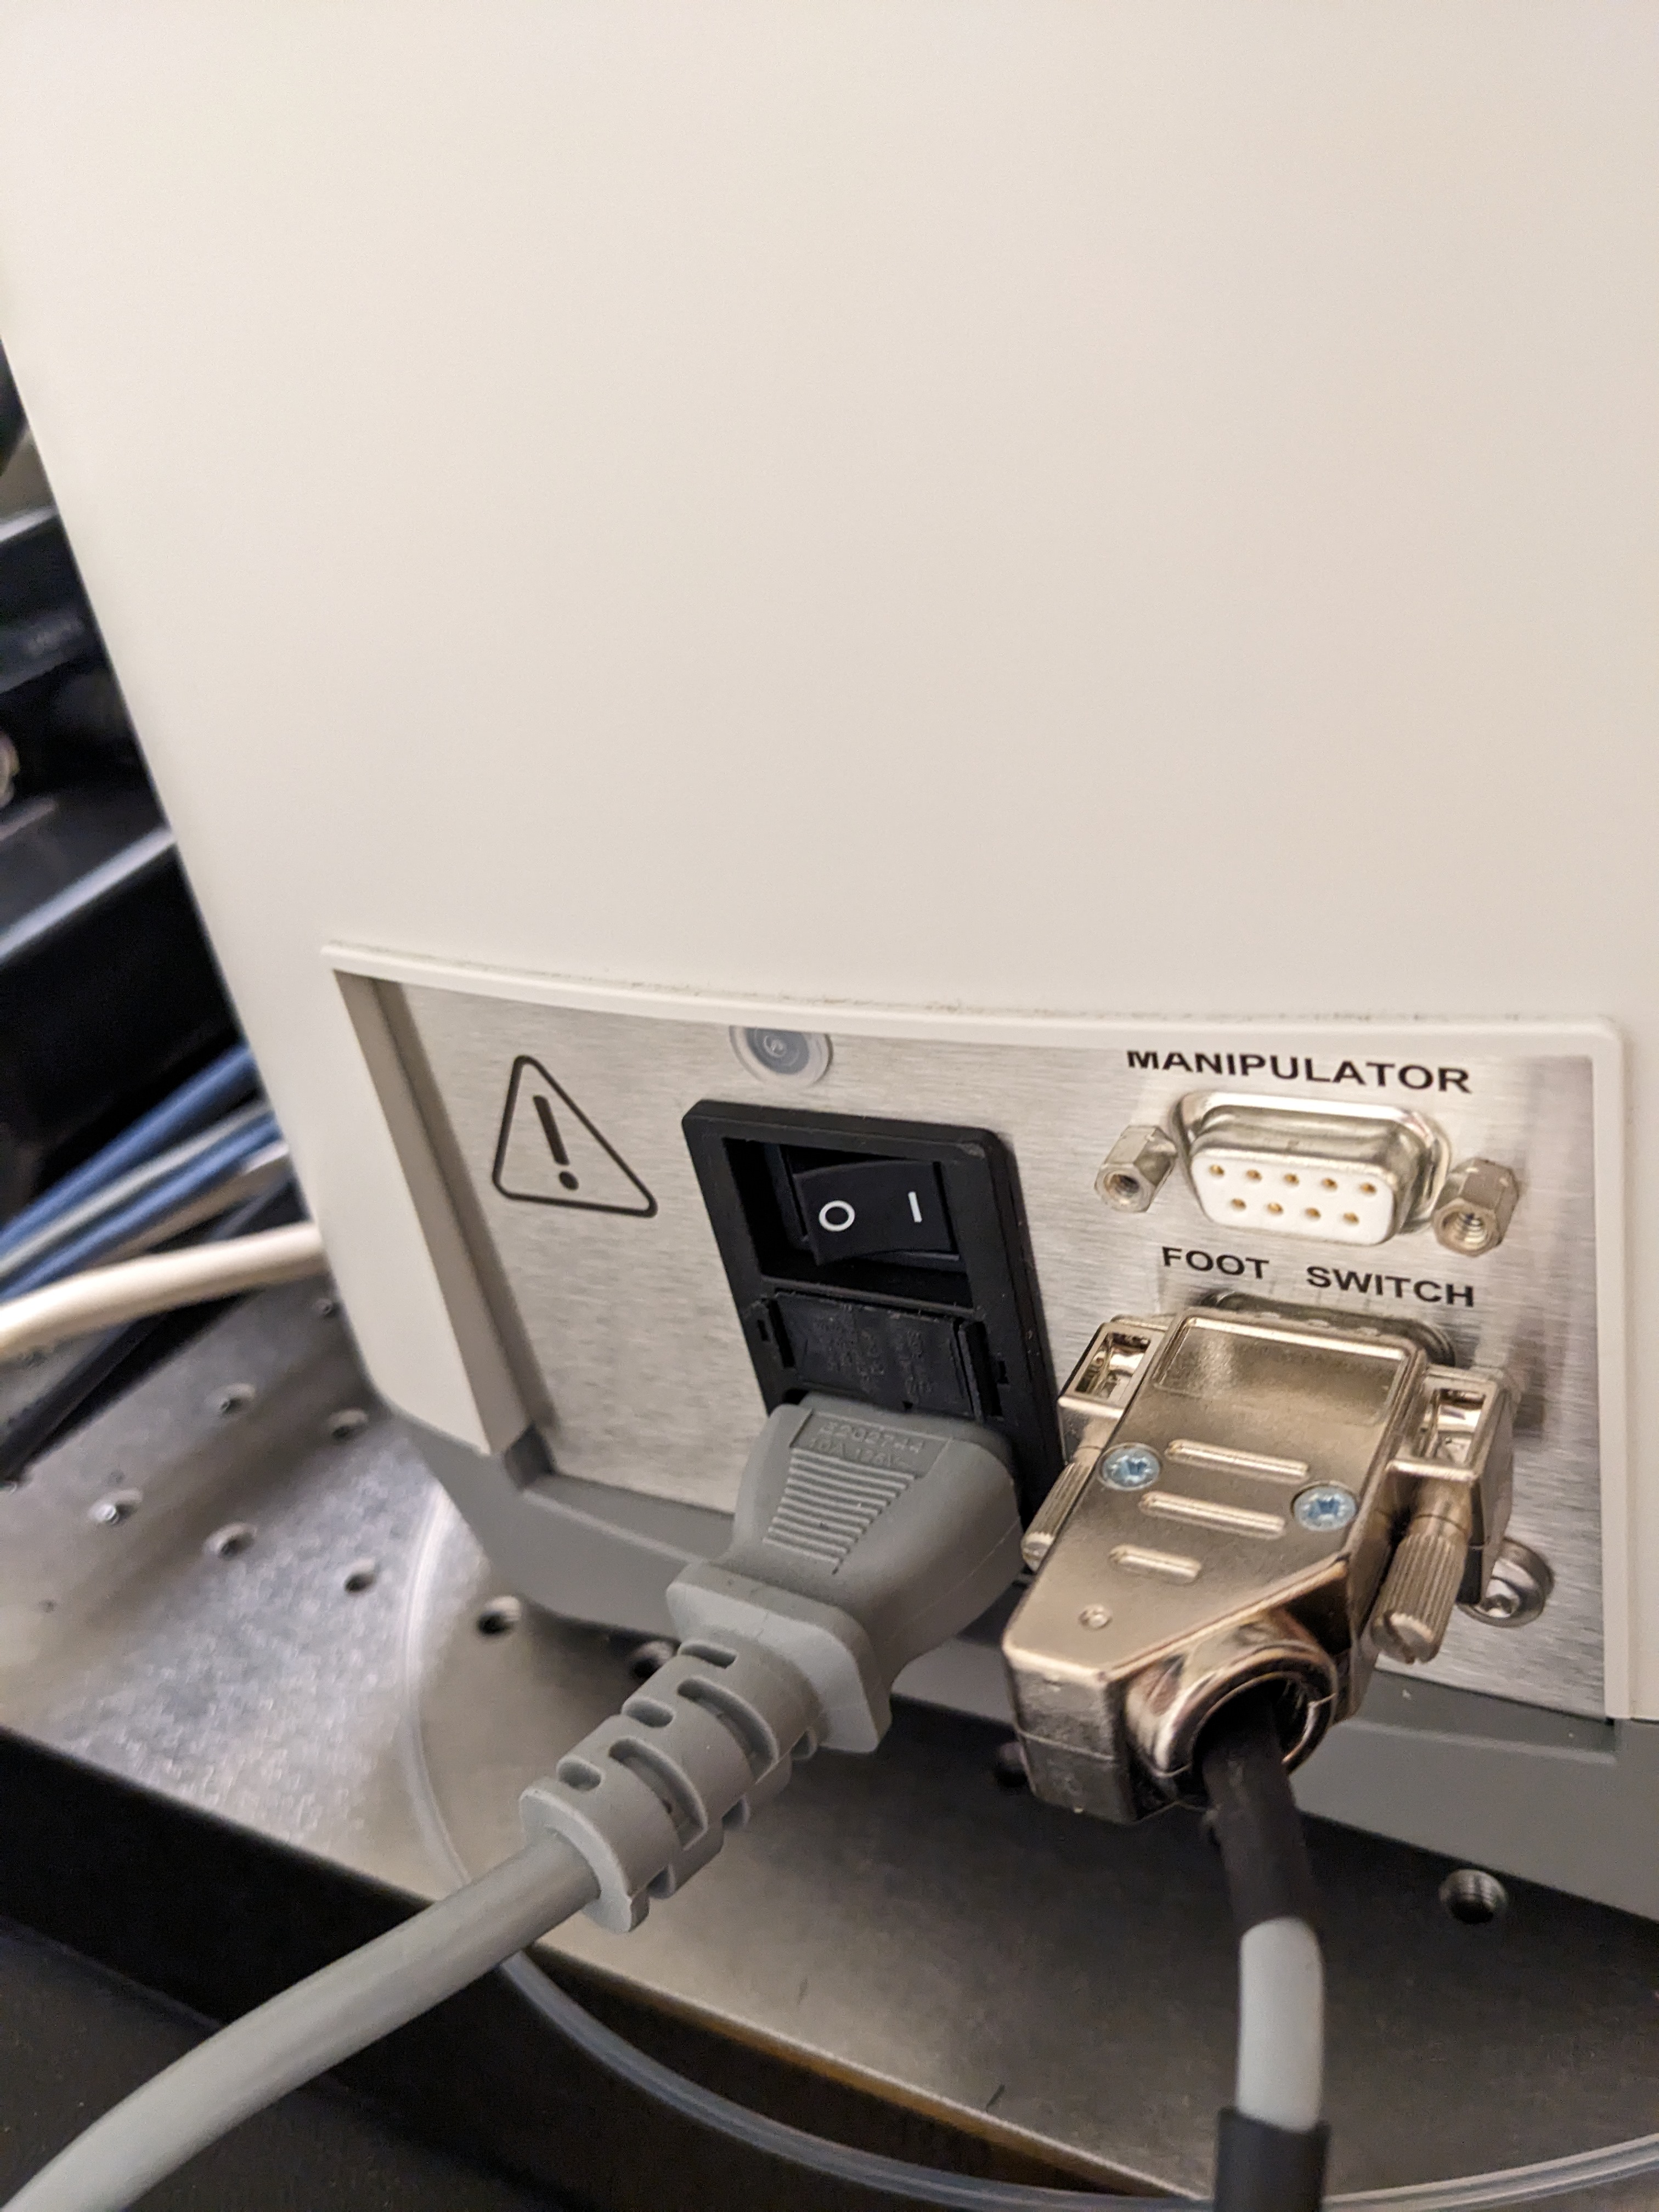
Switch on the microscope and the FemtoJet 4i. Make sure to detach the injection tube first!
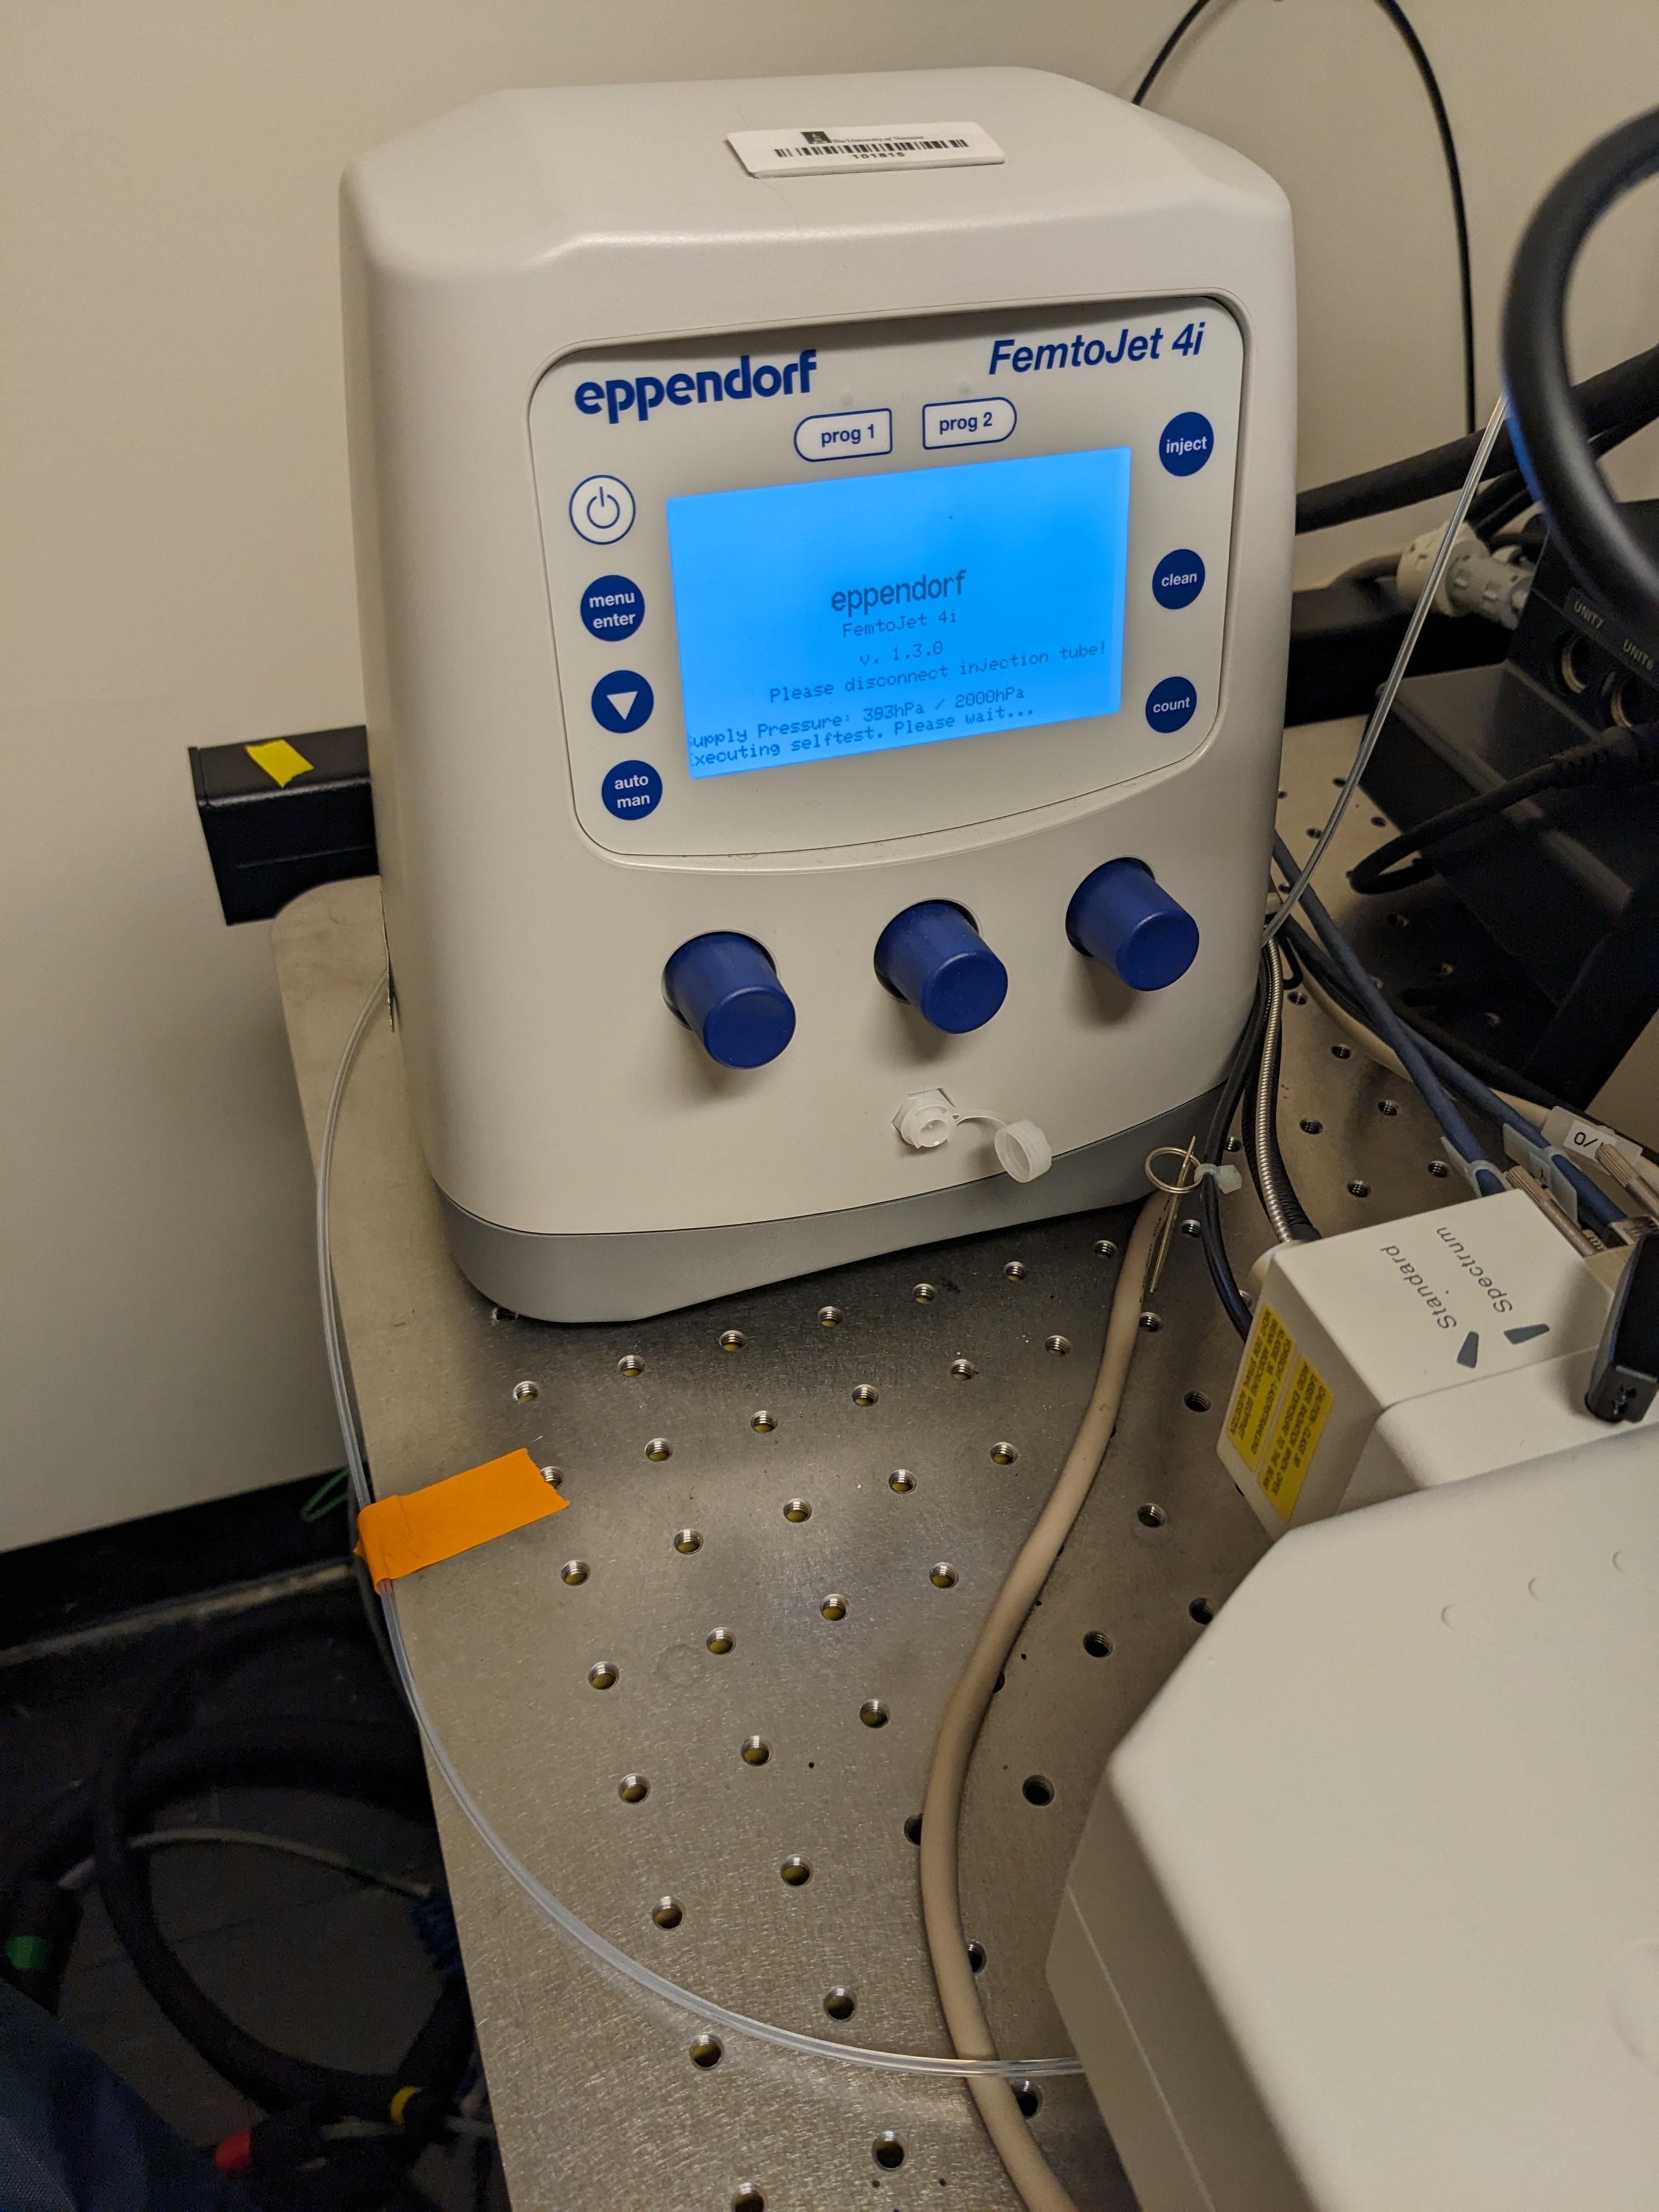
Once the pressure has built up, attach the injection tube to the FemtoJet (TODO note about the ring size). If you see the error message below, make sure that the injection tube is correctly attached to the FemtoJet, and that the needle in the needle holder is all the way in and the tube is screwed on right.
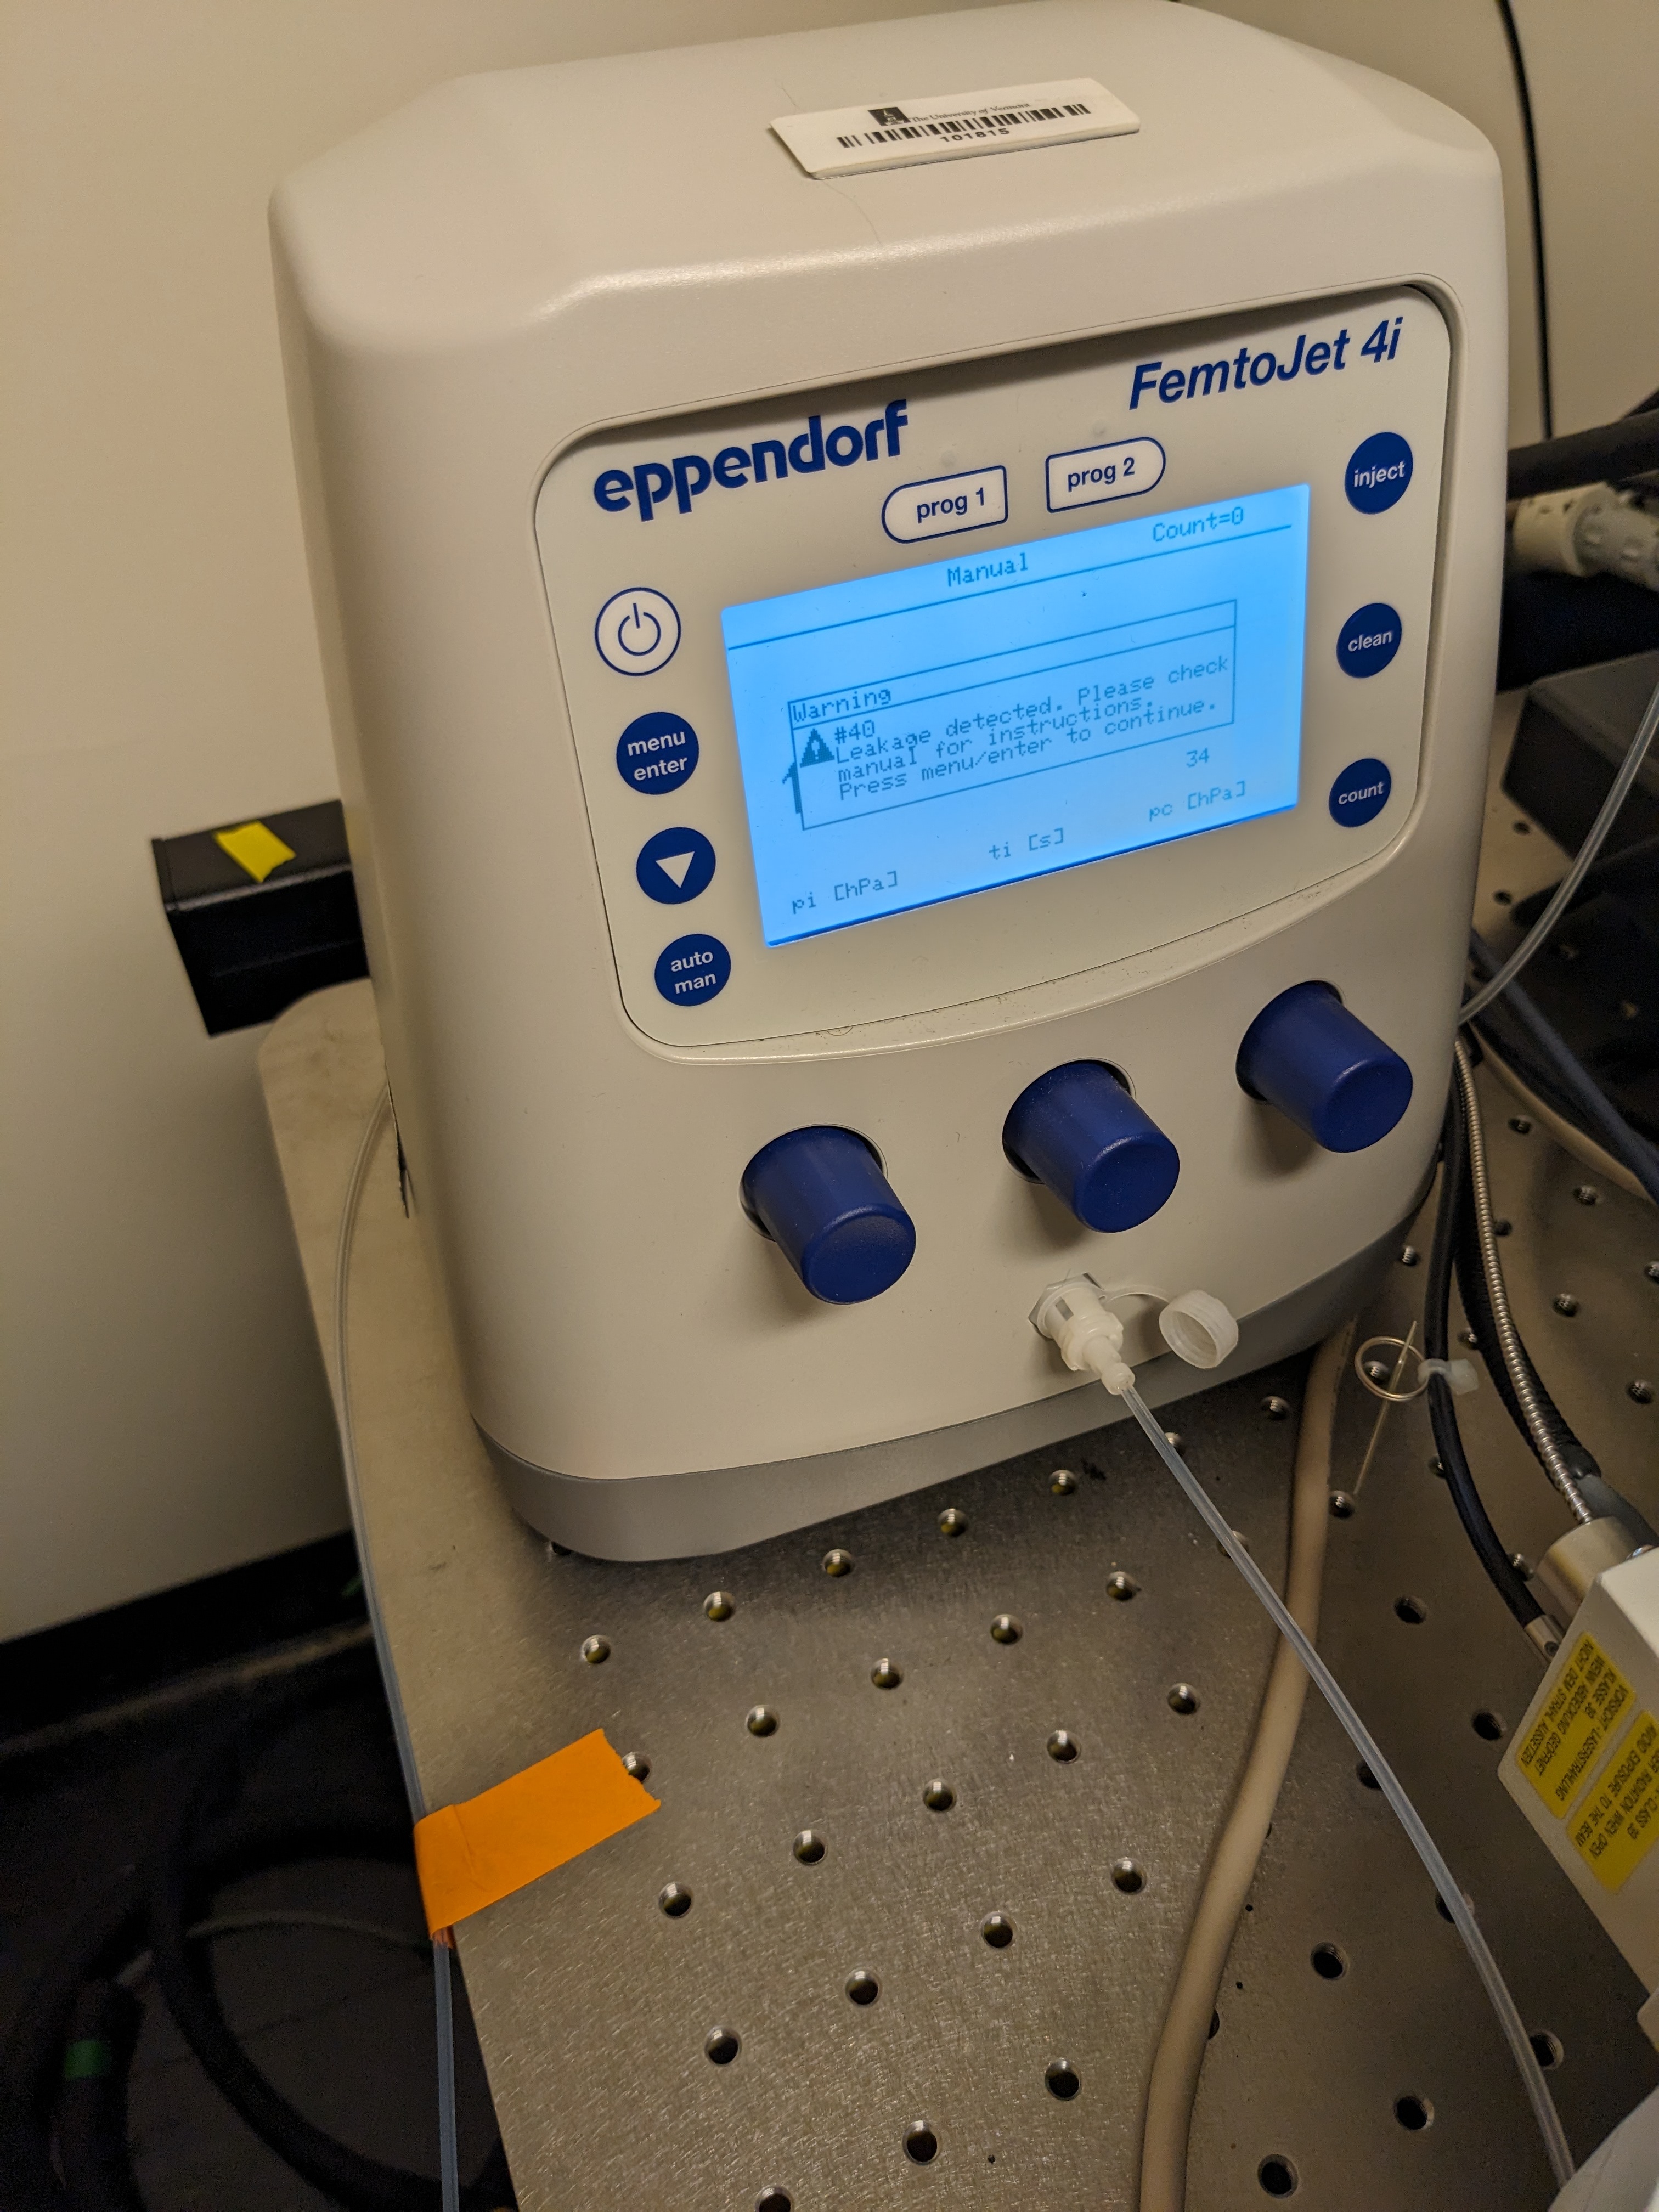
Default microinjector settings: Manual, 120, 40.
Lower needle into the sea water using the macromanipulator. Once the needle touches the water, find the needle through the microscope and lower/adjust focus until the needle touches the bottom of the petri dish. Navigate to the scratch mark. Gently touch the scratch with the end of the needle to break it very slightly. Check with the fluorescent light that there is a good flow of solution.
Rowing the eggs and fertilization
Lift the needle out of the liquid using the macromanipulator to avoid breaking the needle during rowing of the eggs.
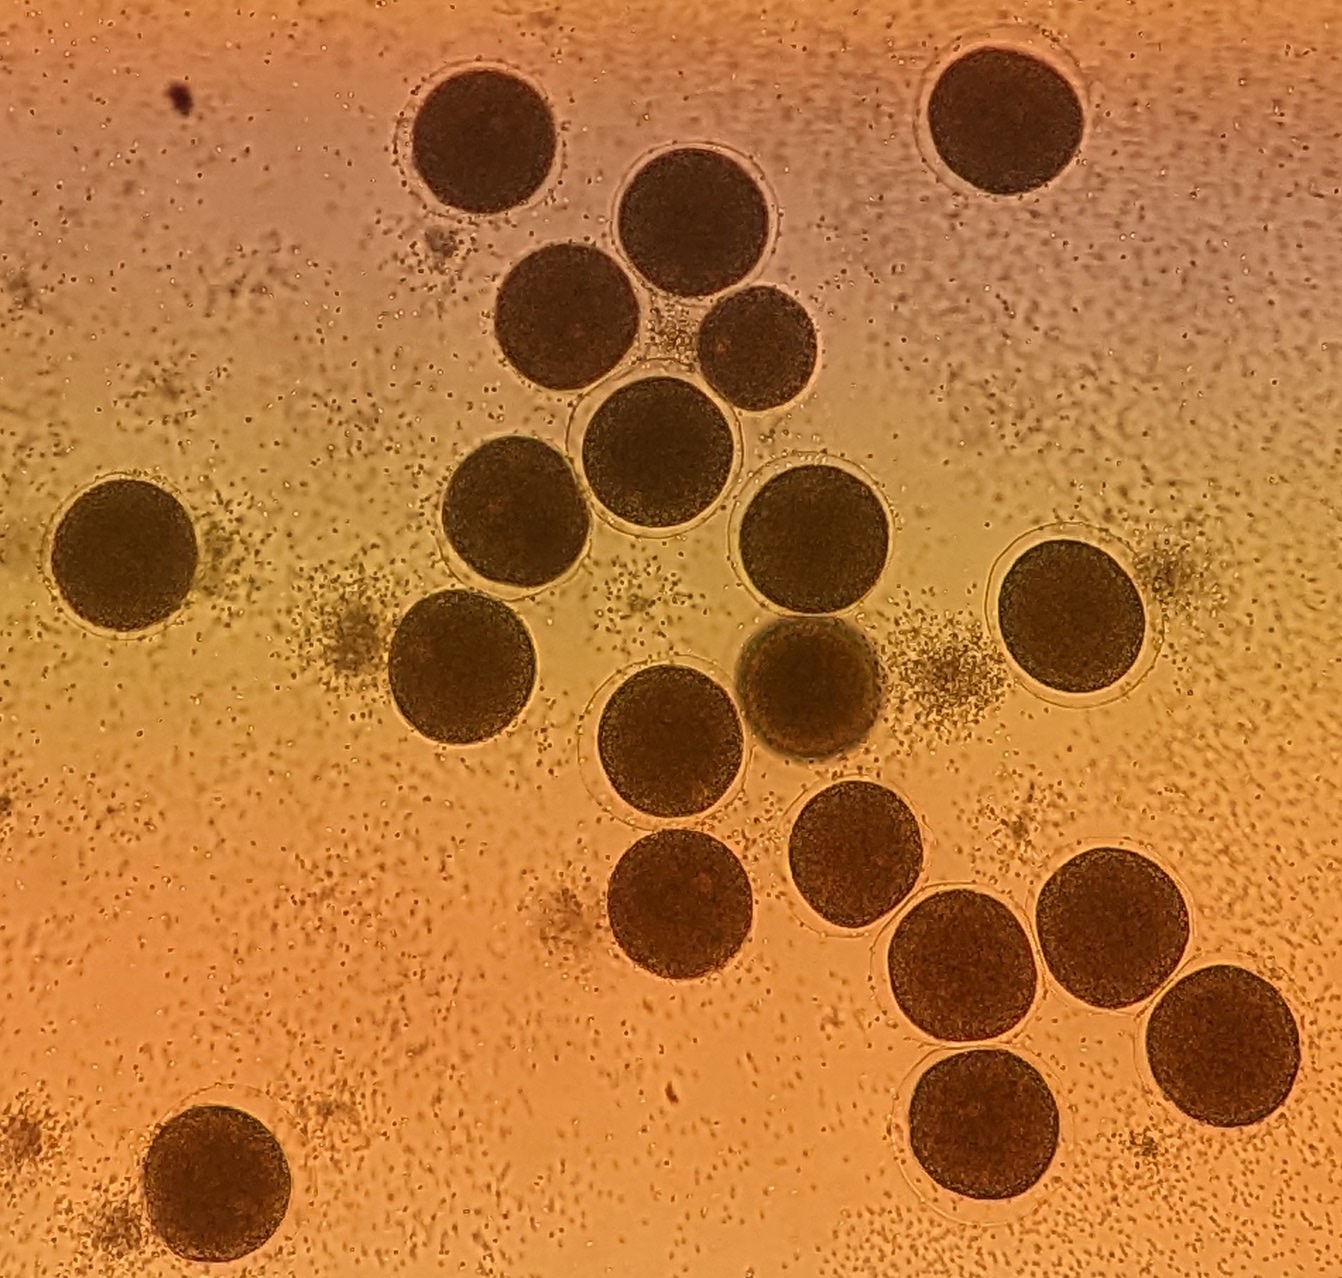
Row 10ul of dejellied eggs in a straight line using a 10 ul pipette tip. If the eggs have been sitting in the glass beaker for a while, they tend to stick to the bottom and pipetting up with the 10ul pipette tip might become difficult. Use a 3ml transfer pipette to pipette up and down near the eggs to stir them up.
Row the eggs on the petri dish parallel and in-between the two lines mentioned above (marker and scratch mark lines) using a pipette. Row the eggs right before the injections, because fertilization problems may occur due to prolonged exposure to 3-AT sea water. Gently press the tip of the pipette to the bottom of the petri dish on the top, and move down in a line while continuously pushing out the eggs from the pipette tip.
Find the eggs with the microscope. Lower the needle back into the sea water and gently poke an egg to make sure they are stuck to the bottom.
Dilute and activate the sperm by adding 1ul of sperm into 100ul of sea water and mixing the water with the pipette tip for a few minutes until there are no chunks left and the solution is opaque and homogeneous. Add 10ul of diluted sperm directly on top of the top eggs. Submerge the tip and expel the sperm directly above, but be careful not to touch the eggs. Only fertilize a portion of the eggs at a time since the fertilized eggs become hardened and impossible to inject 10-15 minutes after fertilization. Once the fertilized eggs are injected and you move down to unfertilized eggs, repeat this step including the dilution of the sperm as after 10-15 minutes the activated sperm become less fertile.
Microinjection of fertilized eggs
Once the eggs are fertilized (the fertilization envelop appears), push the needle against a fertilized egg such that it makes a dent in the middle of the cell.
Hit the side of the microscope with your hand to make the needle enter the cell. You might need to hit it repeatedly.
You can tell that the needle has entered the cell if:
you see the tension of the cell wall is released and the dent created by the needle disappears
you see some movement inside the cell as the flow of the injection solution from the needle in disturbing the cellular content
After pressing the pedal, you should see a light area appear around the needle - this is called the injection bolus. Once the size for the injection bolus reaches 1/4 of the volume of the cell, pull out the needle. The cell should remain intact without anything flowing out of it. The injection bolus should disappear after 30 sec - 1 min.
Move to the next cell using the micromanipulator and the stage controller. Repeat.
When done (fertilized eggs hardened or injected enough eggs), remove the dish from the stage and carefully aspirate out water using a transfer pipette.
Do not let the zygotes dry. Quickly add fresh prechilled sea water (from the 15°C fridge) to cover the dish. Label the petri dish (your name, date, time in hours and minutes, number of eggs injected, type of injection solution used). Incubate the embryos at 15°C. It is recommended to put the petri dishes with the embryos in sealed boxes with a wet paper towel to minimize evaporation of water from the sea water.
3-AT stock soluion: Prepare 1 M stock solution of 3-aminotriazole (3-AT, MW = 84.08) by dissolving 0.84 g of 3-AT in 10 ml of ddH2O. This solution can be stored at 4 °C for up to 6 months.↩︎
PS coated dishes: Prepare 1% solution of protamine sulfate (PS) by adding 0.5 g of PS to 50 ml of deionized, distilled water (ddH2O) in a 50 ml conical tube. Shake well at high speed on a bench shaker at room temperature for 1-2 hr to ensure complete dissolution of PS. This solution can be stored at 4 °C for at least 3 months (make sure to completely dissolve gel-like precipitate before each use). Take a sleeve of 60 mm x 15 mm polystyrene Petri dishes and lay out both lids and bottoms on the bench. Warm up PS solution to room temperature. Pour 1% PS solution in each dish (both bottoms and lids can be used) just enough to cover the surface, leave for at least 2 min. The leftover PS solution can be reused many times within 3 months when stored at 4°C. Place PS-treated dishes in a beaker filled with distilled water (dH2O). Leave the beaker under running dH2O for at least 10 min. PS-coated dishes can be used immediately or air dry for storage. Cover them to prevent dust accumulation. They can be stored at room temperature for 1 month.↩︎