We would like to thank Jian Ming Khor and Gary Wessel for their useful tips and helpful correspondence.
Goals
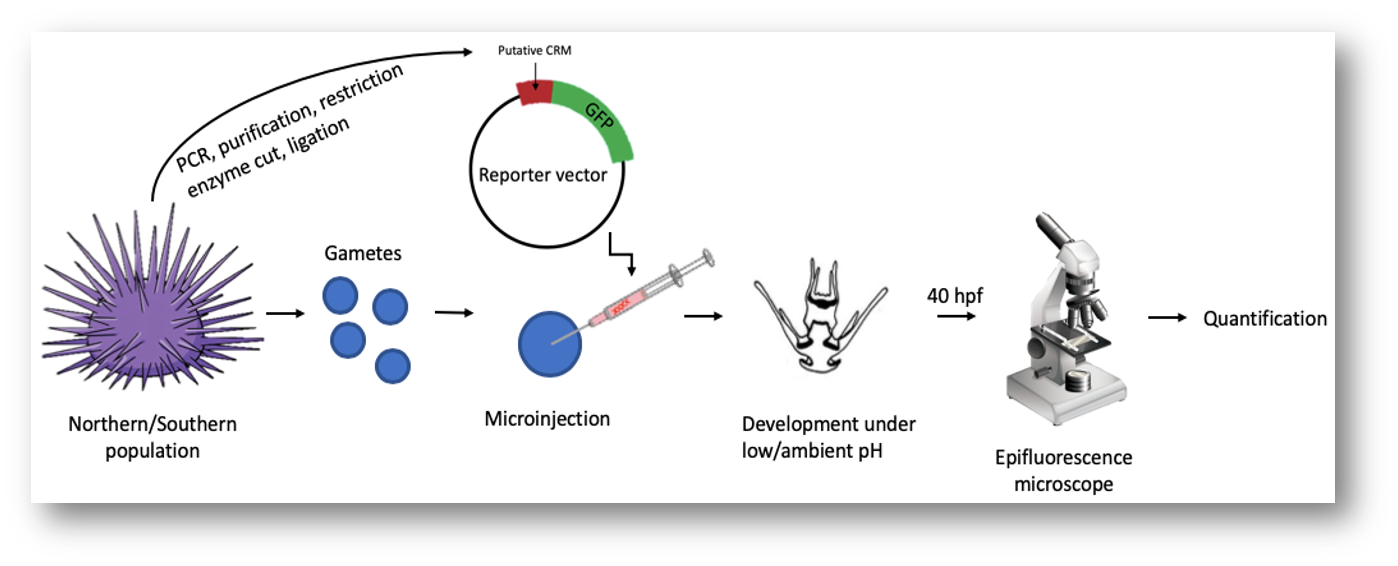
Functional validation of candidate regulatory variation.
Sub aim: developing a reliable and efficient method in the lab.
Main idea: a GFP reporter construct with a modified regulatory region is microinjected into fertilized sea urchin eggs. The output is the intensity of fluorescence, which could be:
- Tissue specific
- Developmental time specific
- Genetic background specific
- Environment specific
Primary gene of interest
ECM3, extracellular matrix protein 3. LOC579397 / SPU_001796.
- Outlier putatively adaptive cis-regulatory variant.
- Down-regulated in populations most frequently exposed to pH < 7.8 and up-regulated in populations less frequently exposed to pH < 7.8.
- In a conserved promoter region with L. variegatus (50 Mya).
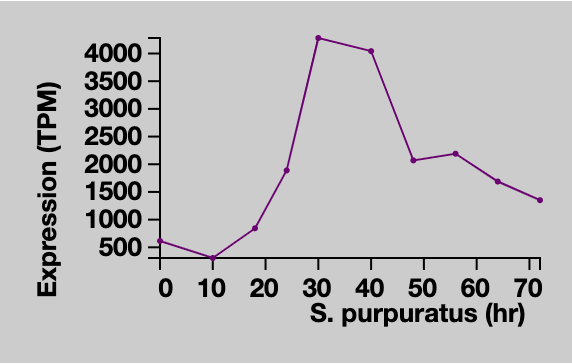
- High expression during early development.
- Important biomineralisation gene.
Expression pattern
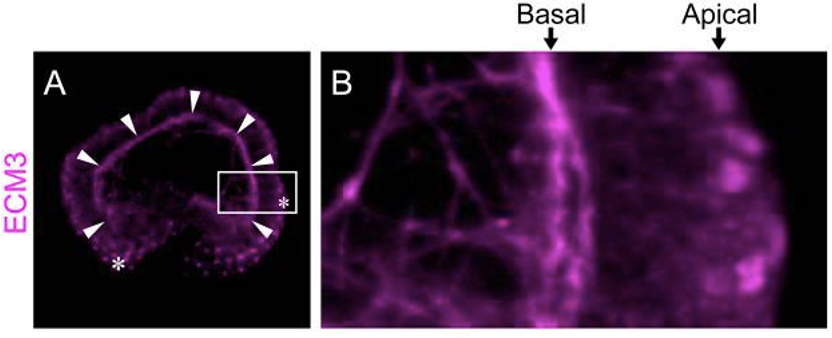
Location of ecm3 expression
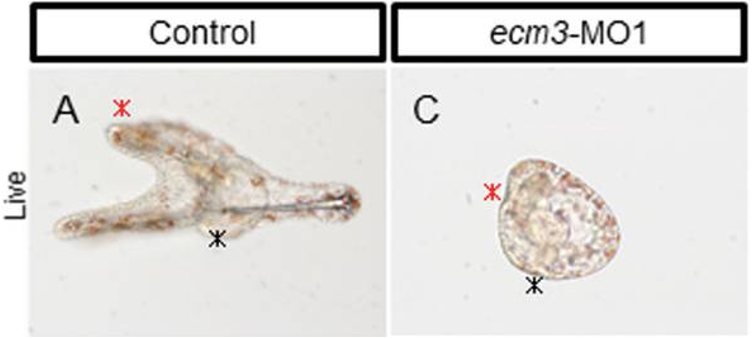
Ecm3 knockout shows abnormal larval skeleton development
Available control constructs
From Mamiko Yajima:
- SM50-GFP construct
From Jimmy Khor1:
- Sp-anpep_1
- Sp-Clect_25
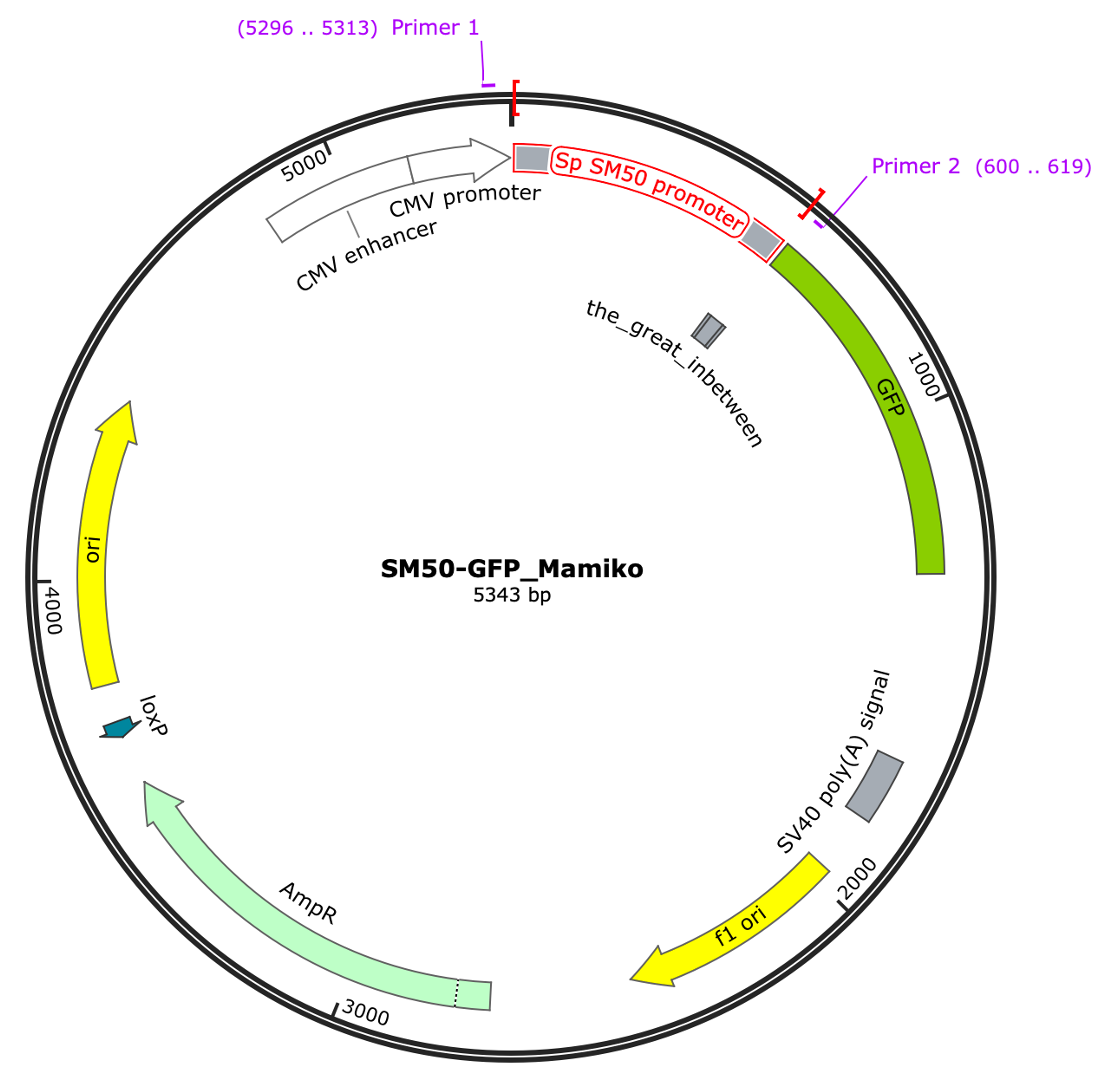
SM50-GFP
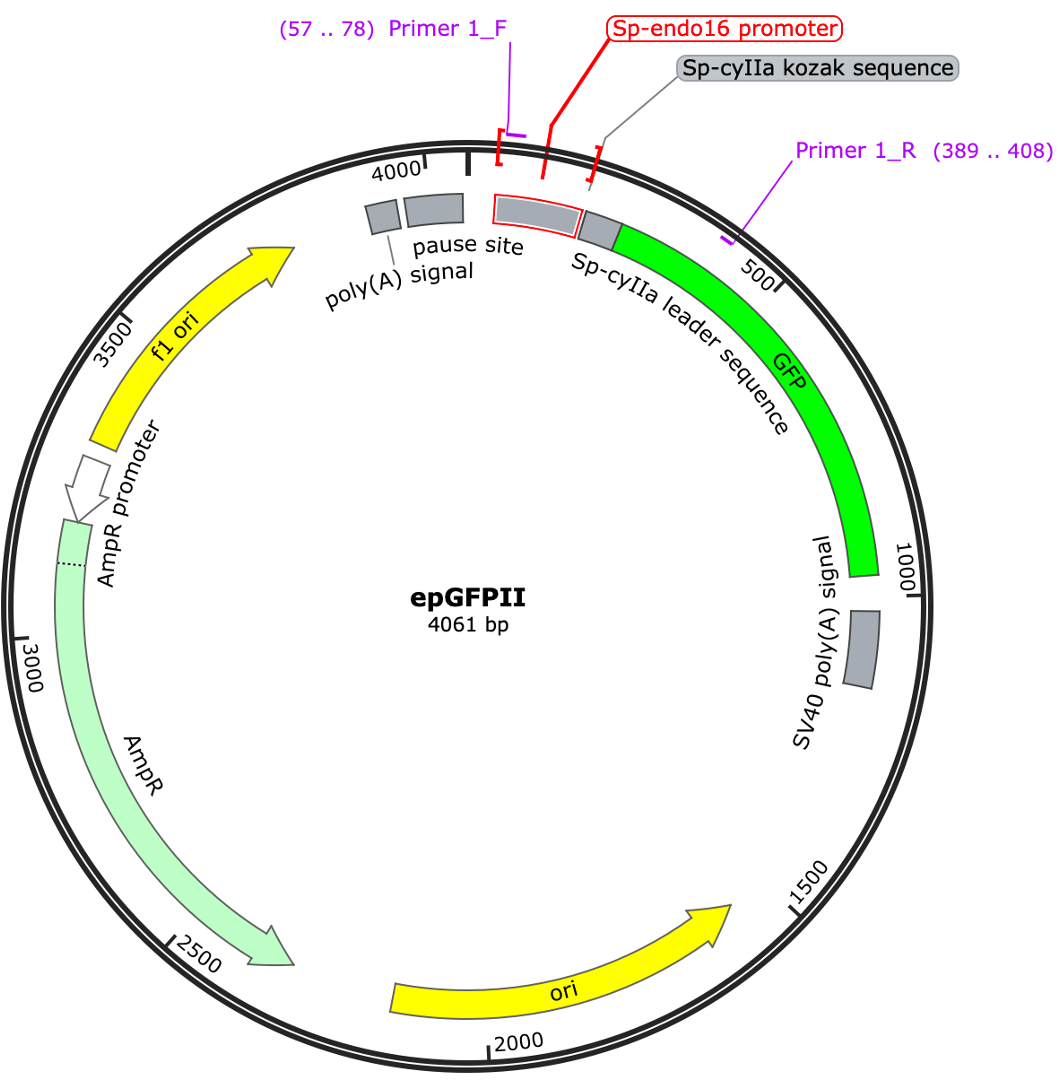
epGFPII backbone
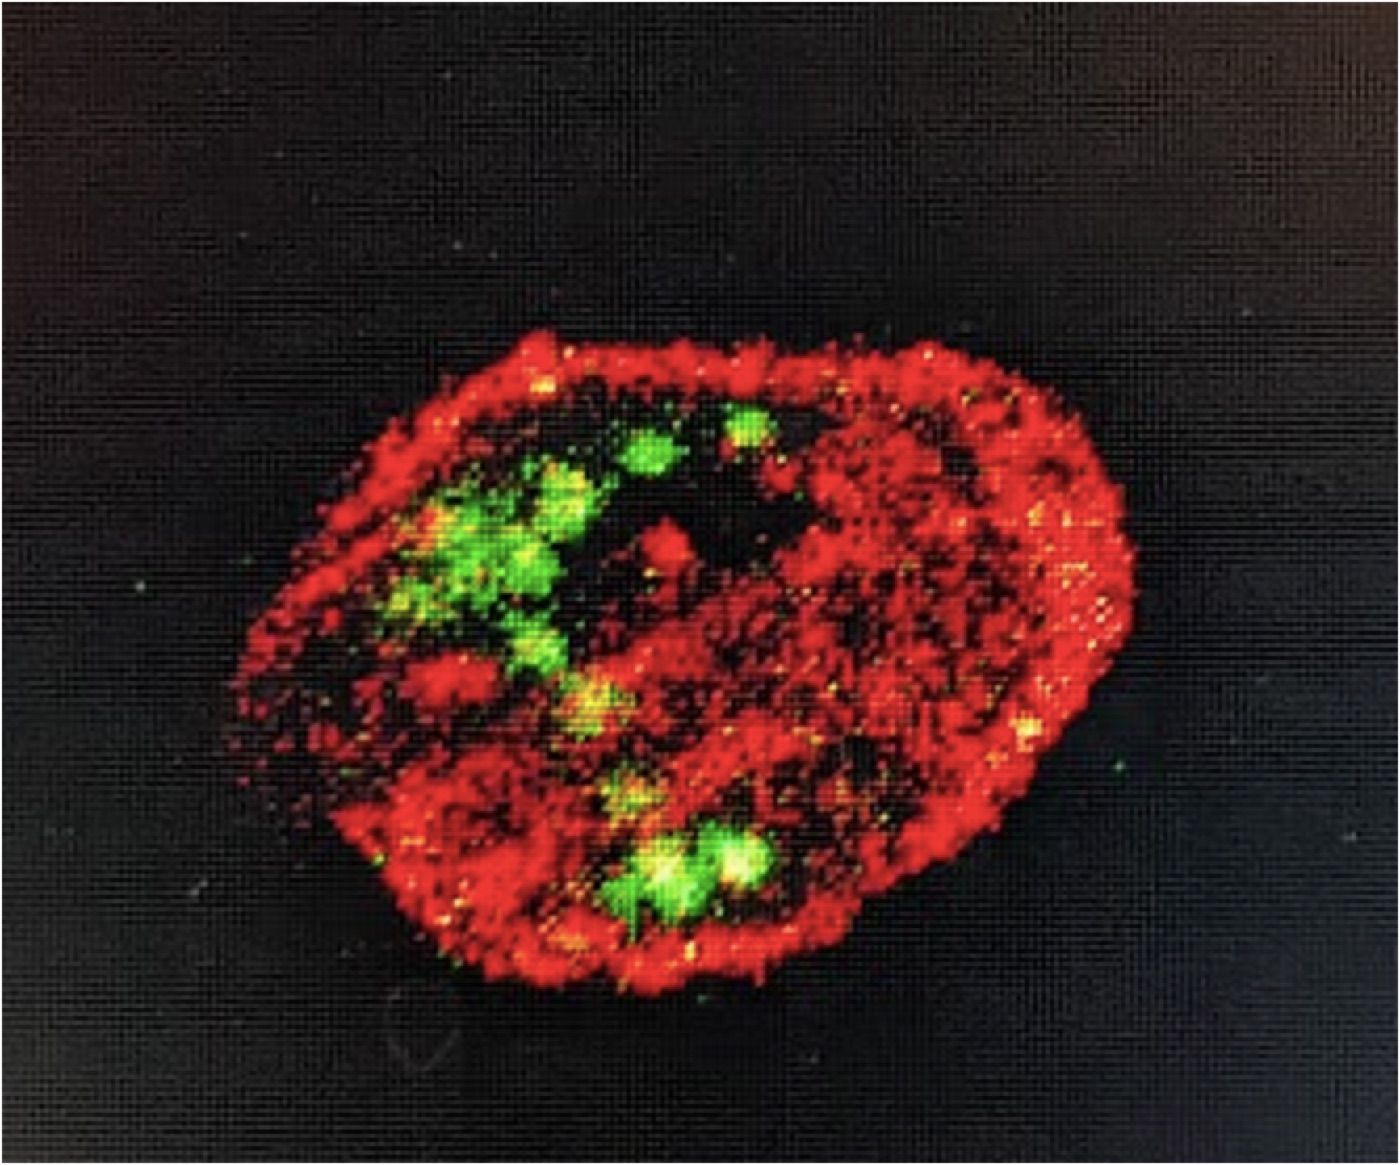
GFP expression upon successful Sp-anpep_1 injection
Available testing constructs
epGFPII backbone with:
- ECM3 promoter region, 1,700 bp upstream of the TSS
- ECM3 promoter region also with UTR
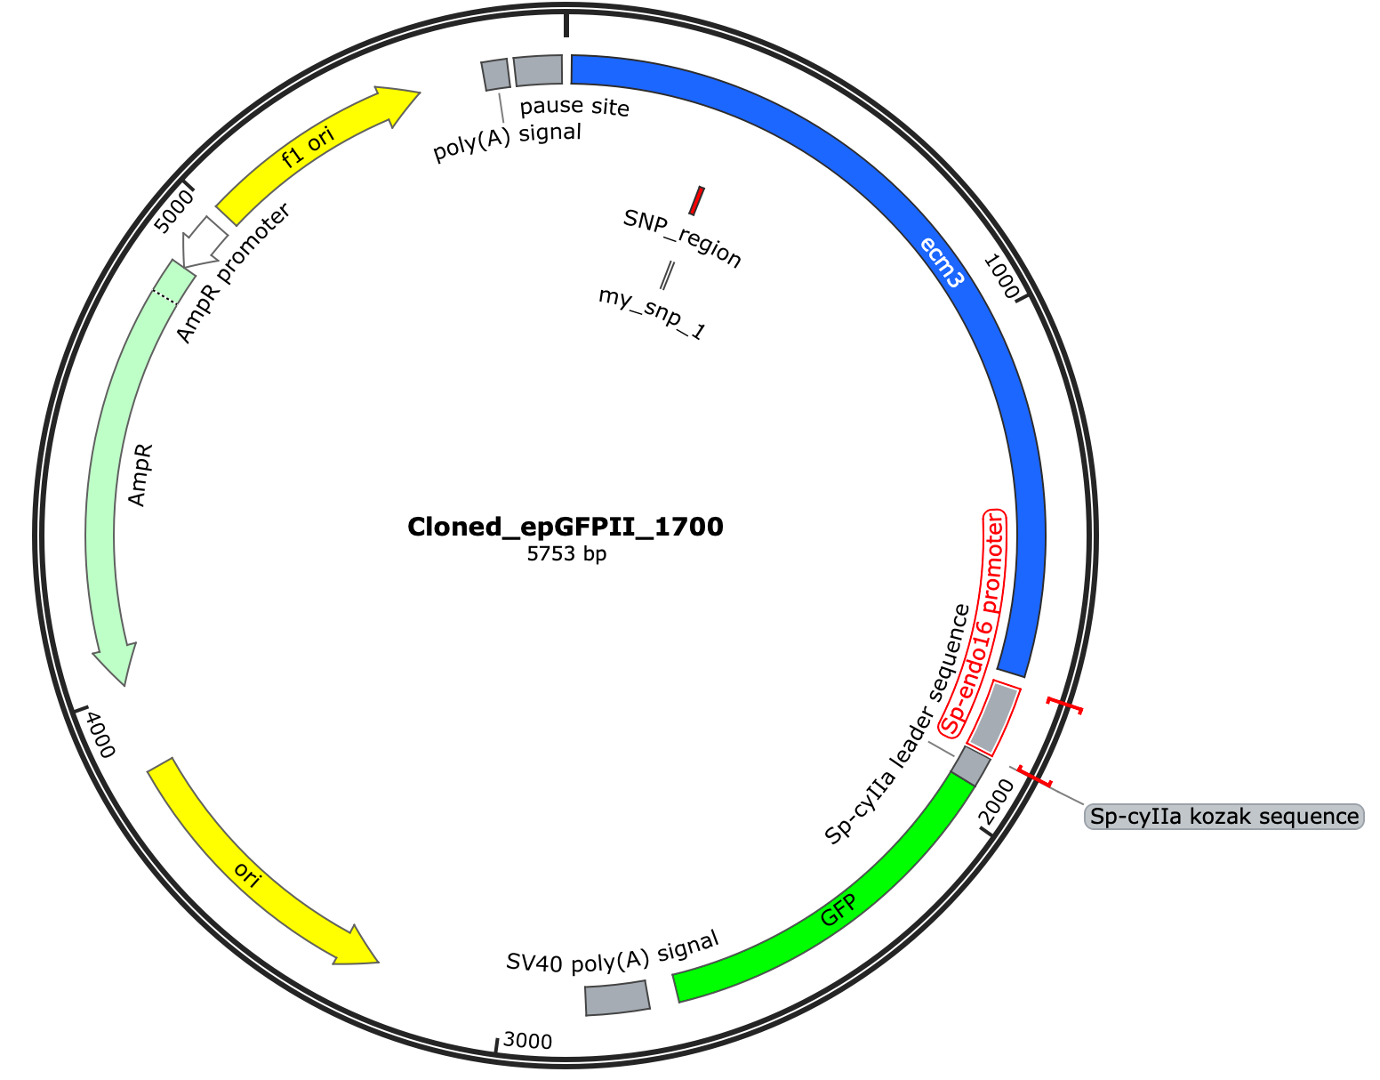
Construct with ECM3 promoter
Construction of constructs
- Order (or PCR amplify) the promoter region
- Insert into a temporary vector for an infinite supply
- Digest the temporary vector, extract the target DNA sequence
- Digest the target vector
- Ligate the ends
- Bacterial transformation
Collecting eggs and sperm
Ingredients
- Syringe and 0.5 M KCl
- 1.5 ml tubes
- Tips and pipettes
- Beakers
- 80 µm nylon filter mesh
- Ice bucket with ice
- Prepare a beaker (1000 ml) with sea water (12 °C, RO + Instant Ocean salt). Check for correct salinity (~33‰)! Adjust salinity if needed.
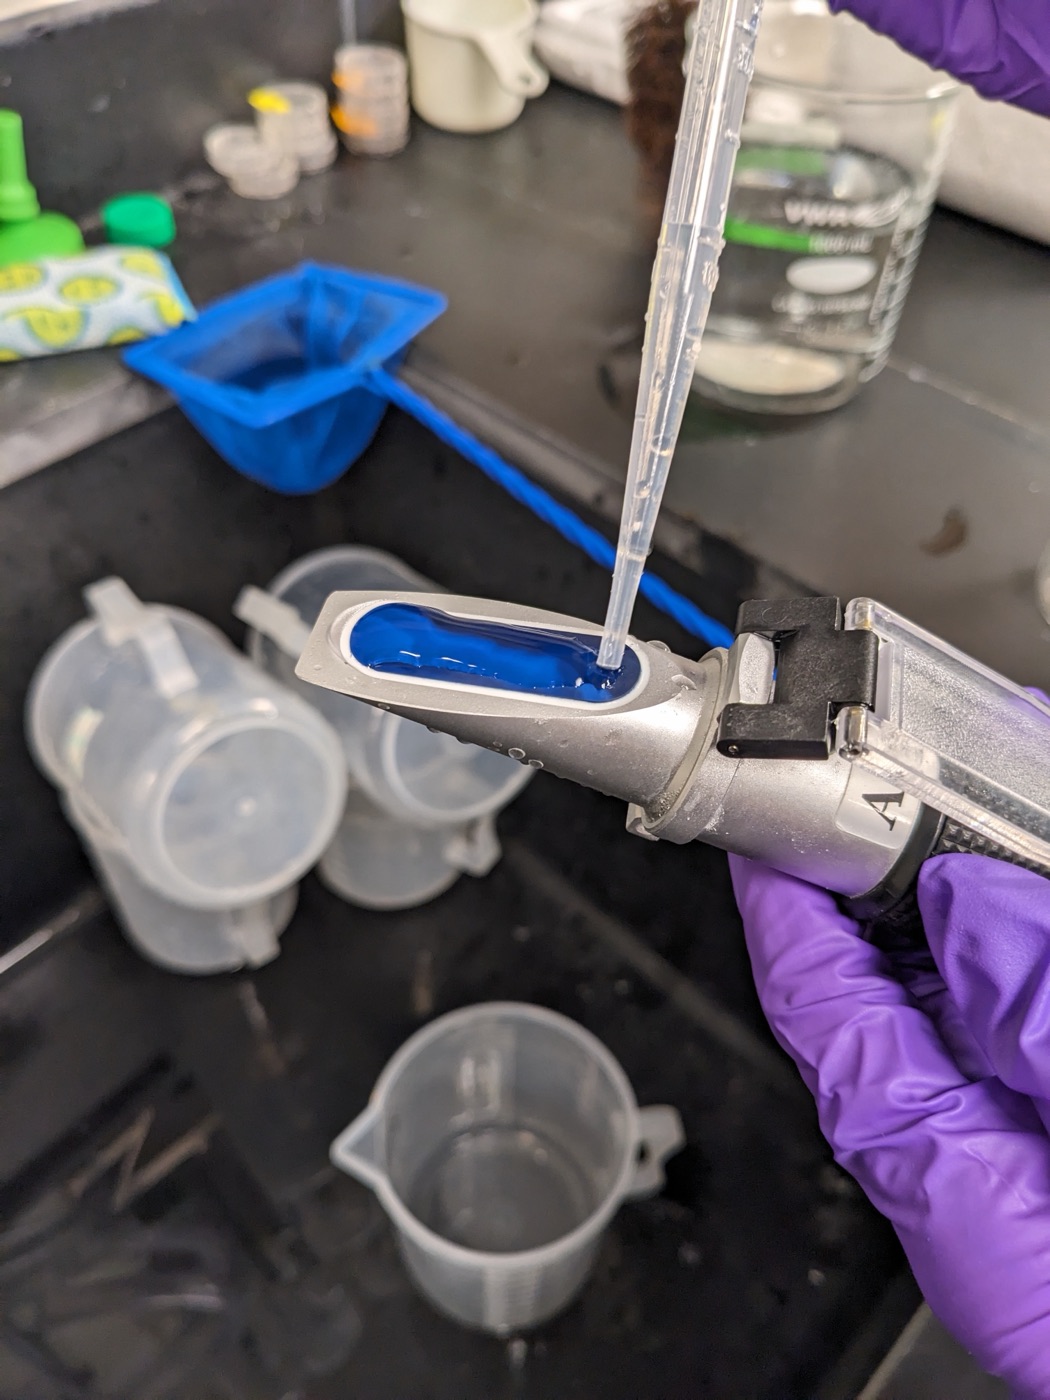
Using the salinity refractometer
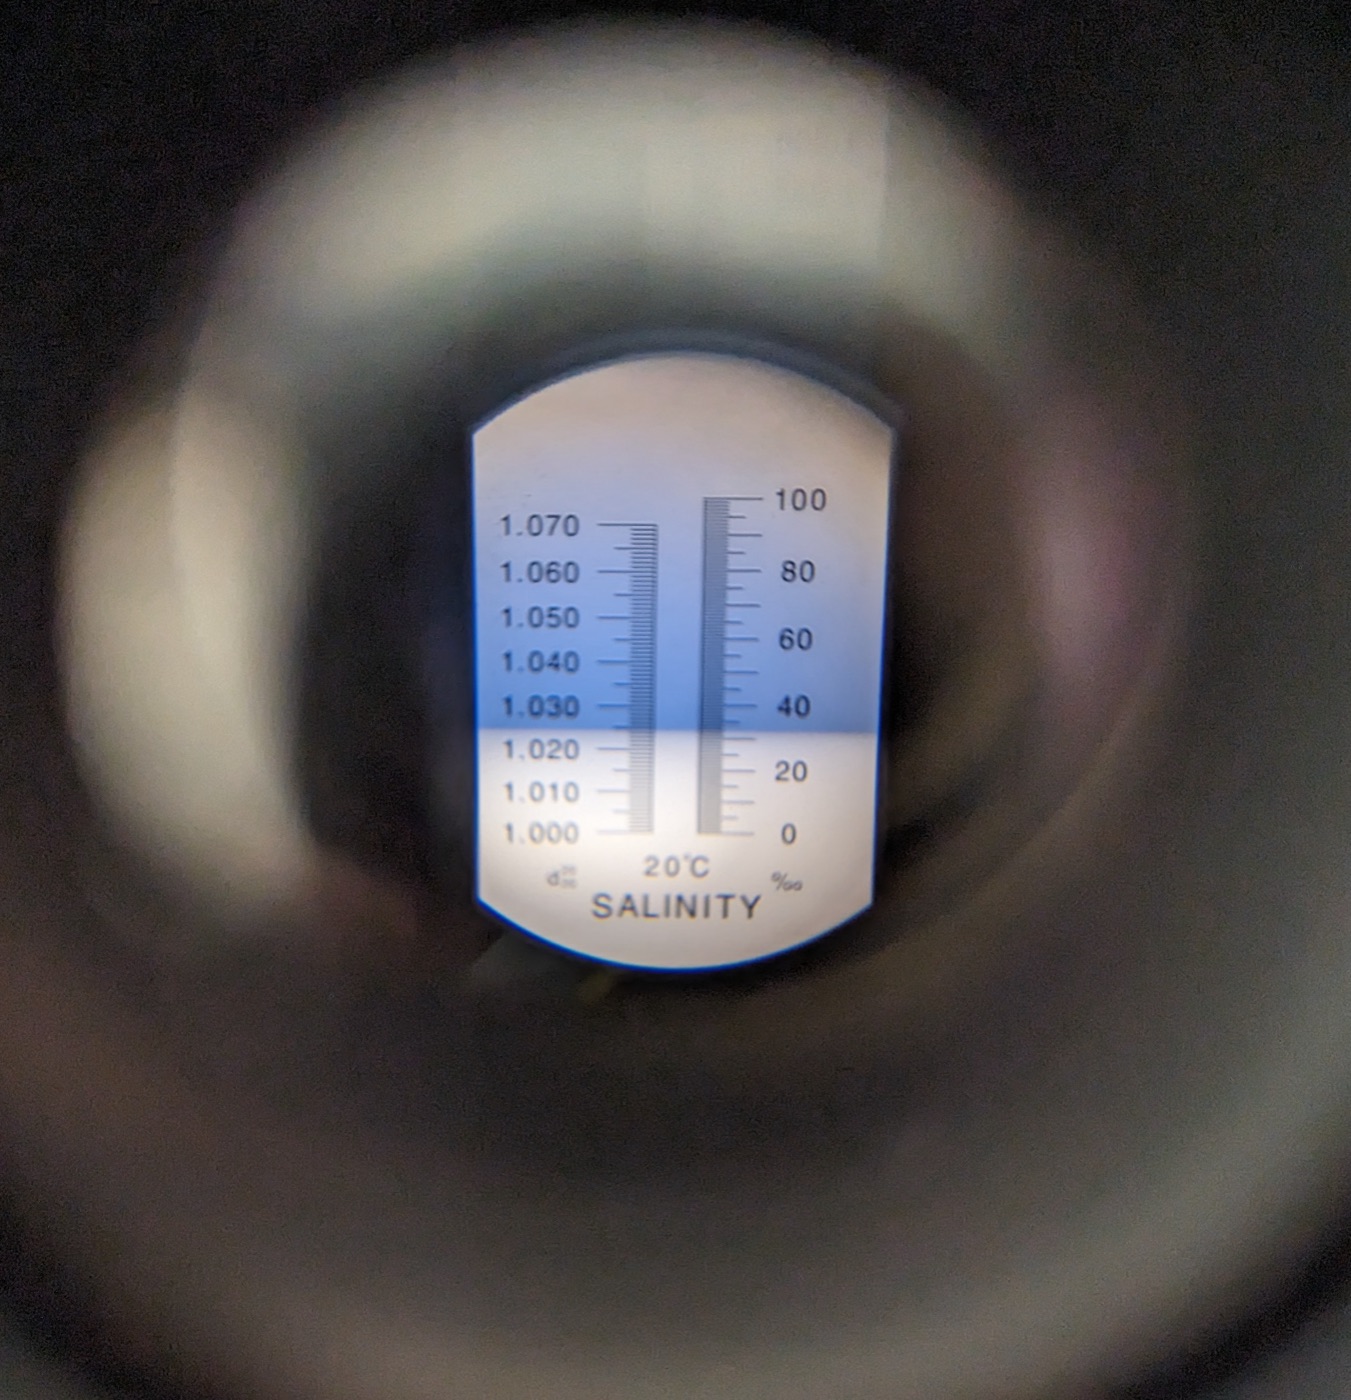
How to read the salinity measurement, which should be 33‰ like on the picture
- Fill a syringe with 2 ml of 0.5 M KCl solution, twist on the needle.
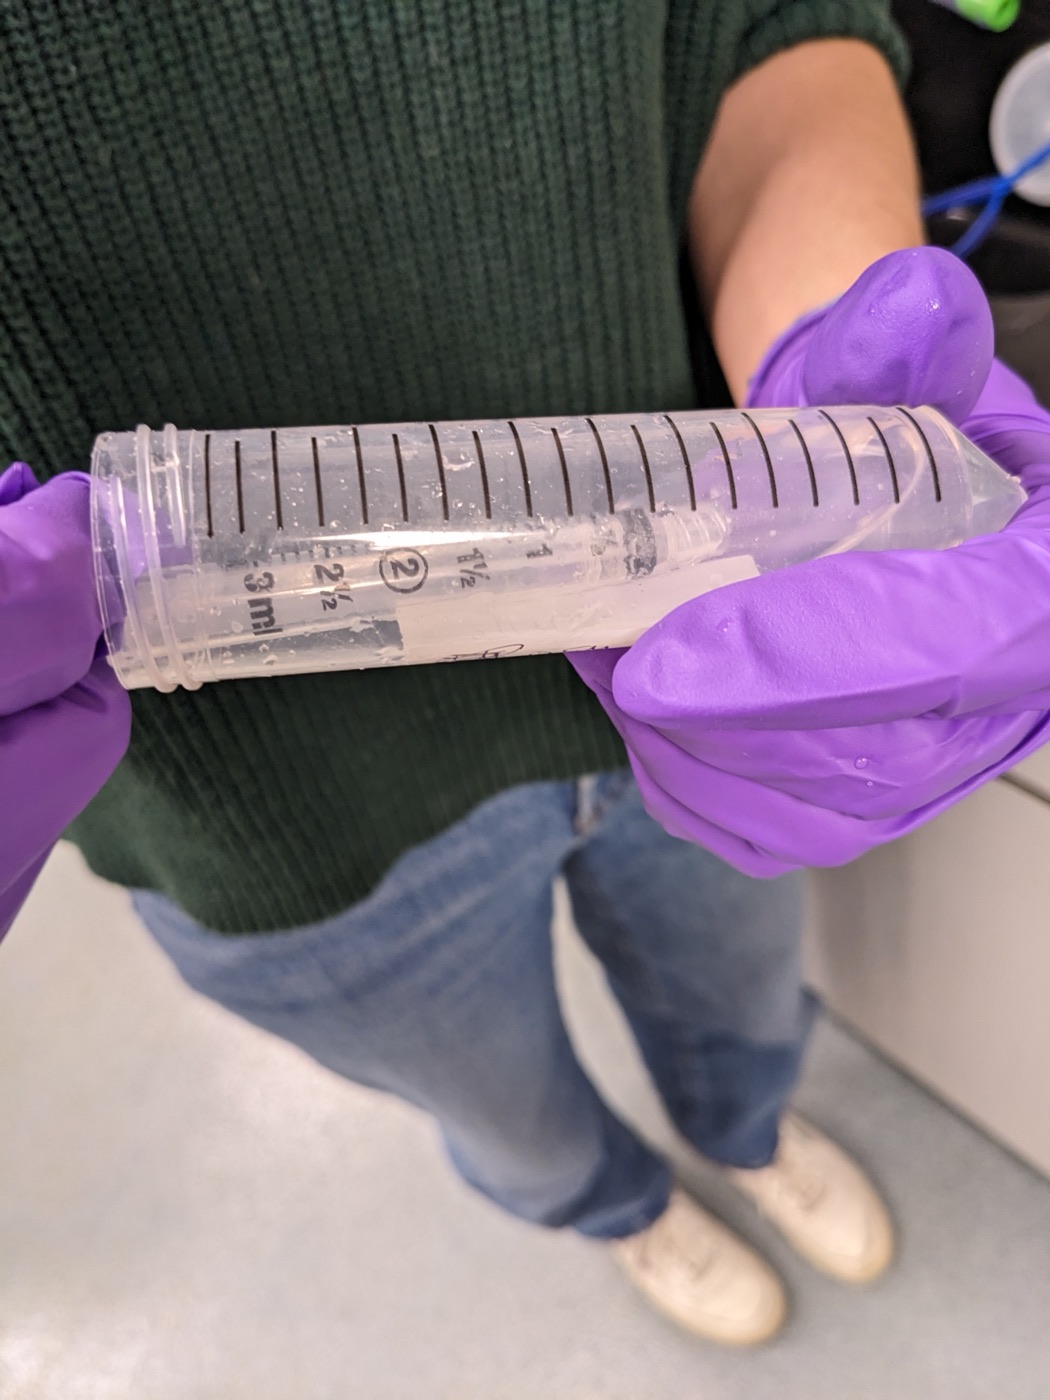
Filling up the syringe
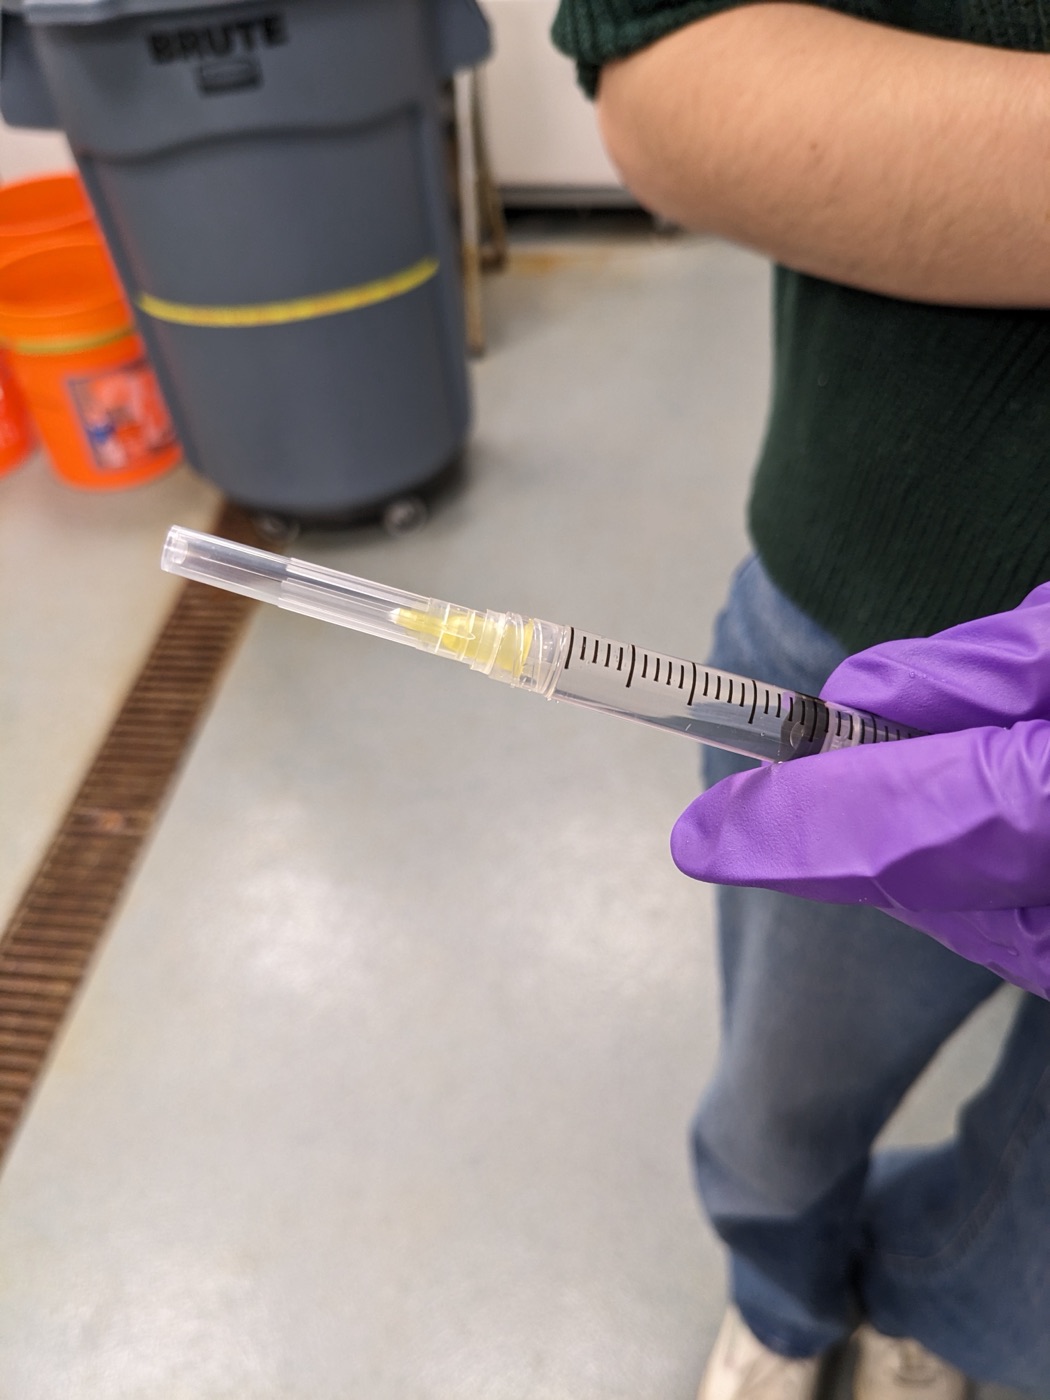
Screwed-on needle
Take a new, clean small beaker and fill it almost to the brim with the sea water from step 1.
Select an urchin and use the net to take it out of the tank.
Hold the urchin upside down in one hand, hold firmly, and shake the urchin confidently.
Shaking an urchin to induce spawning
Place the urchin upside down on the small full beaker. Make sure that the genital pores are submerged in water. Wait 3 to 5 minutes. Check for white substance in the water regularly.
If no spawning is initiated, repeat steps 5 and 6. If you still don’t see any sperm or eggs appear, hold the urchin upside down in one hand and inject ~0.5 ml of KCl solution with the other hand. Make sure that you are injecting into the soft part around the mouth, at roughly 3 separate spots. Shake gently.
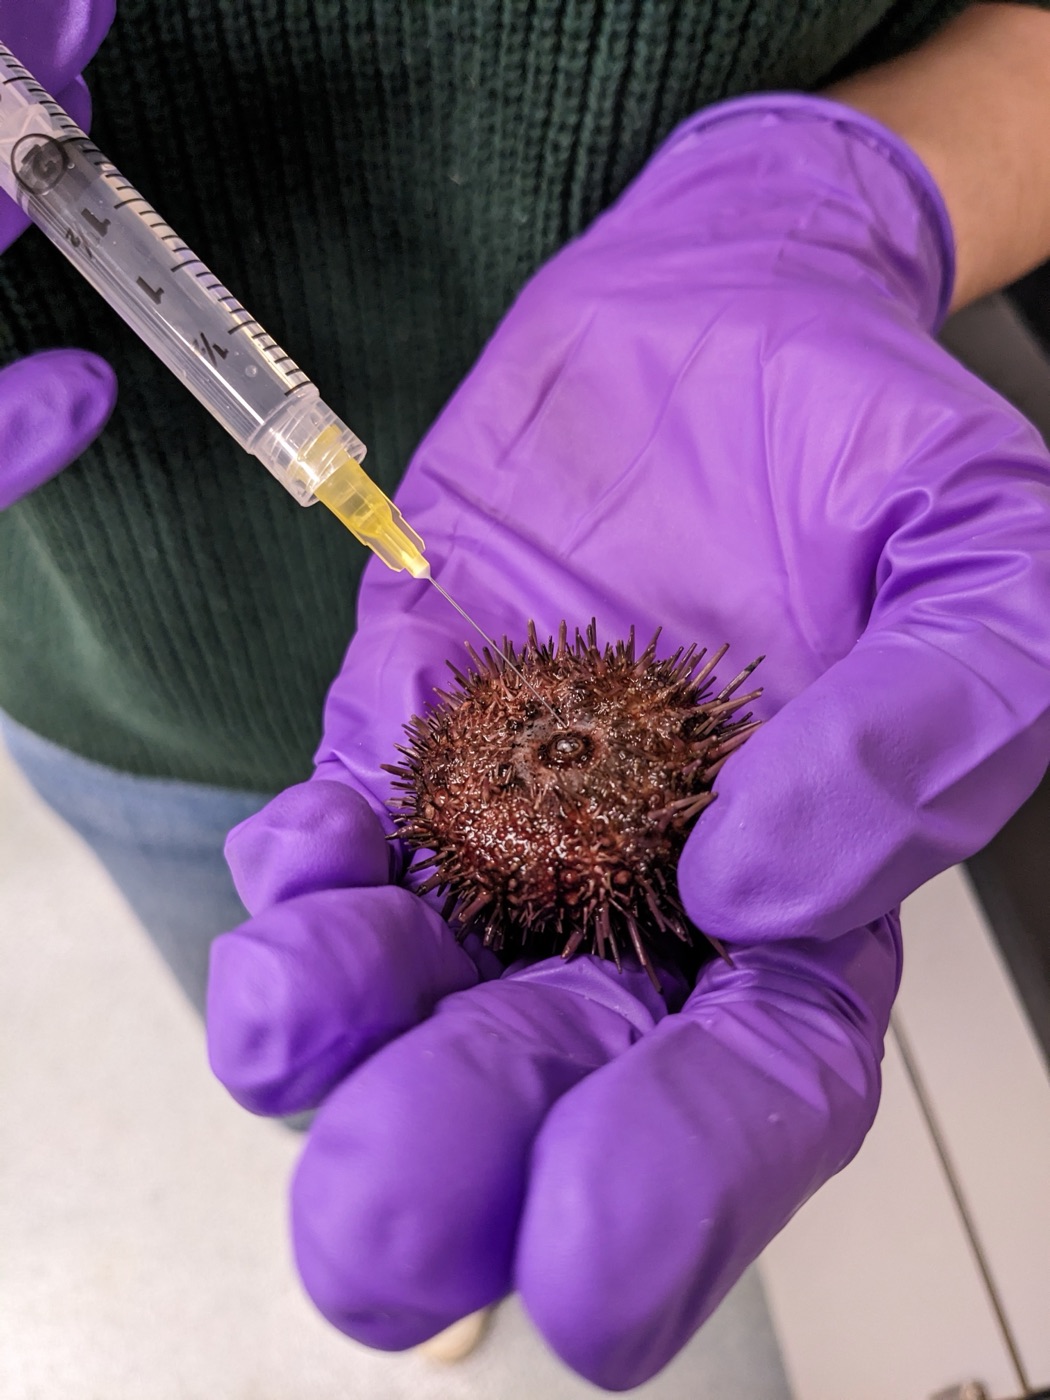
Injecting an urchin with KCl
Repeat step 6. Continue to shake gently or inject more KCl if no spawning is initiated. White substance should be slowly dropping in the water.
If the white substance looks like white paint mixed in water, lift the urchin, shake gently to remove excess water, and use a 10 µl pipette to pipette the sperm into a 1.5 ml tube. Collect as much as possible (a small amount should be enough in most cases). Try NOT to mix the sperm with sea water.
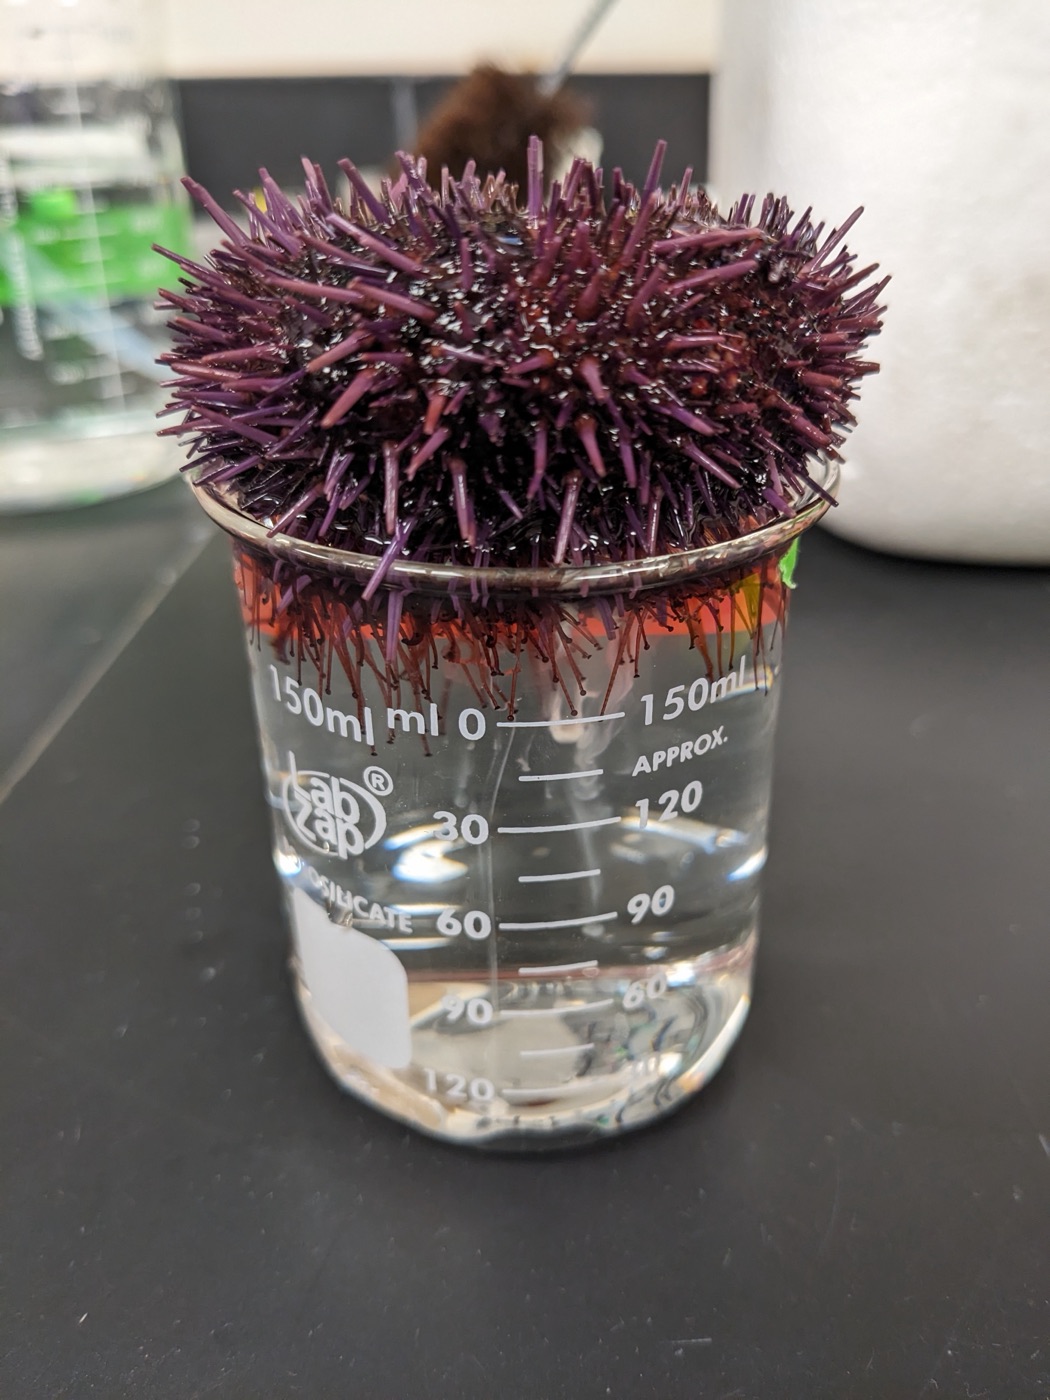
Spawning male urchin
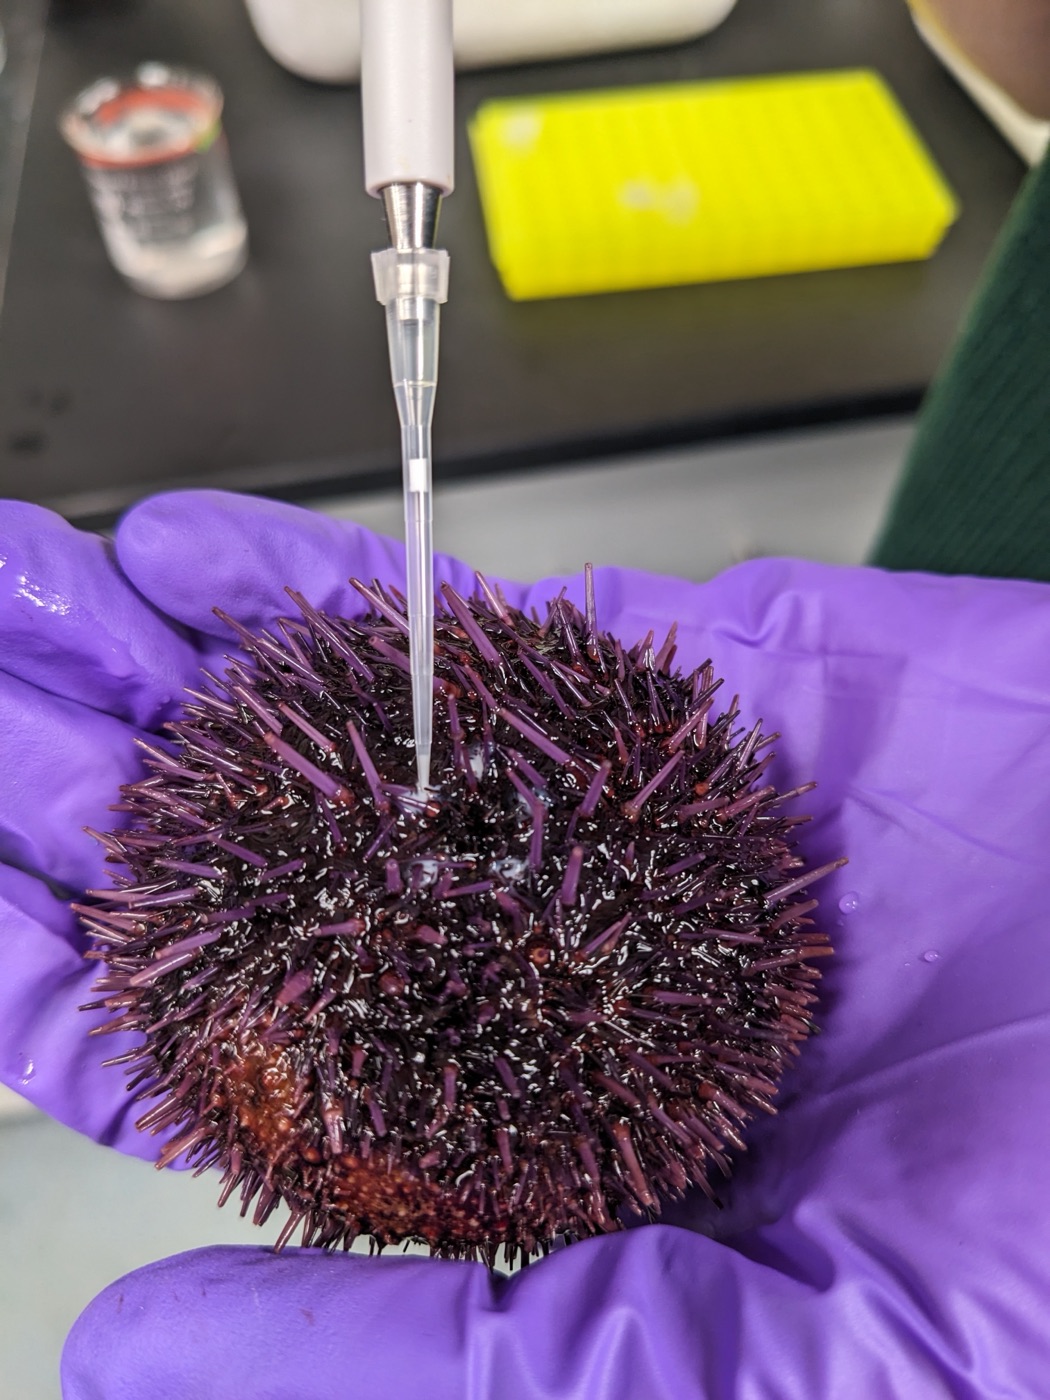
Dry collection of sperm
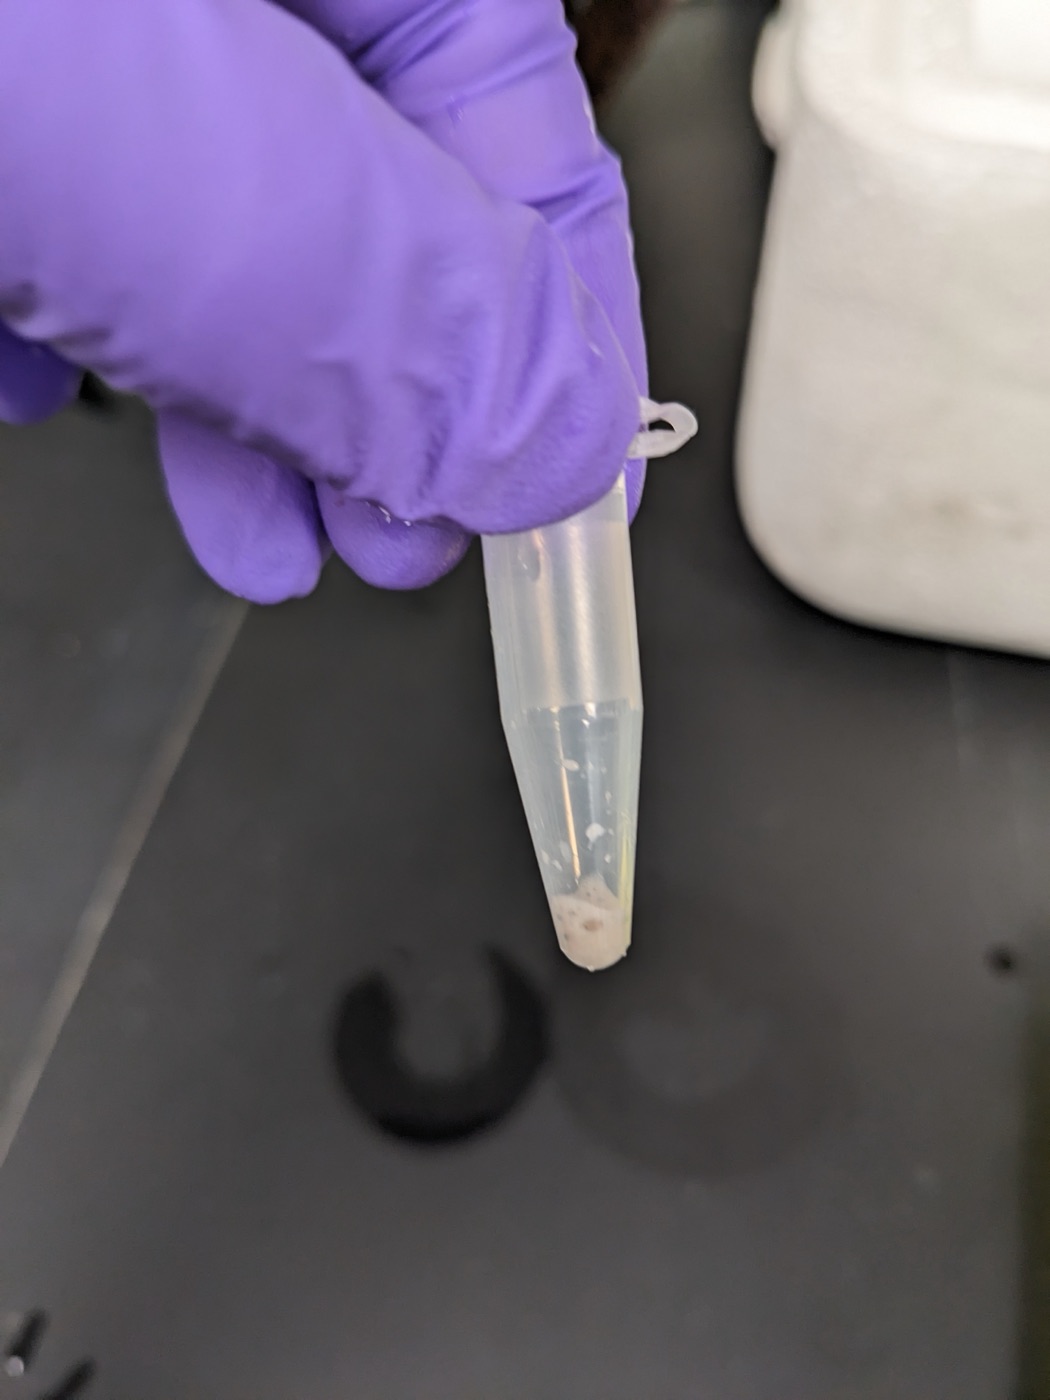
Good amount of collected sperm
- If a yellowish substance is visible in “droplets”, leave the urchin as it is, submerged upside down on the small beaker. Eggs will collect on the bottom.
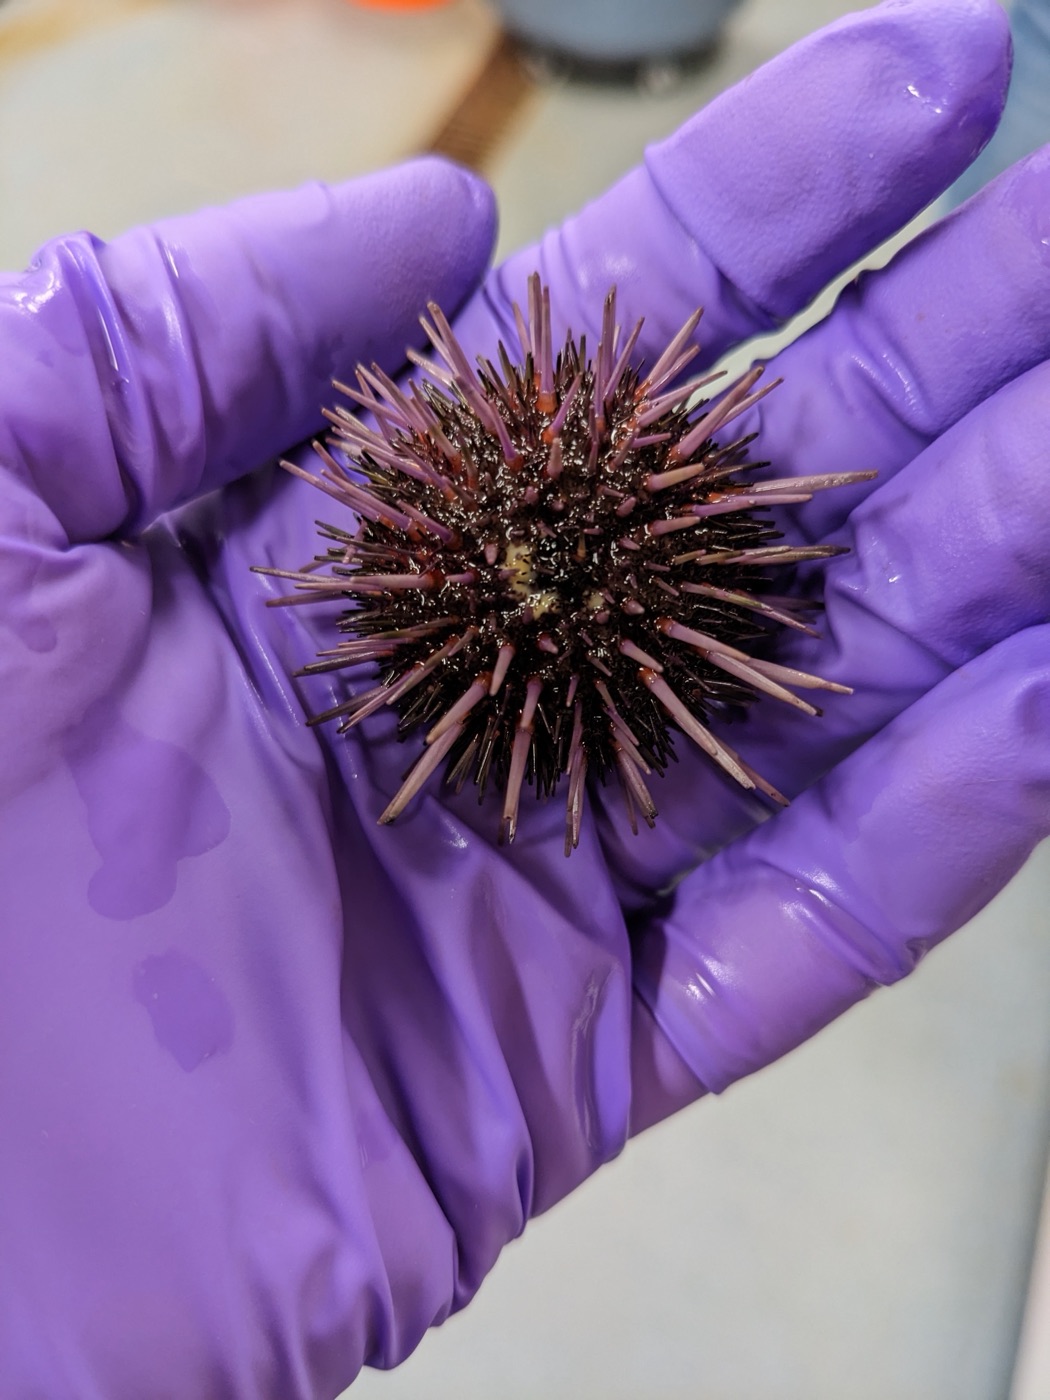
Spawning female urchin
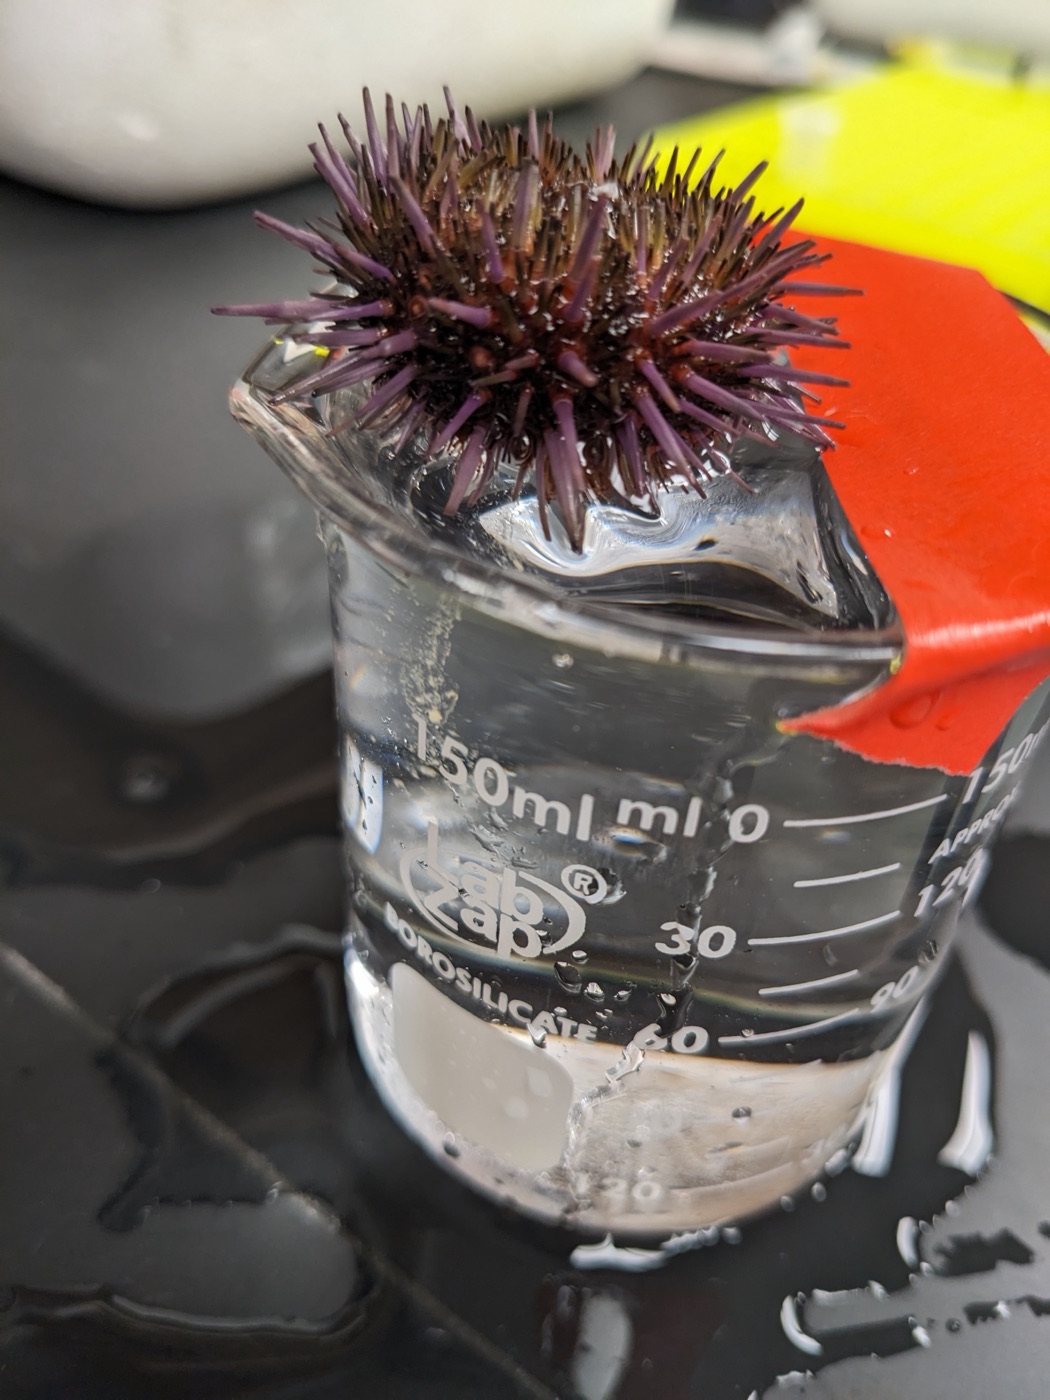
Eggs being collected
After enough eggs or sperm have been collected, place the urchin back into the tank it came from.
Place the sperm and eggs on ice. Note the time (hour and minutes) in the lab book. Label both eggs and sperm.
Filter the eggs from debris such as animal spines using the 80 µm nylon filter mesh. The best results are achieved if the eggs are used within 5 to 7 hours after spawning. Keep filtered eggs on ice.
NOTE: Use a 3 ml transfer pipette to pipette up and down near the eggs to stir them up before pouring them through the filter! This is to avoid missing eggs that get stuck to the bottom.
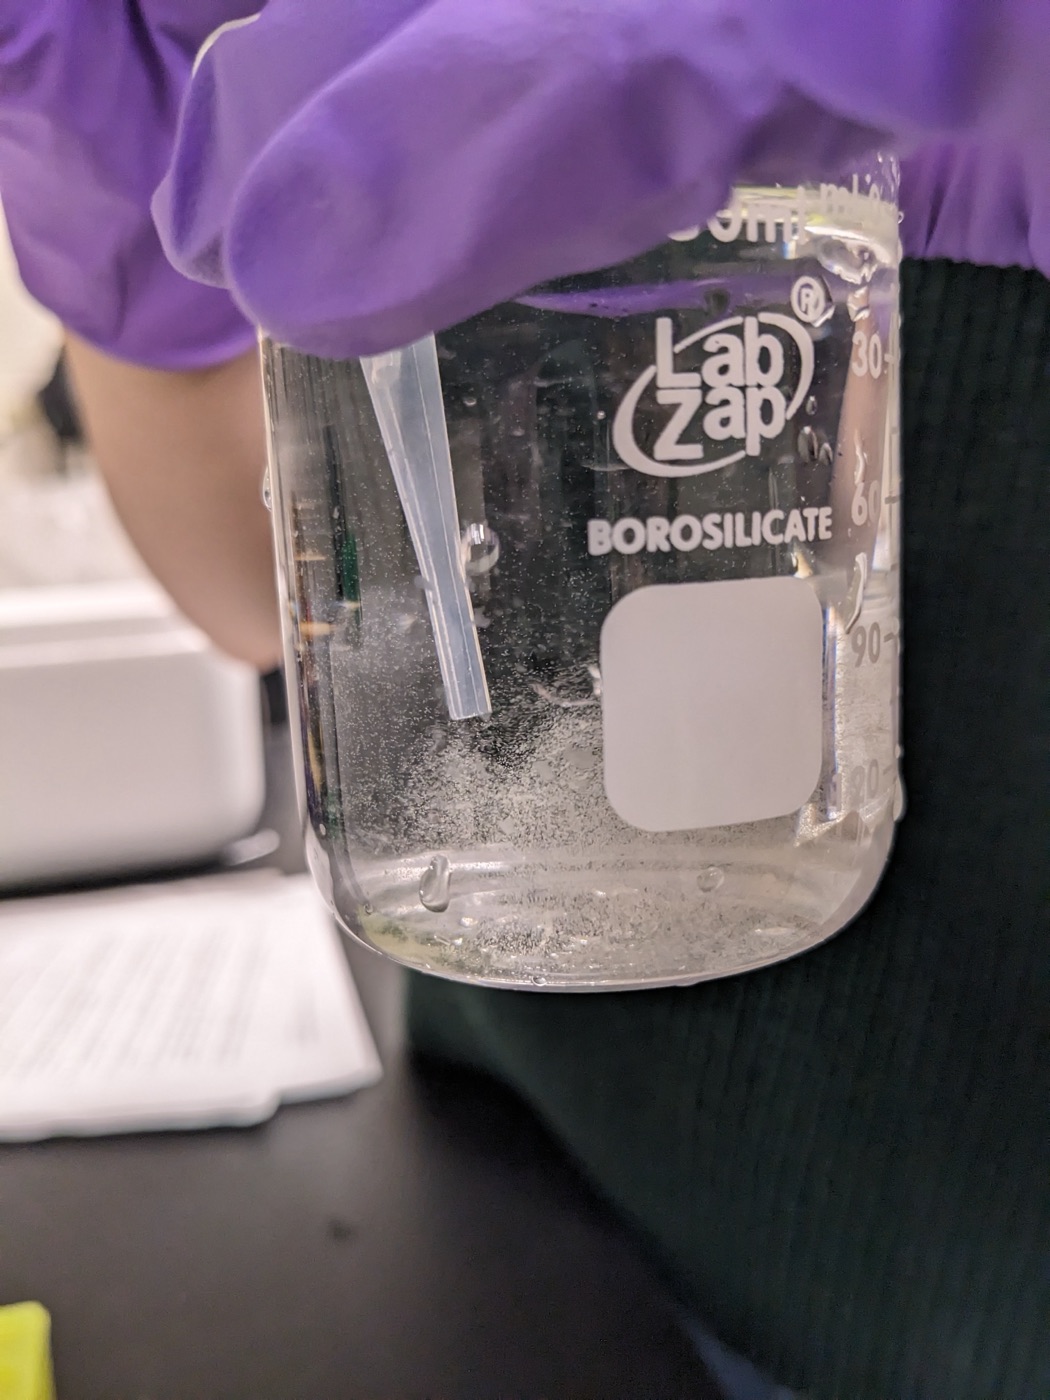
Stir the eggs with a transfer pipette
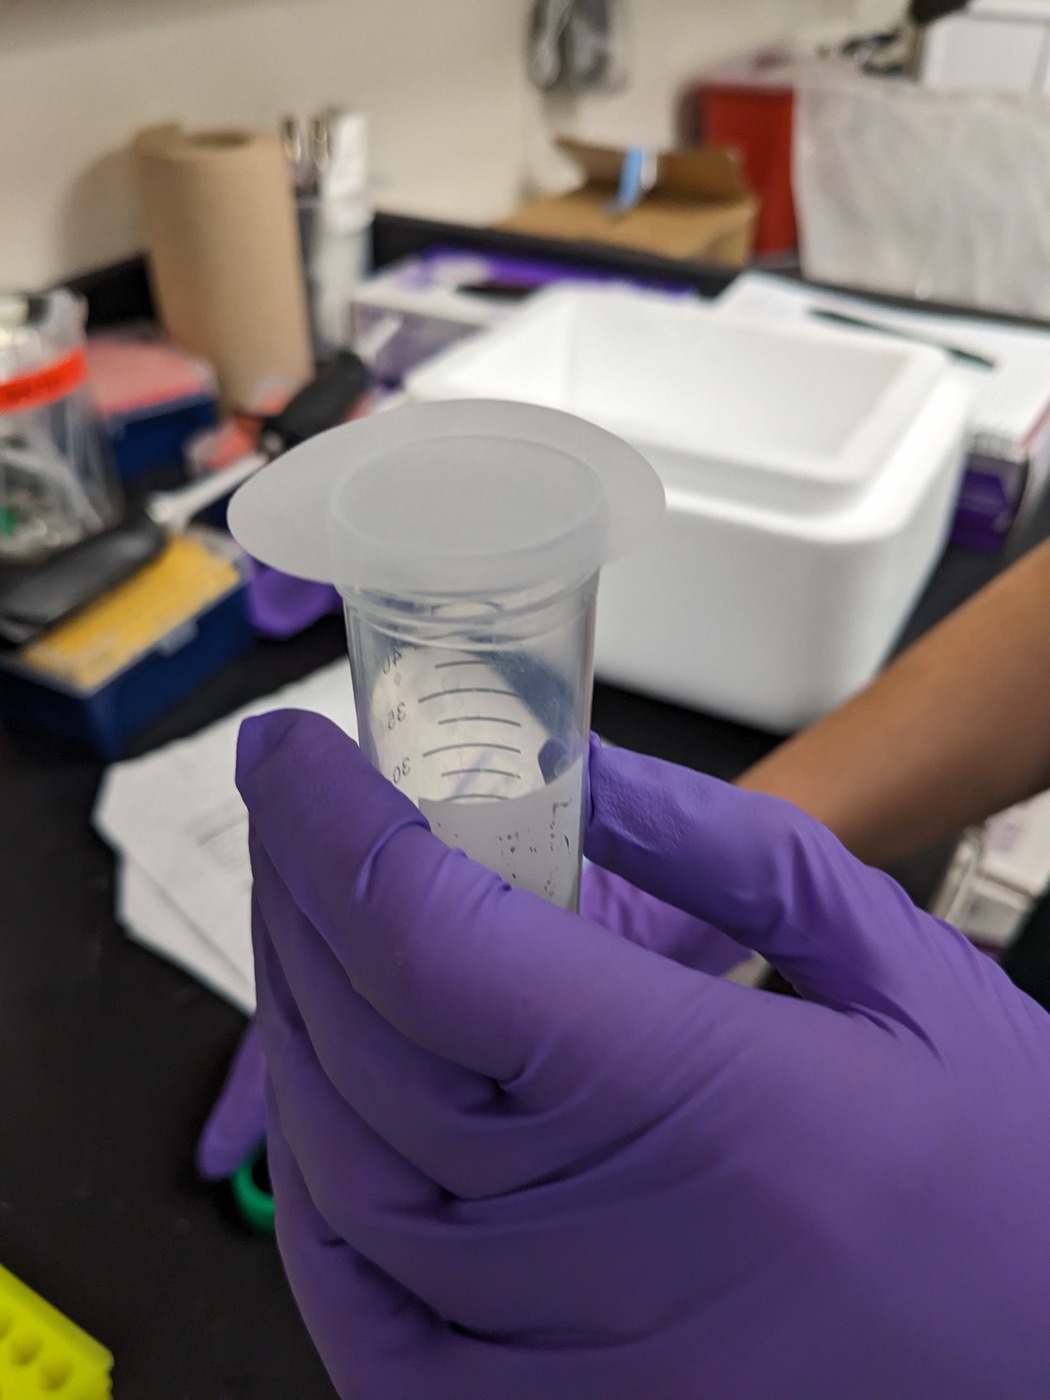
Setting up the filter mesh, step 1
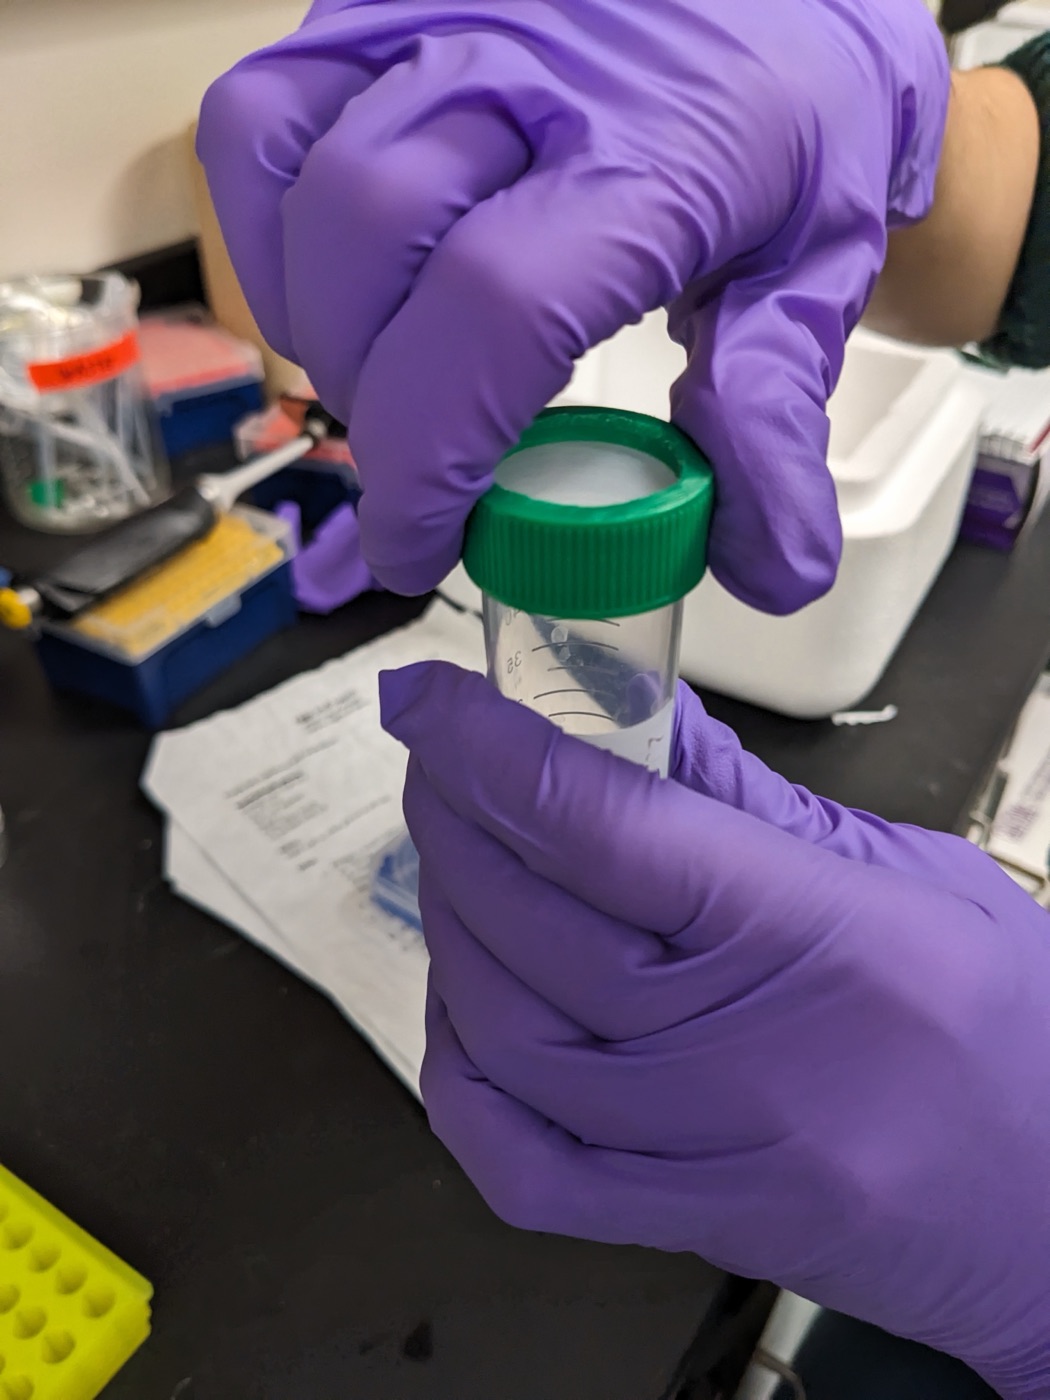
Setting up the filter mesh, step 2
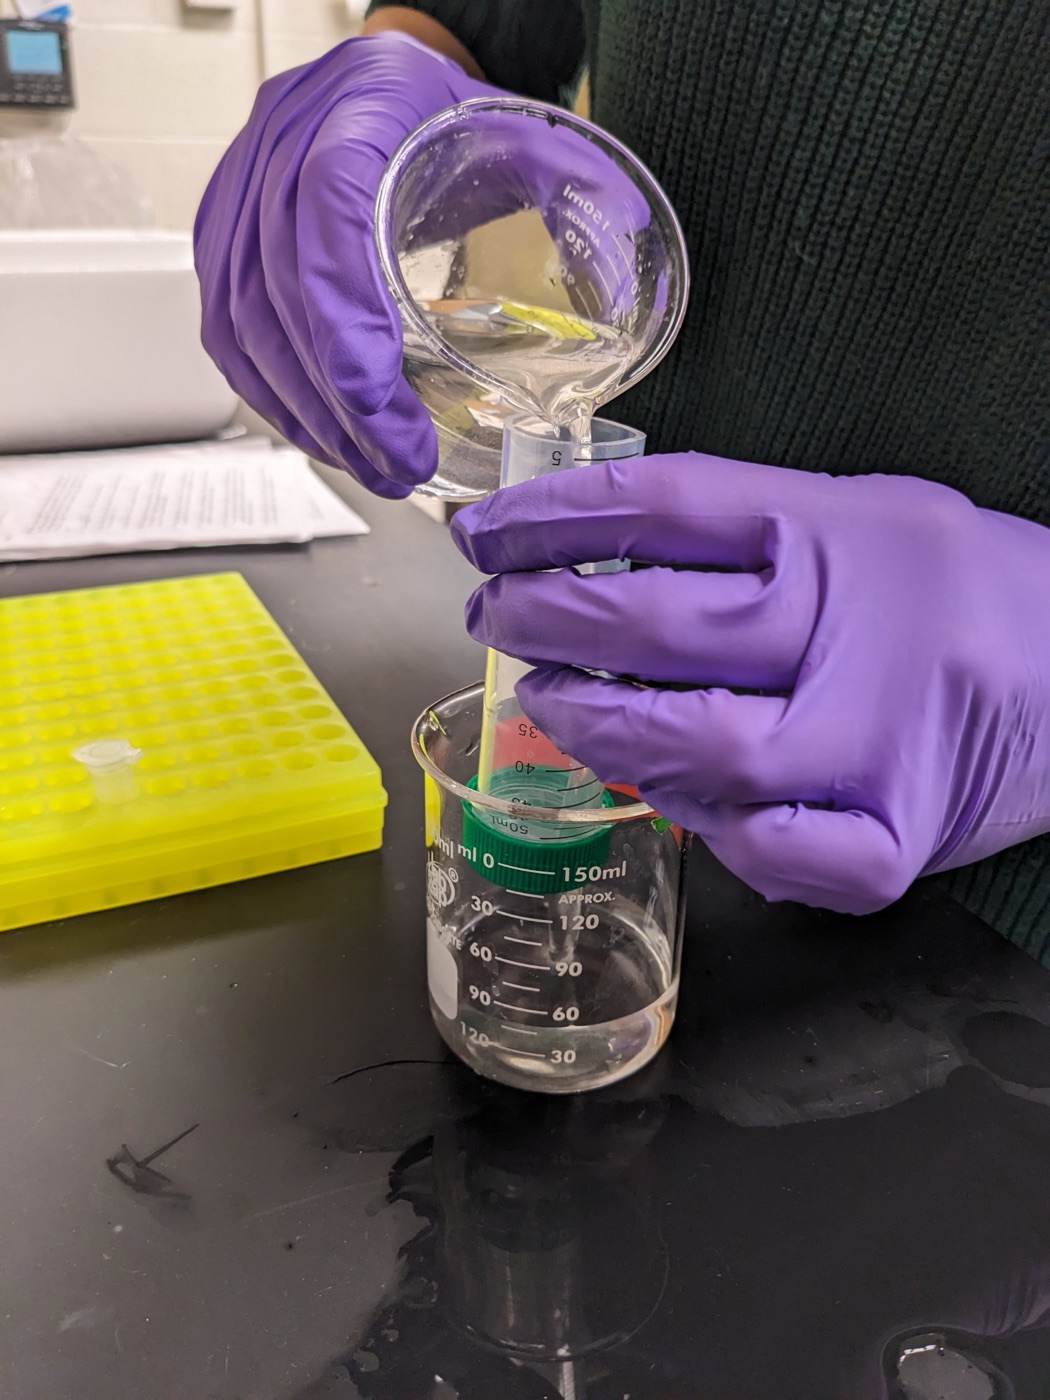
Eggs being filtered
- Dejelly the eggs by pouring them through the 80 µm mesh 3 times from 3 cm above the tube opening. Too far up and the eggs will break. Too close and they won’t be dejellied and will move around in the petri dish during the microinjections. Note: do this shortly before microinjection.
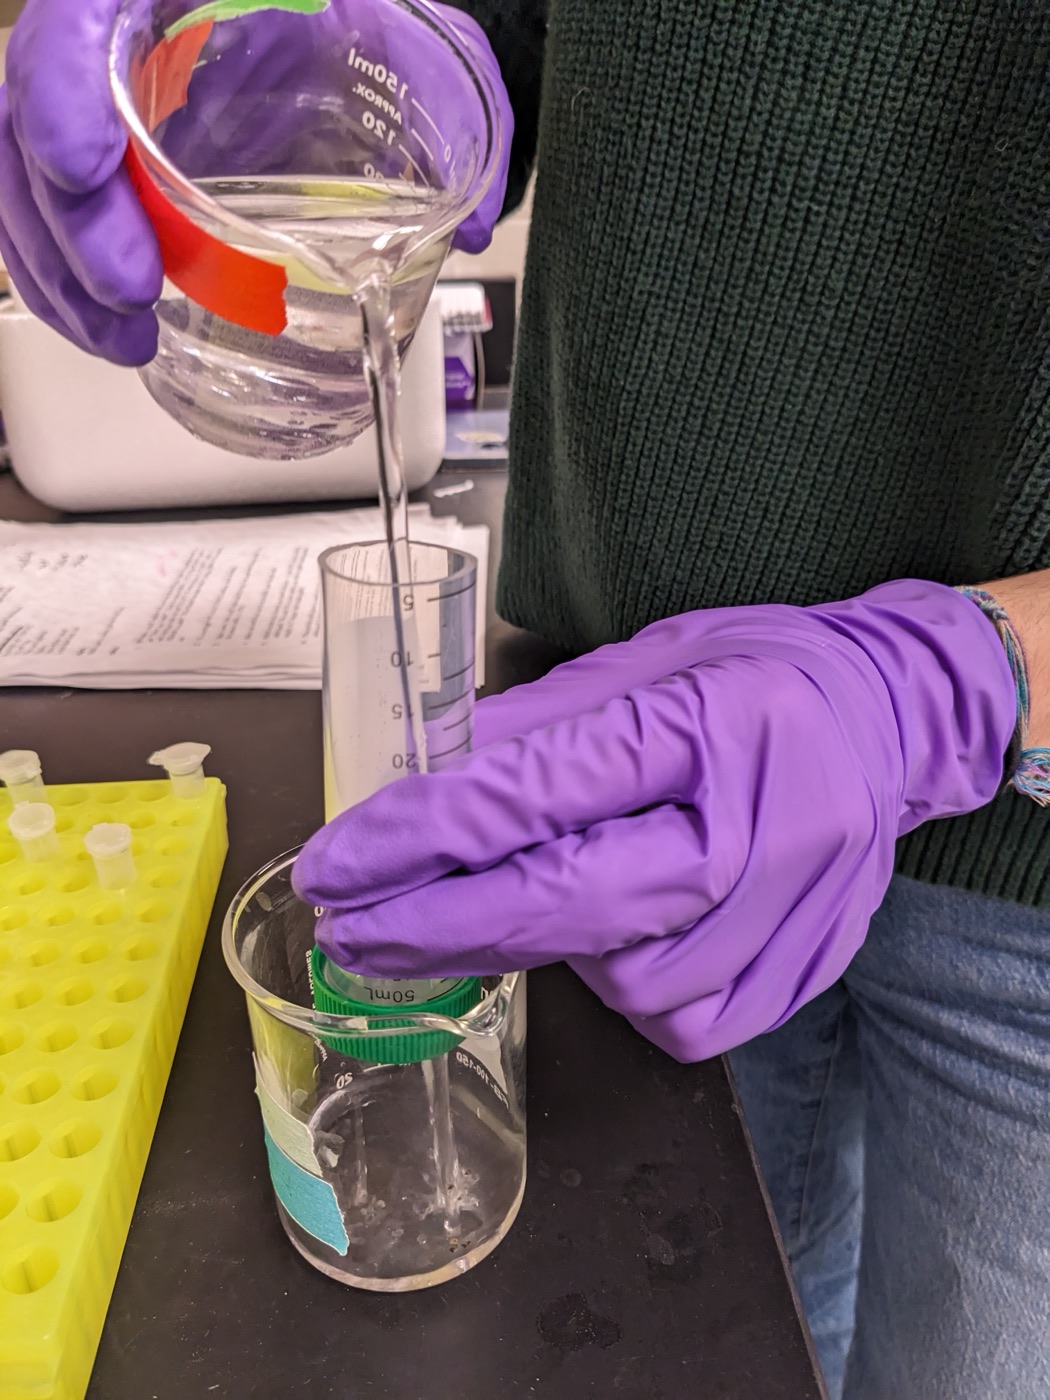
Dejellying by pouring the eggs over the mesh from ~3 cm
- Sperm can be stored in a 4 °C fridge for a few days. Eggs can be stored in a 4 °C fridge for 24 hours with the addition of antibiotics (50 µl of 10 mg/ml ampicillin to 10 ml of sea water with eggs).
Microinjections
Ingredients
- 3-AT sea water
- PS-coated petri dish
- Pipette and tips
- Dejellied eggs
- Sperm
- Microinjection needle
- Injection solution
Preparation of injection solution and needle
Prepare the following injection solution, preferably the same day it is going to be used.
| Ingredient | Final quantity in 20 µl | Volume to be added |
|---|---|---|
| Linearised construct | 100 ng | Depends on construct concentration |
| gDNA | 500 ng | Depends on construct concentration |
| KCl (1 M) | 0.12 M | 2.4 µl |
| Glycerol (50%) | 20% | 8 µl |
| Control dye (10%) | 0.25% | 0.5 µl |
| ddH2O | - | To add up to 20 µl |
Linearised construct
gDNA
Control dye
The injection solution should be centrifuged for 15 minutes at max speed immediately before filling the microinjection needle.
Preparation of the needle
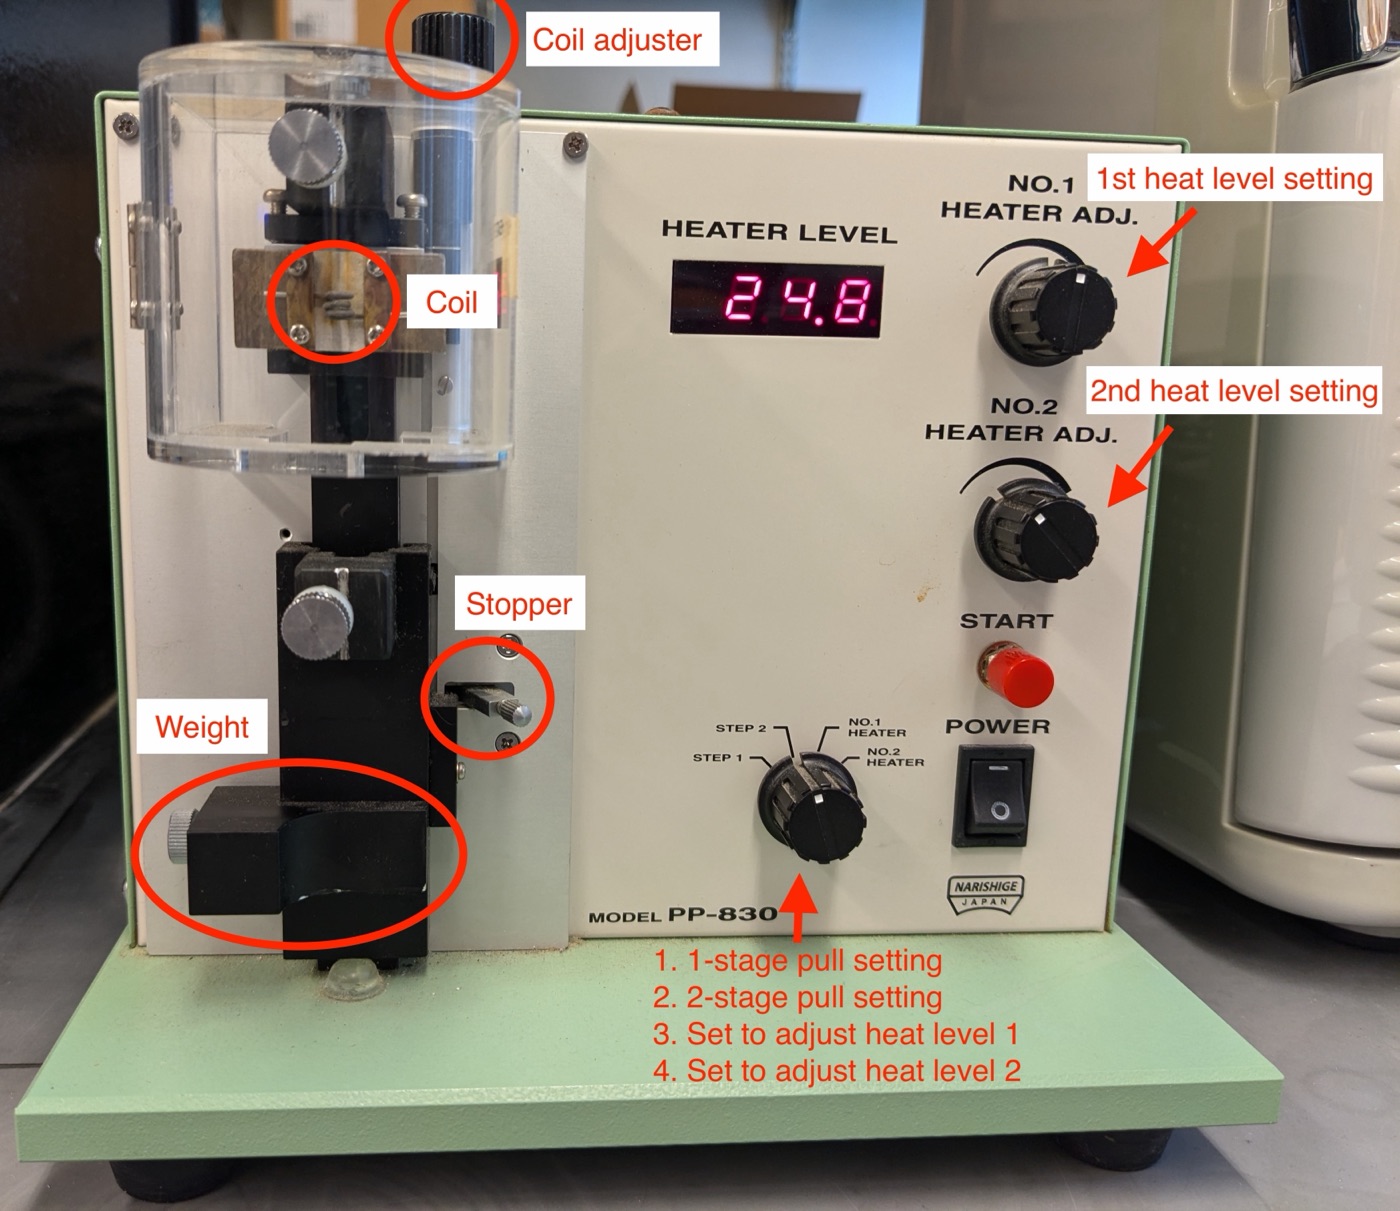
We used a Narishige puller, model PP-830, with Narishige GD-1 glass capillaries with filament and the following settings:
- Two stage: 67.4 °C, 80.2 °C.
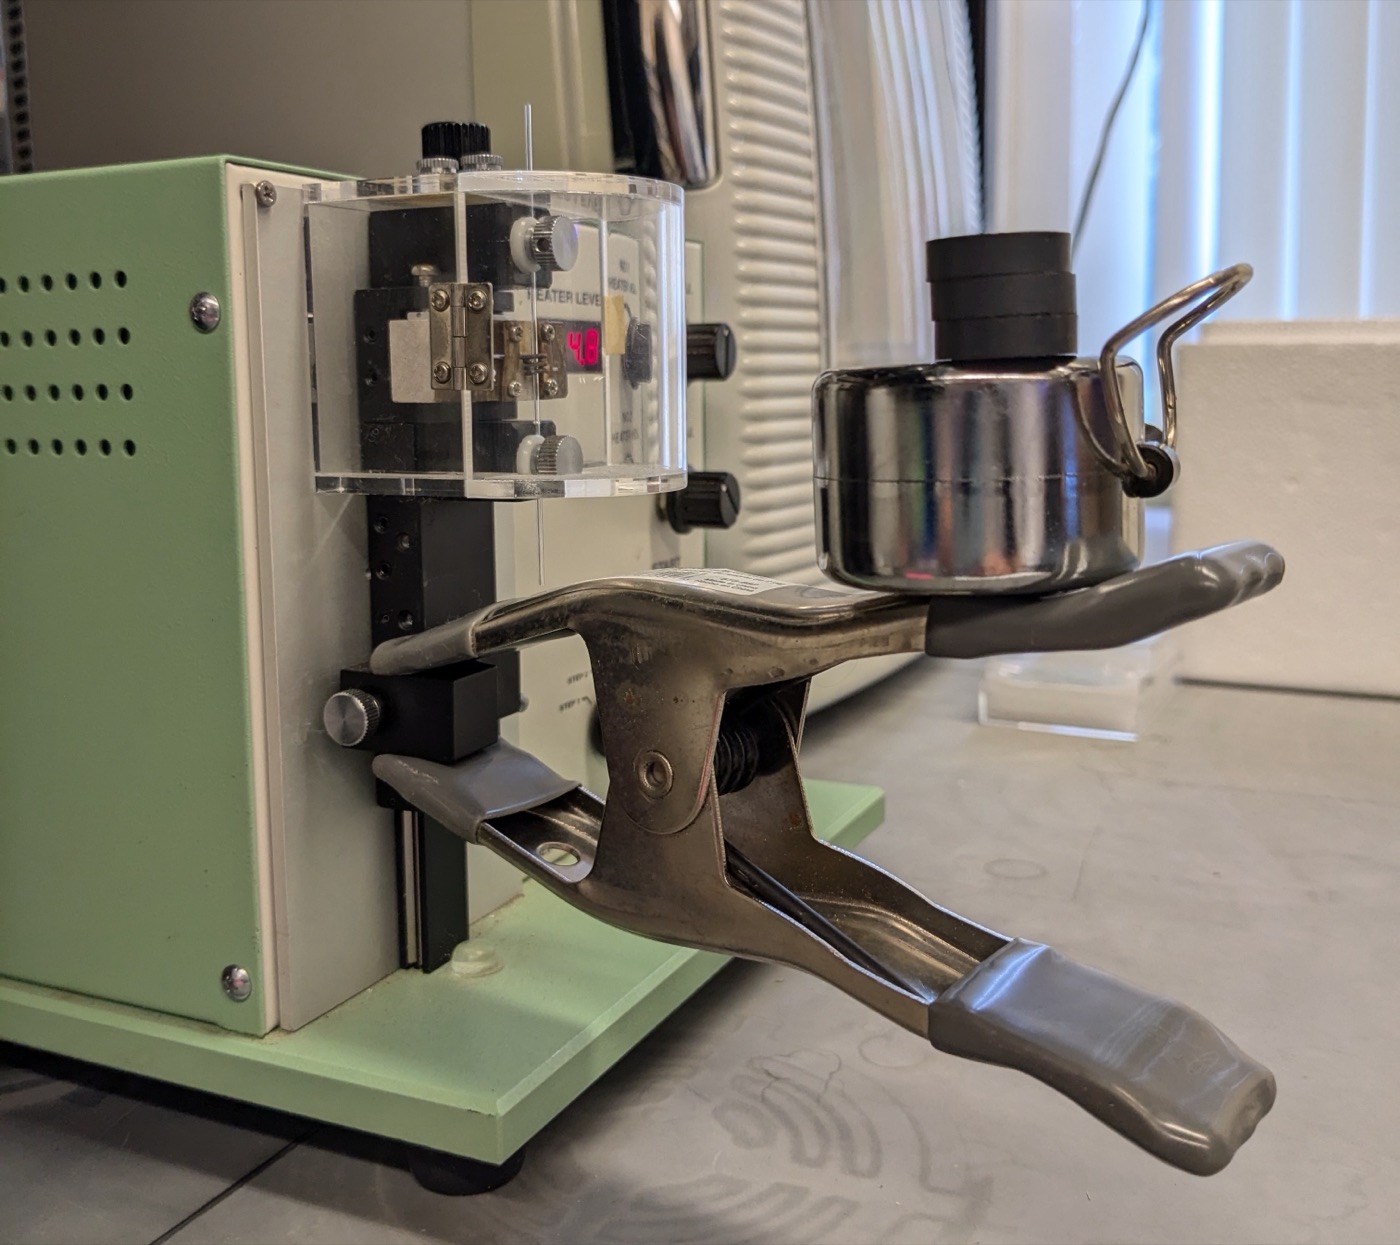
- Weight: 248.01 g.
- Setting of the height on the side, next to the stopper: 6.
Photo
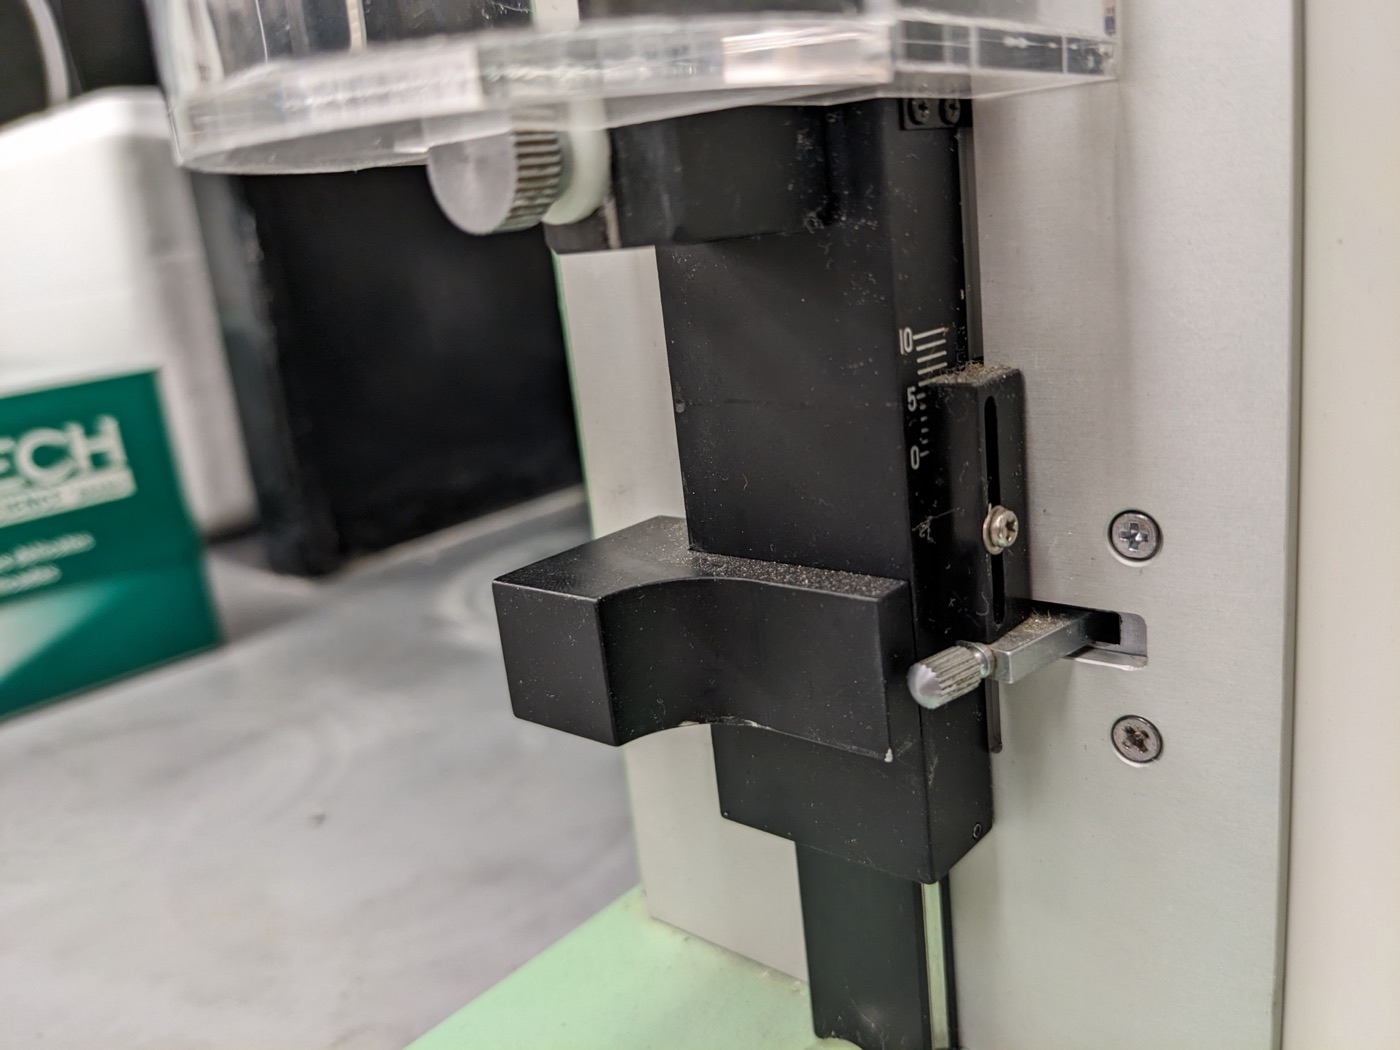
6th grid setting
Needle puller machine
Step 1: Make sure that the coil adjuster is set to the maximum, so the coil is in the uppermost position possible.
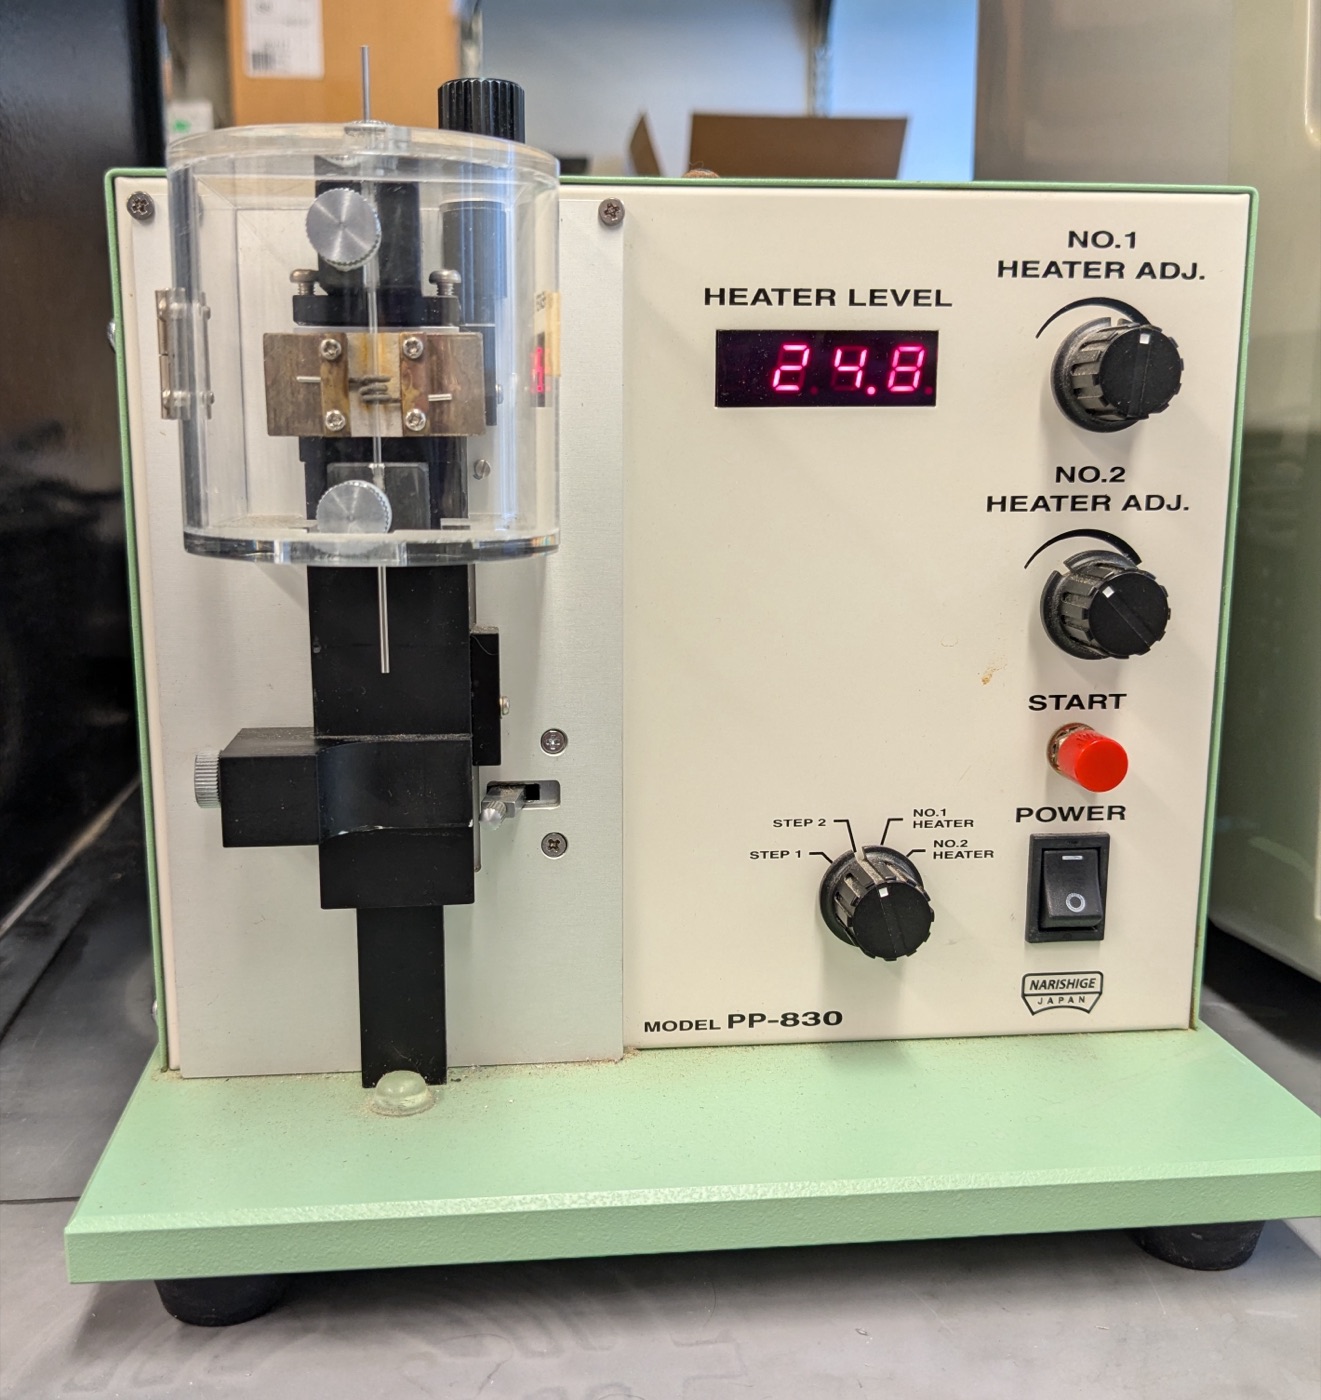
Step 2: Place a glass capillary through the coil and tighten the top screw. Then push up the bottom part with the weight and screw in the bottom screw. For a two-stage pull (used in this protocol), the bottom part of the needle puller with the weight should not be touching the stopper. That is where the apparatus will arrive at the end of the first pull. See the video below.
Step 3: Make sure that the coil is approximately at the middle of the capillary. This is important to end up with equal-length needles. Adjust the capillary position if needed. Do not adjust the position of the coil. Set-up at the end of this step:
Correct capillary position
Step 4: Add the correct amount of weight to the bottom of the puller, 248.01 g in this protocol. We used the items below to achieve this weight.
Puller weights on the machine
Step 5: Push the red start button. The coil will heat up and the bottom of the puller will slowly drop onto the stopper. At this point, adjust the coil to be in the thinnest (melted) part of the capillary. This has to be precise! Remove the stopper and press the red start button again. The bottom of the puller will drop to the bottom and you’ll end up with two needles.
Using the needle puller
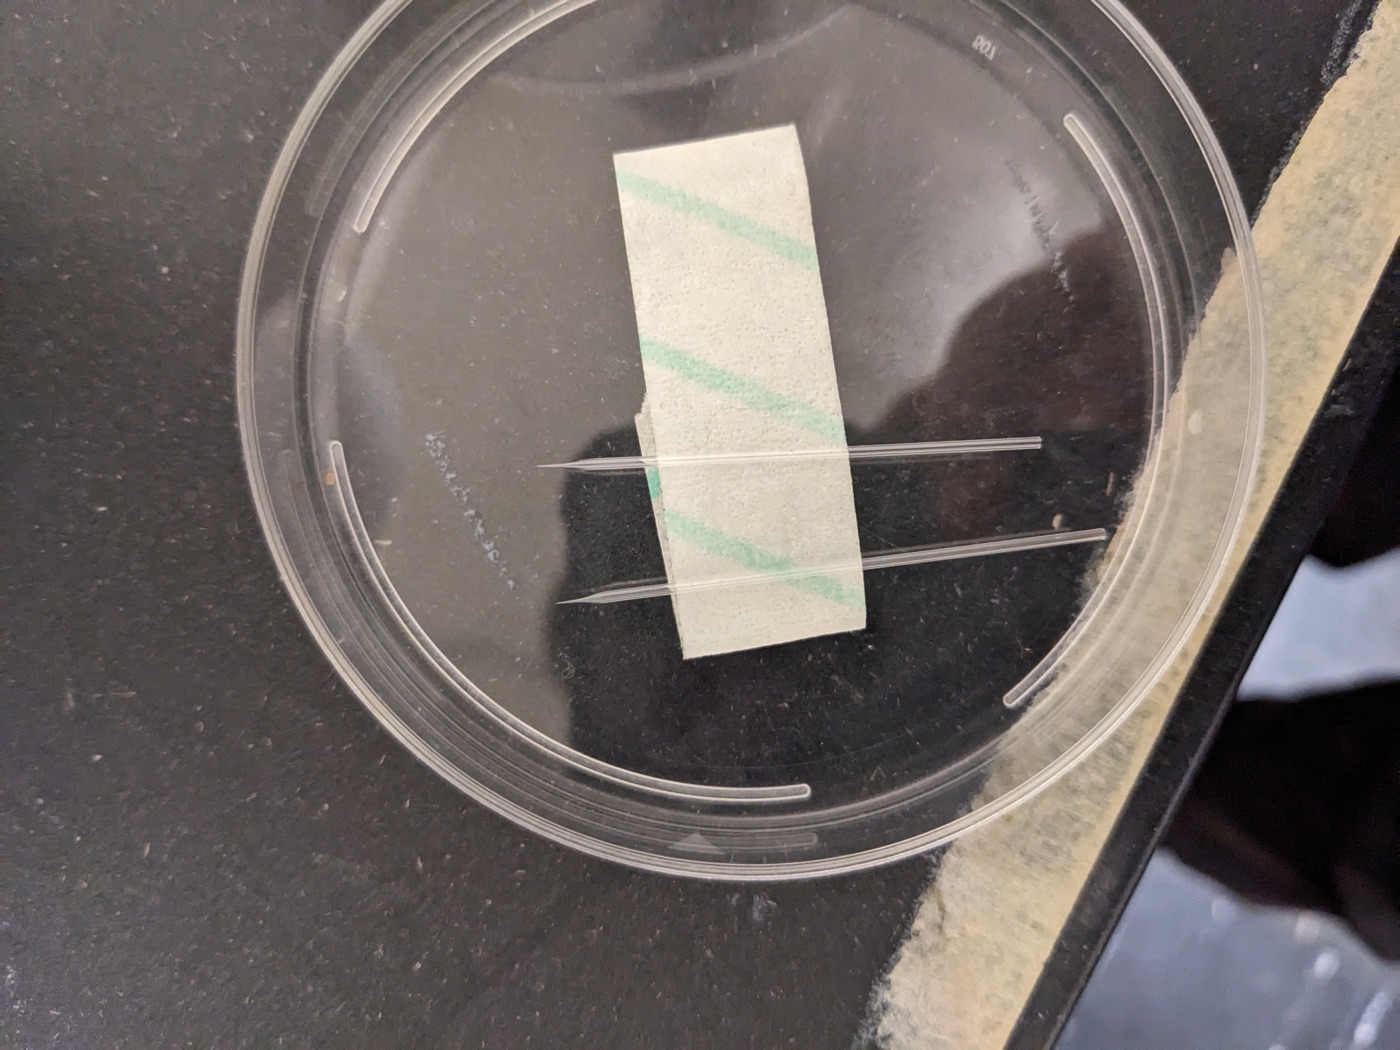
Step 6: Carefully remove the two needles by loosening the screws and taking them out sideways to avoid touching anything with the needle (it will very likely break at the slightest touch). Place the needles in a petri dish with a folded piece of tape on the bottom.
Storing pulled needles
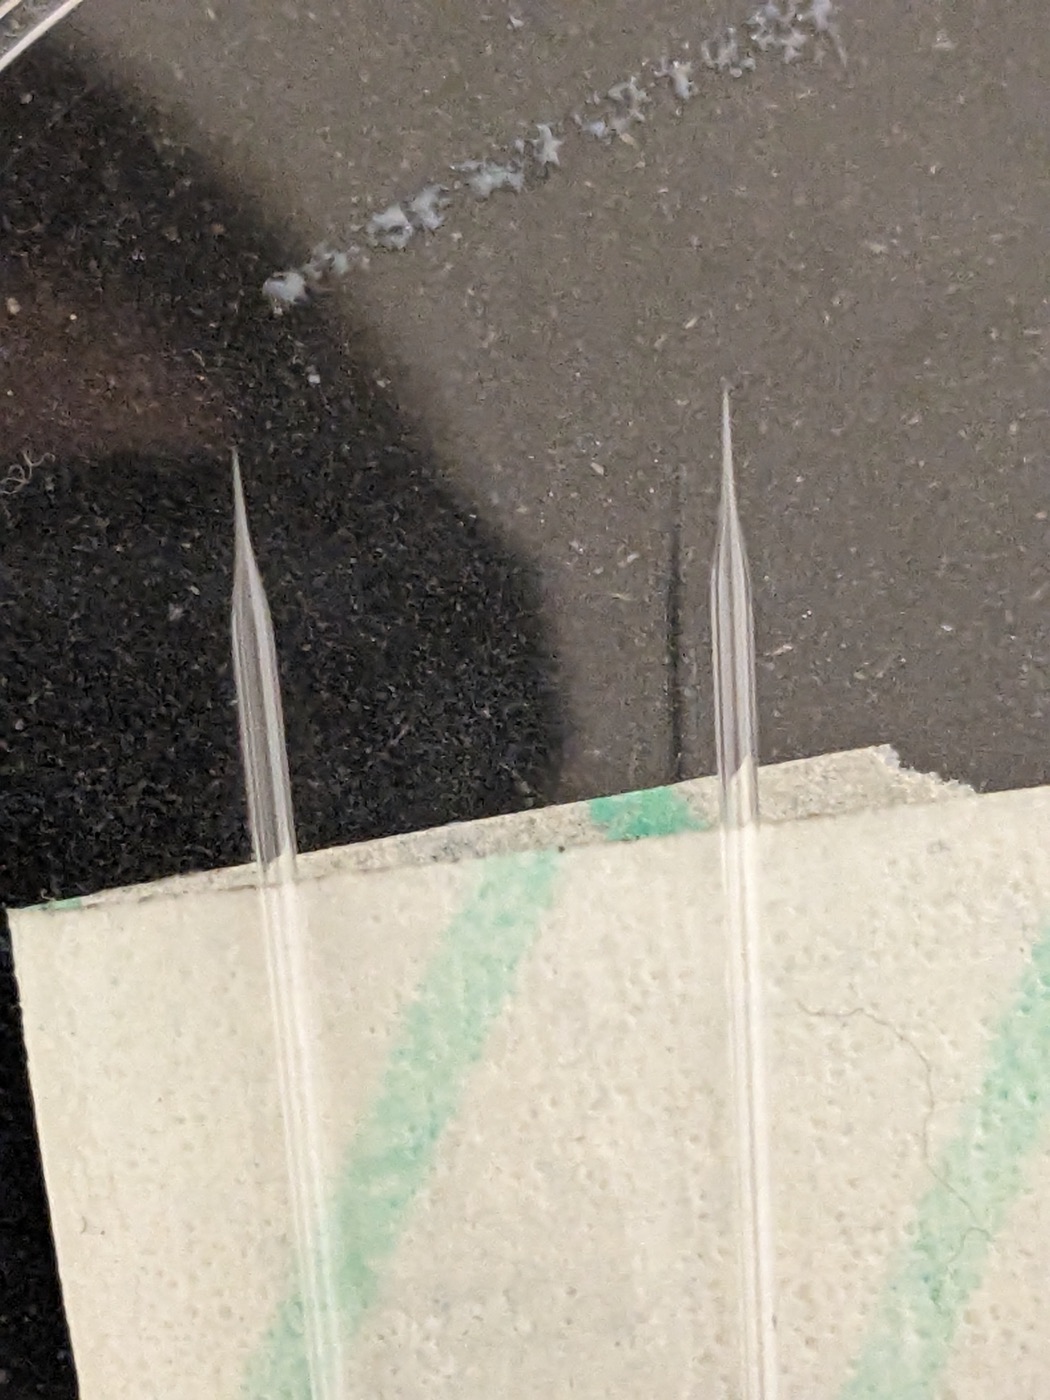
Pulled needle ends
Filling the needle
To fill the needles, pipette up 0.5 µl of injection solution. Use a 10 µl pipette tip. Make sure to get the liquid from the top or middle of the tube in order to avoid any precipitate stuck to the bottom or sides of the tube during centrifugation.
Put a piece of clay on the side of a table and push the needle upside down into it. Fill the needle by touching the end of the needle with the tip of the pipette and pushing out the liquid with the pipette. Make sure that the liquid enters the needle instead of just sitting on top. Wait a few minutes for the solution to reach the bottom of the needle.
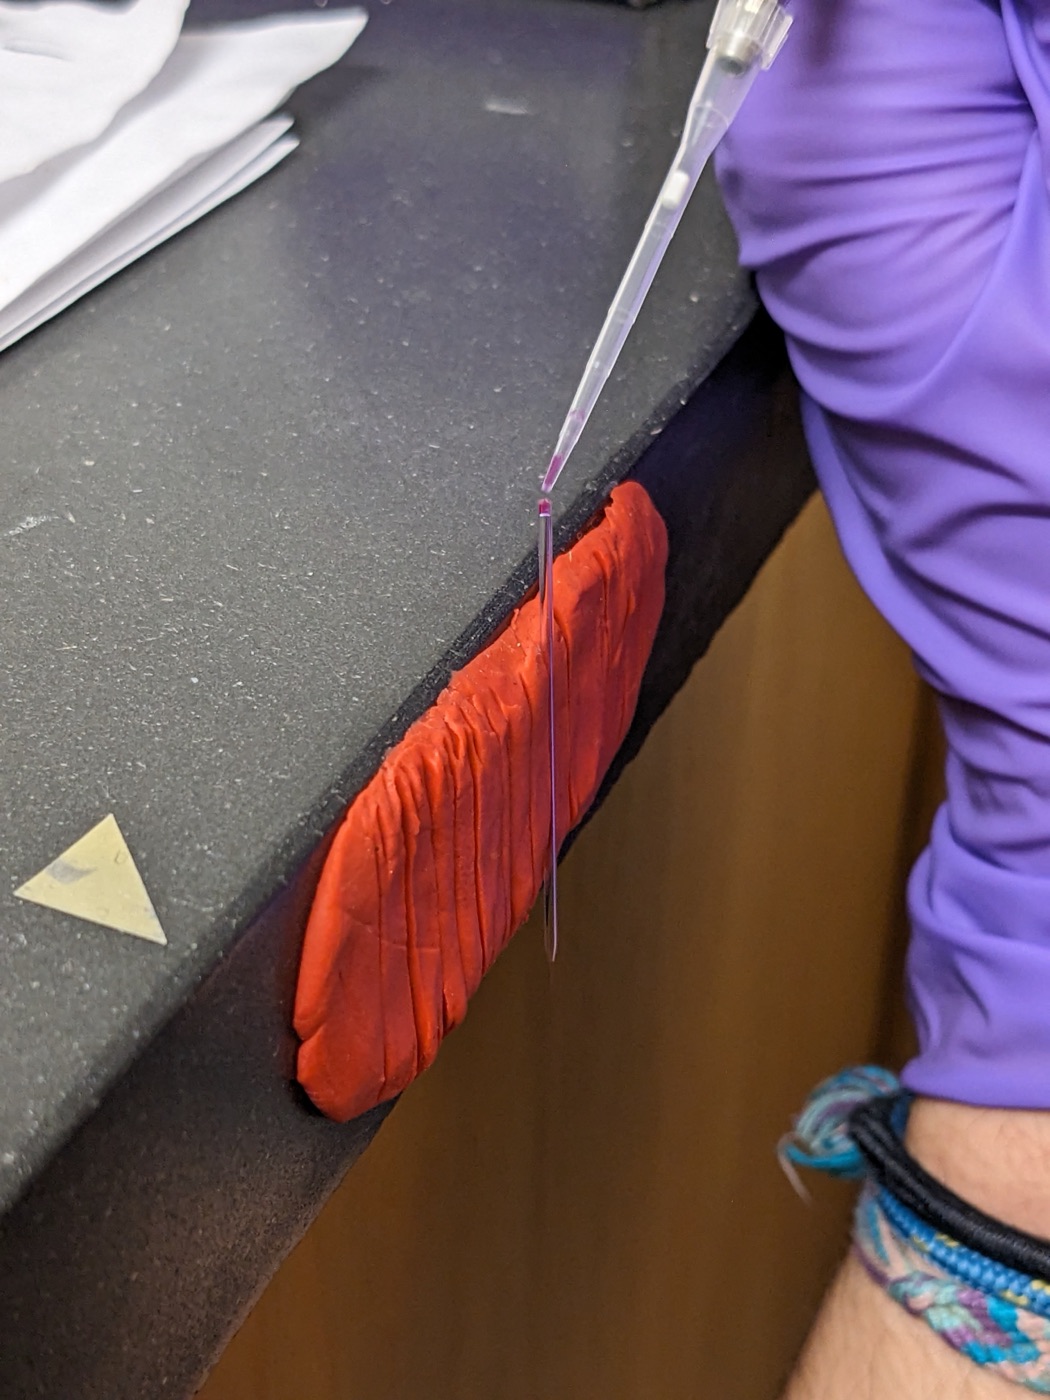
Filling needles
Mount the needle onto the macromanipulator:
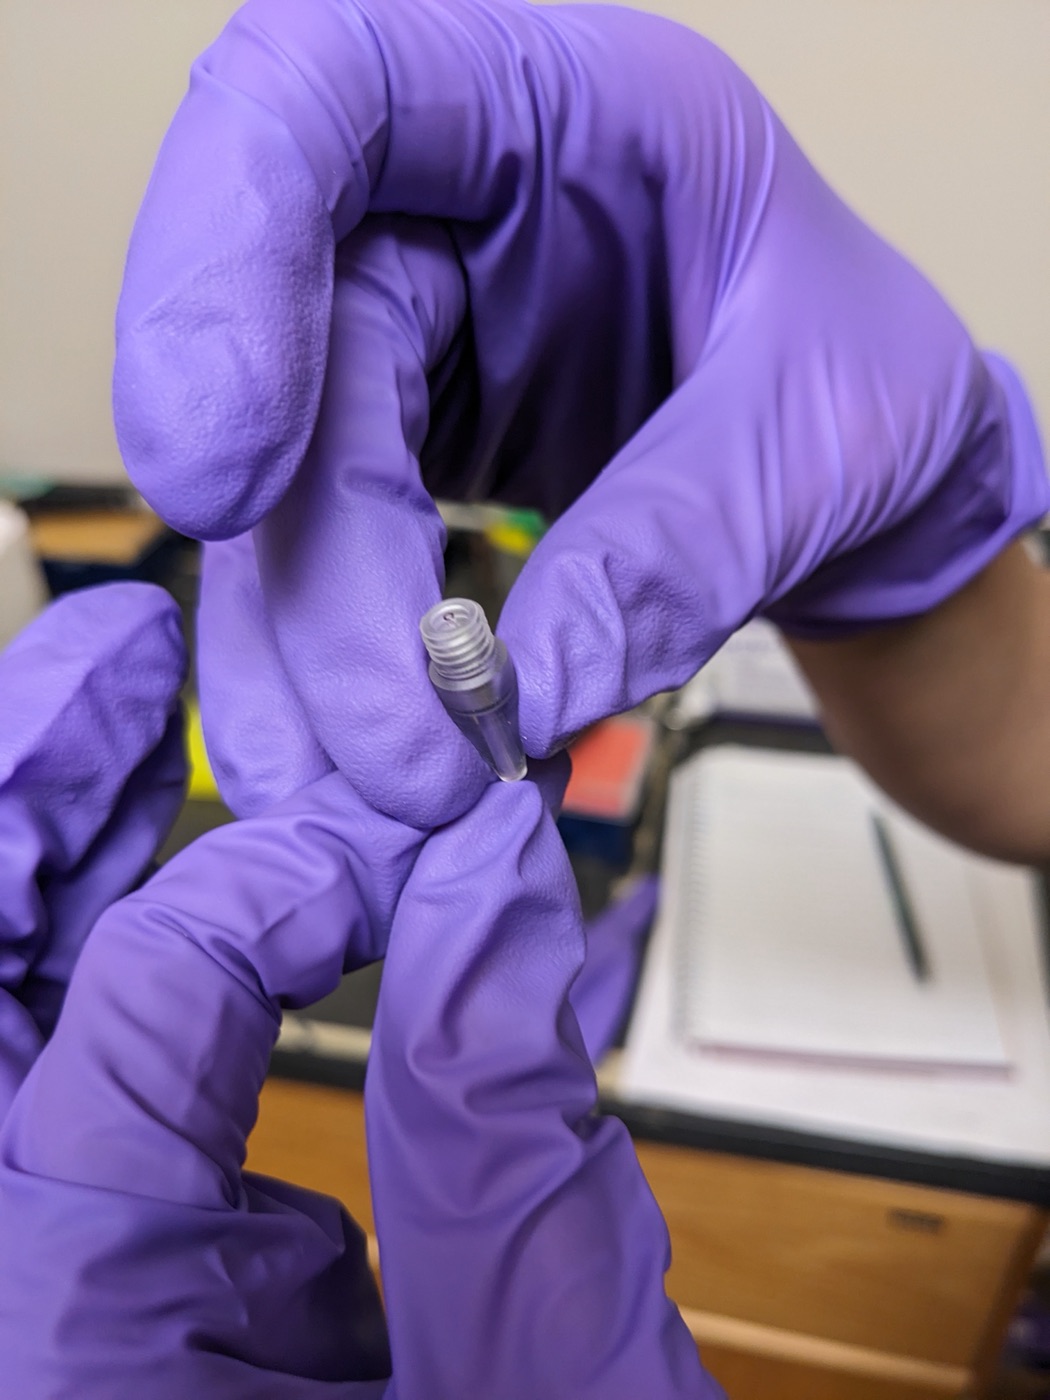
Insert the needle into the needle holder, end first, and make sure the needle end is visible
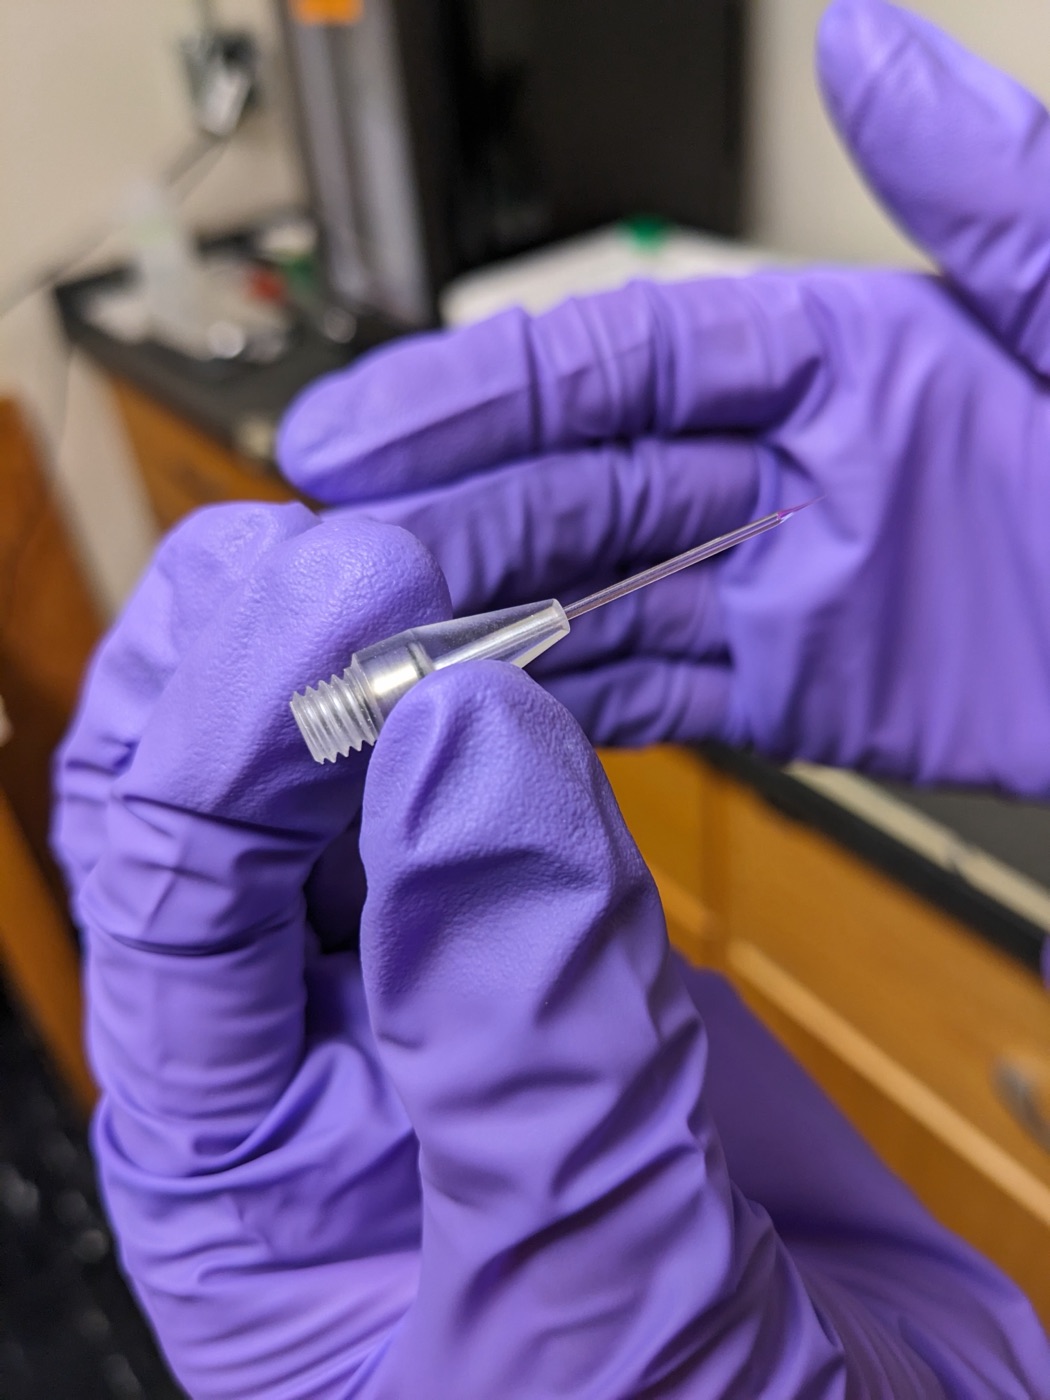
Needle in the needle holder (aka grip head)
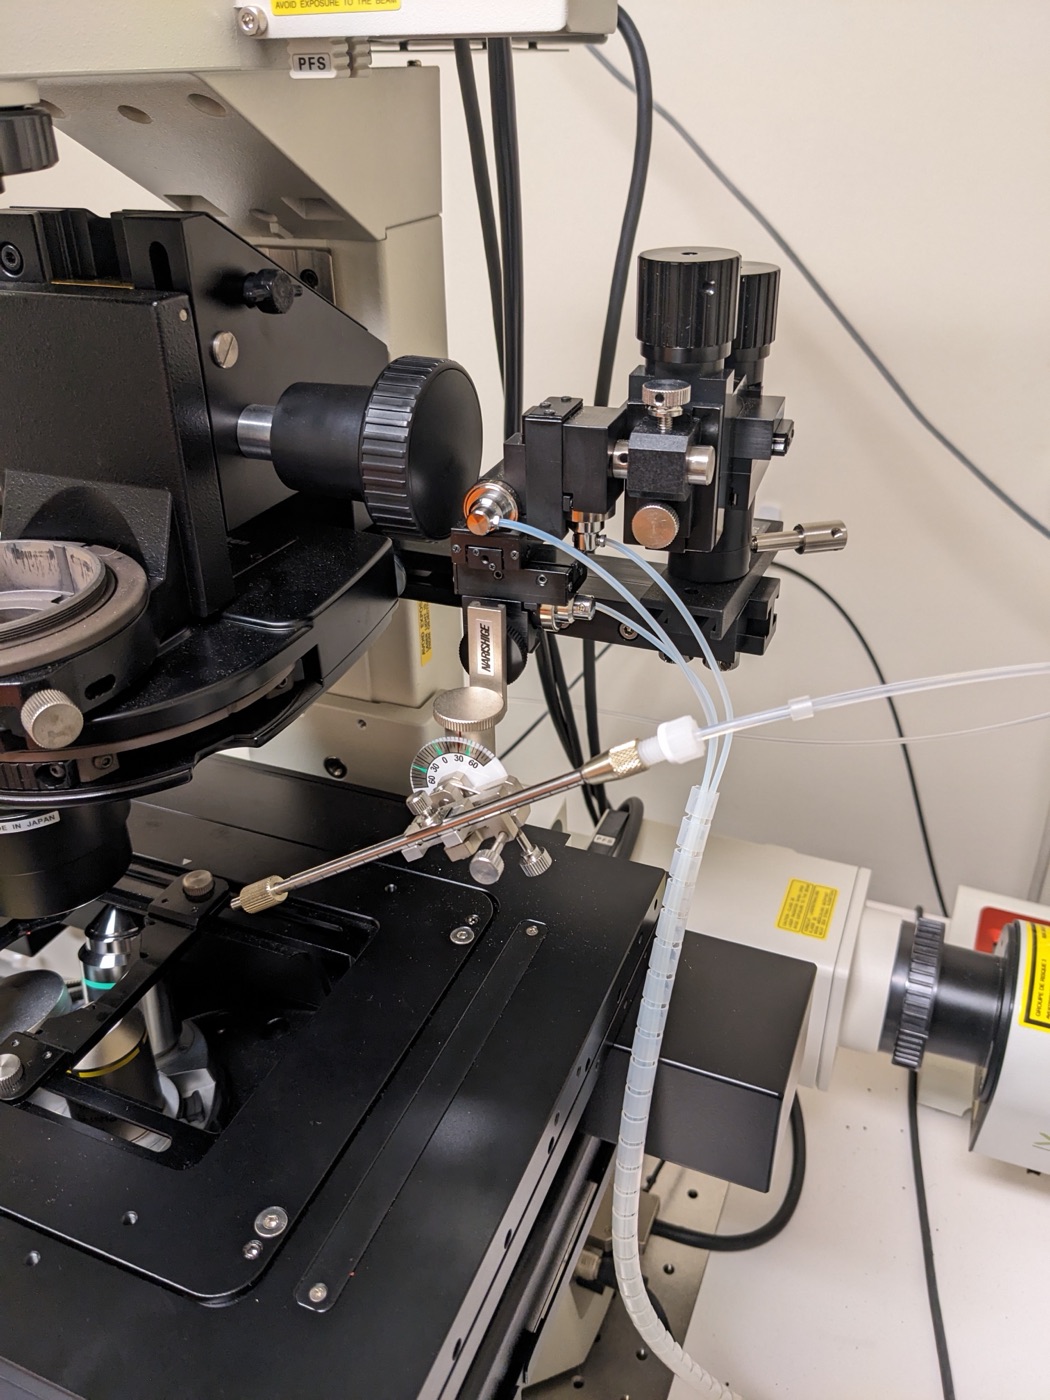
Take off the capillary holder (metal rod) and screw in the needle holder
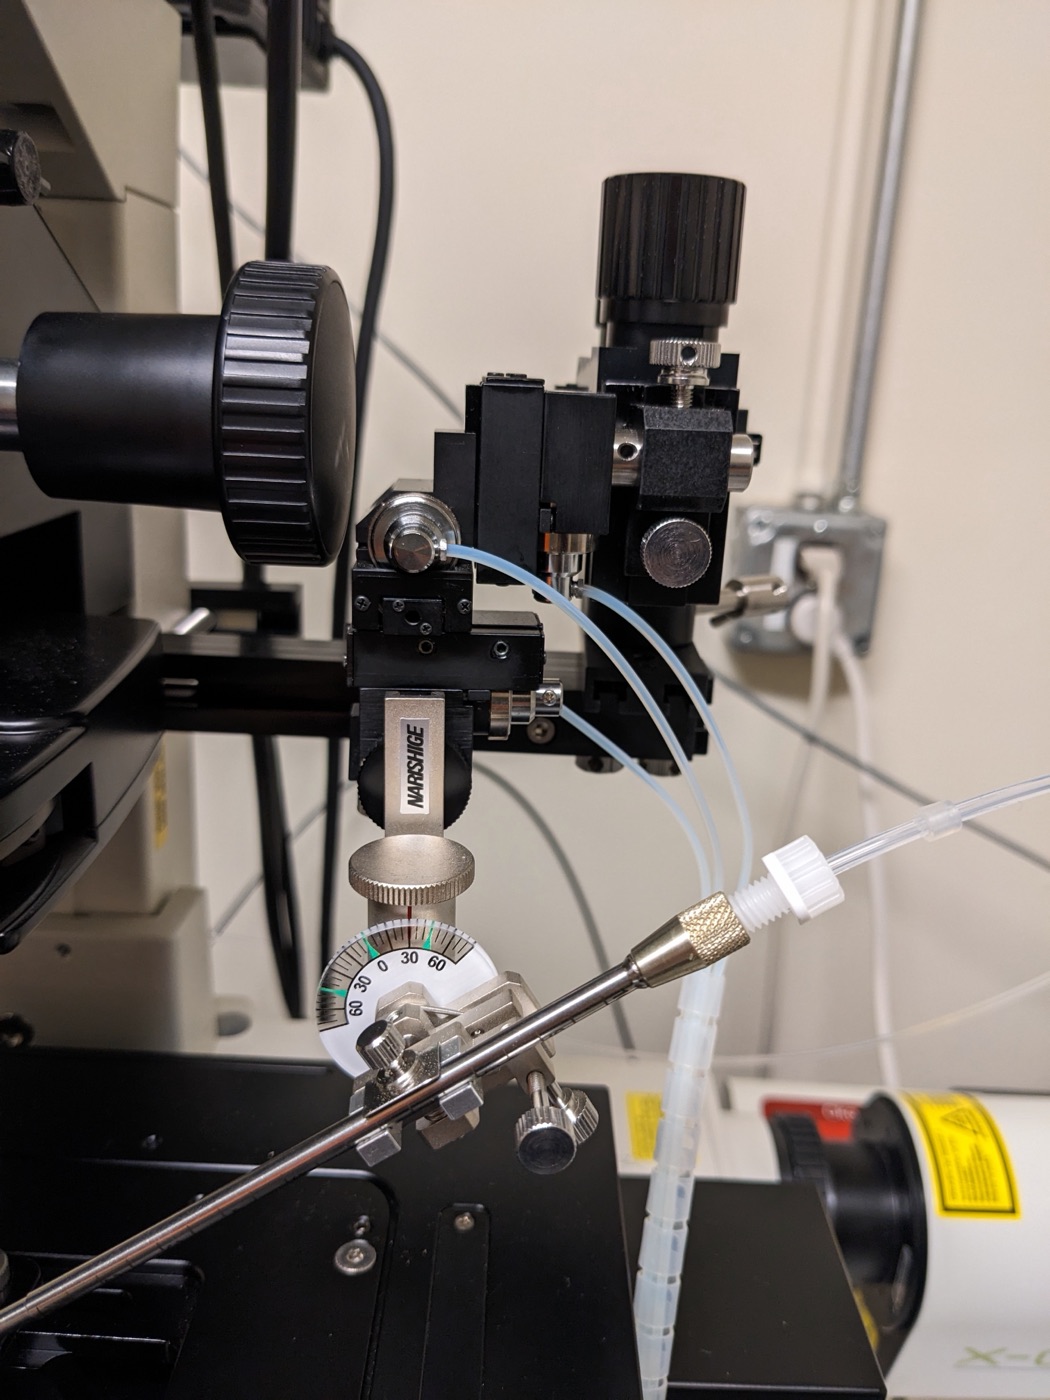
Make sure that the capillary holder is at 30°
The microinjection setup
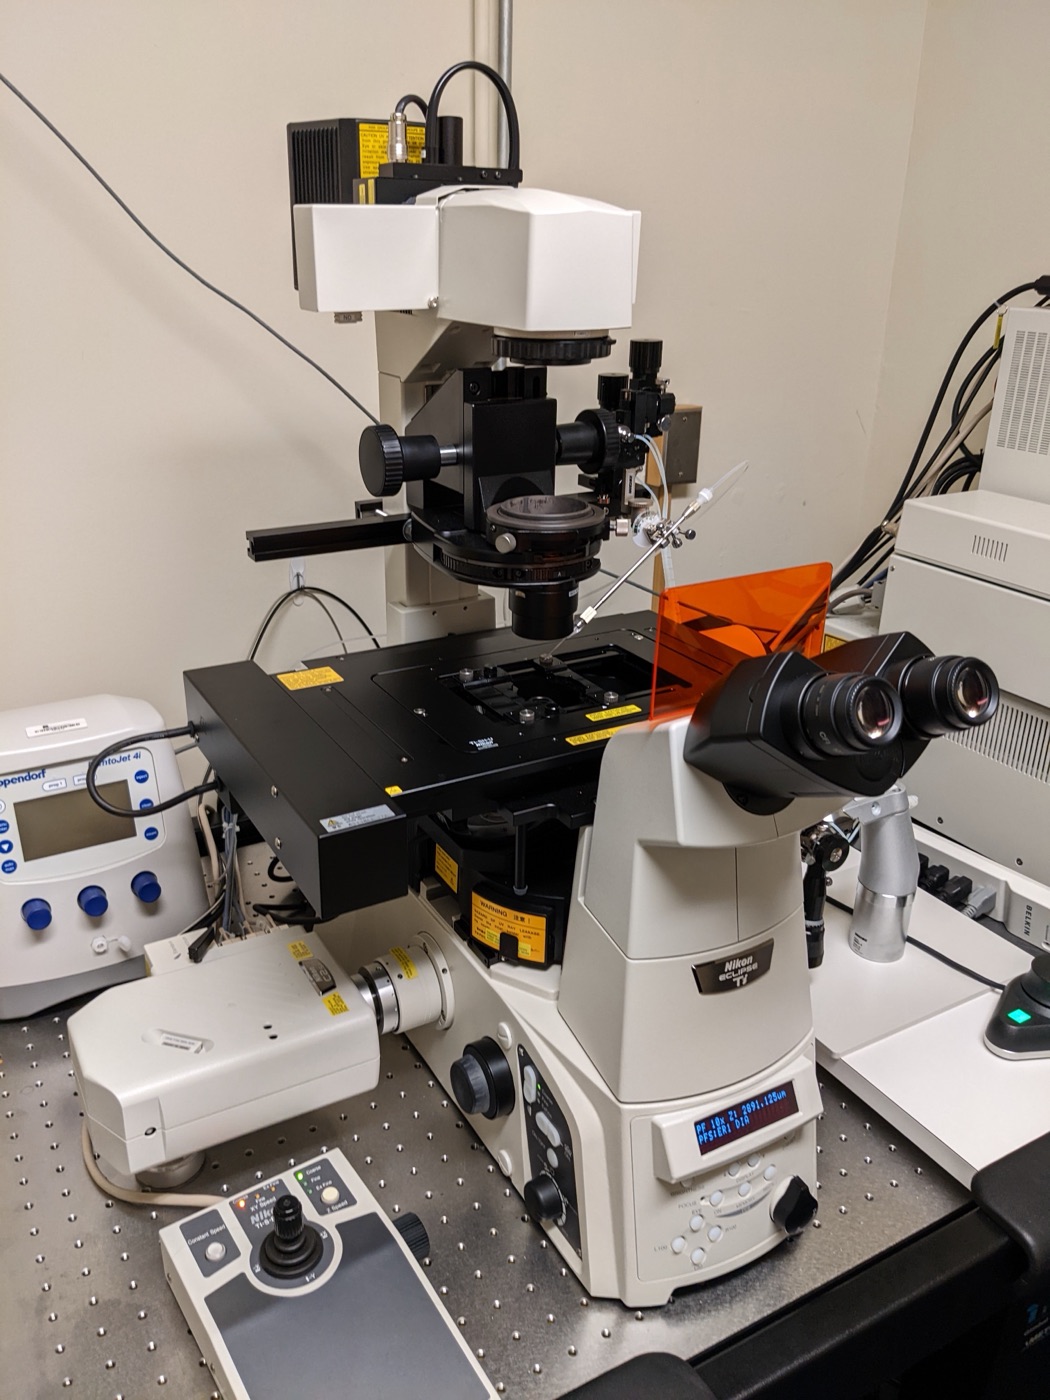
Confocal microscope set-up
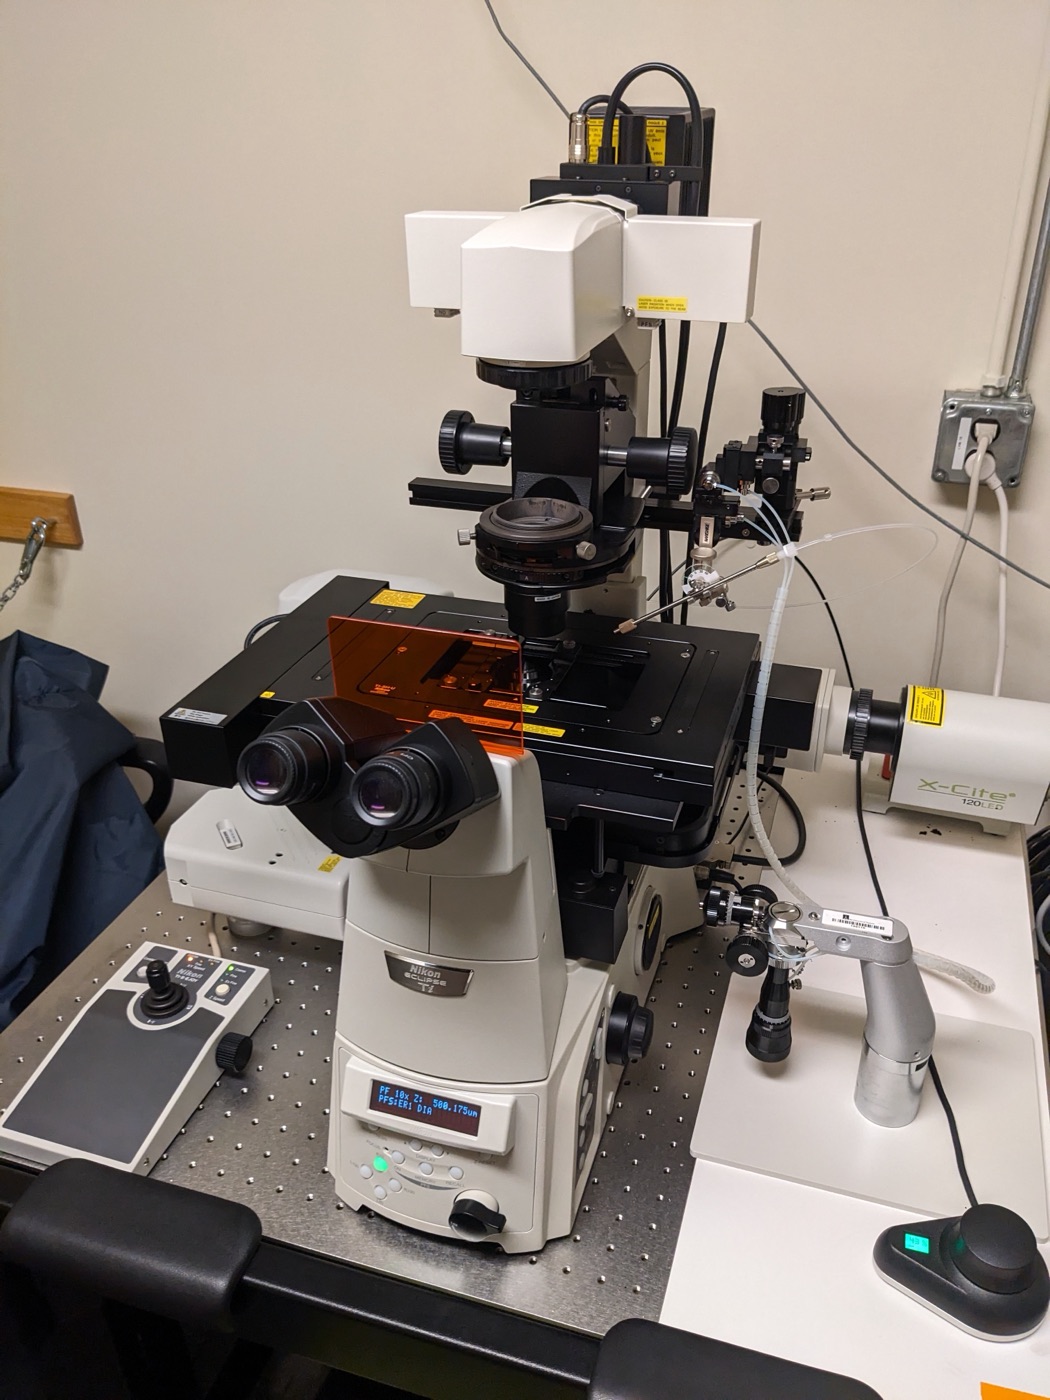
Confocal microscope set-up
Preparing sea water
For embryonic development: prepare a beaker (1000 ml) with sea water (12 °C, RO + Instant Ocean salt). Check for correct salinity (~33‰)! Adjust salinity if needed. Place in the 15 °C fridge.
For during the microinjection: pour 25 ml of the filtered sea water into a 50 ml centrifuge tube and add 25 µl of 1 M 3-aminotriazole (3-AT) stock solution2 to it. Label it “3AT filtered sea water”. Place the 3-AT sea water on ice.
Preparing the petri dish
Take a PS-coated petri dish3 and mark the middle with a straight black line with a marker on the outer side of the dish. Take a razor blade and make a cut parallel to the black line, halfway between the black line and the edge of the dish, on the inner side of the dish. This scratch will be important to break the injection needle to adjust the flow of solution as needed.
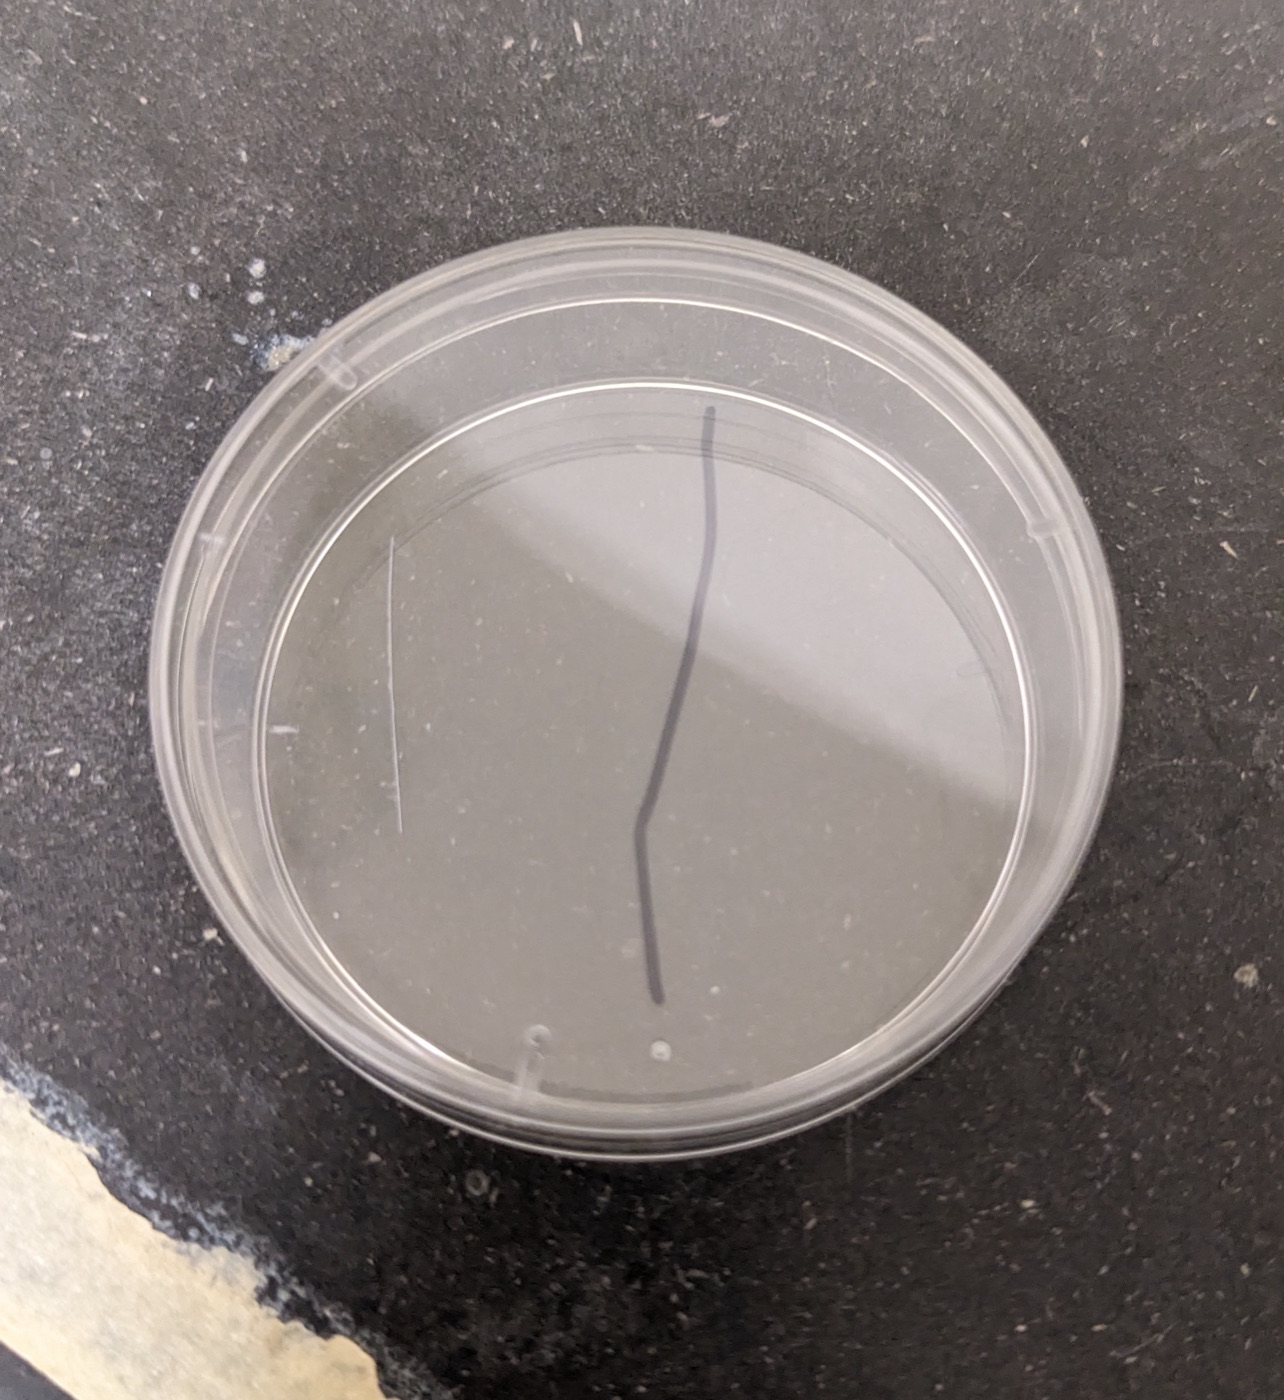
Prepared petri dish
Pipette 4 ml of 1 mM 3-AT sea water (prepared above) into the PS-coated dish using a transfer pipette.
Place the petri dish under the microscope such that the scratch mark is on the left.
Switch on the microscope and the FemtoJet 4i. Make sure to detach the injection tube first!
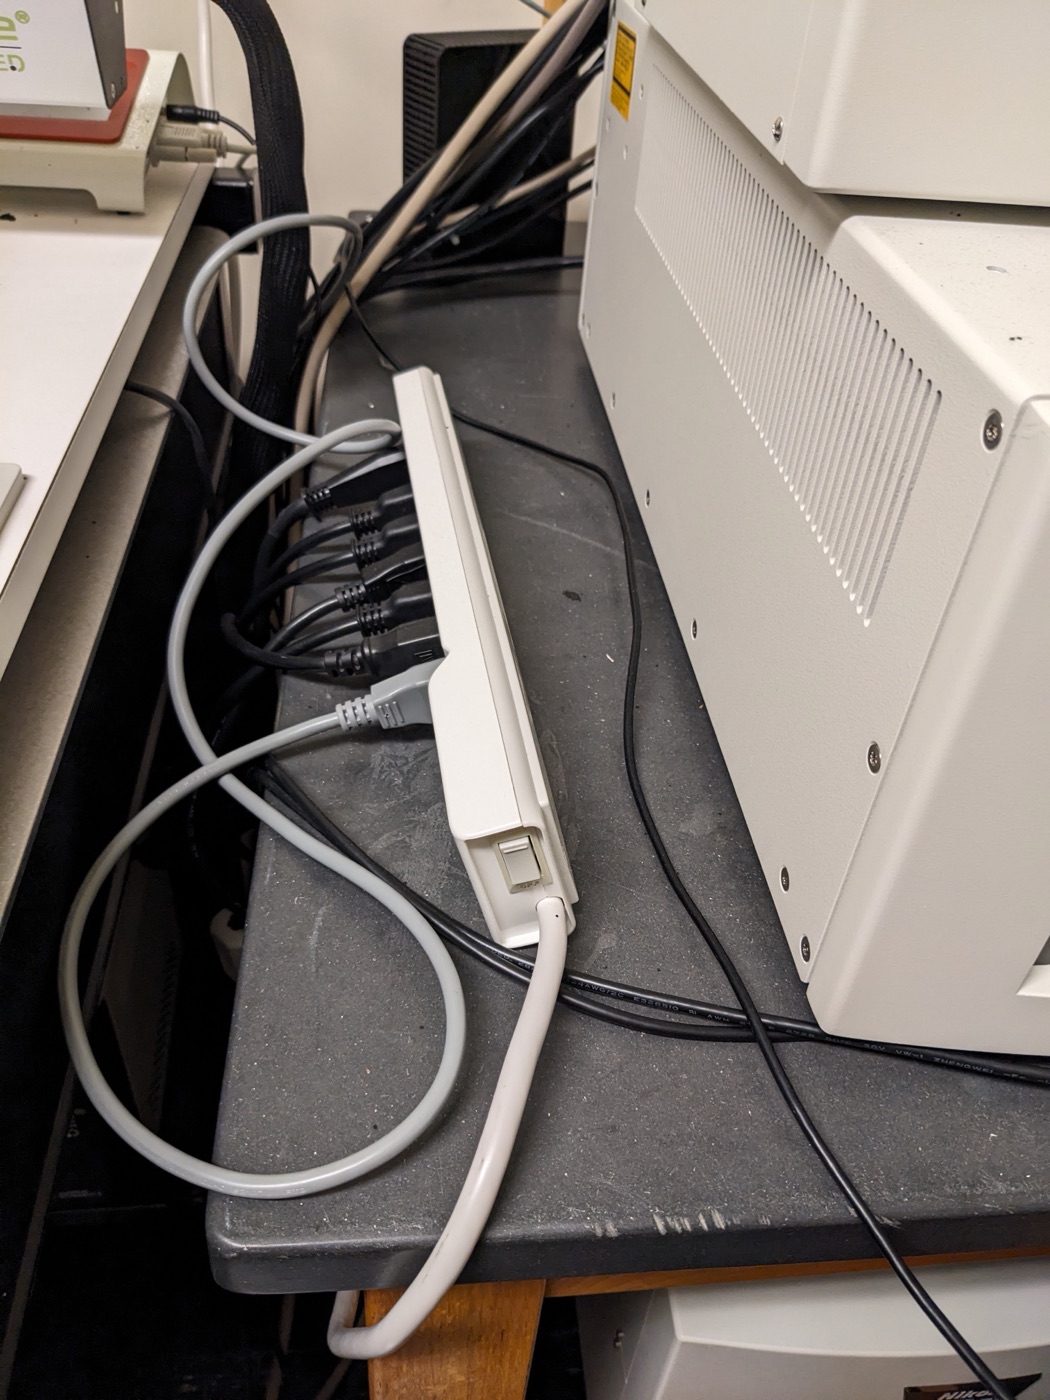
Switch on the power strip to switch on the microscope
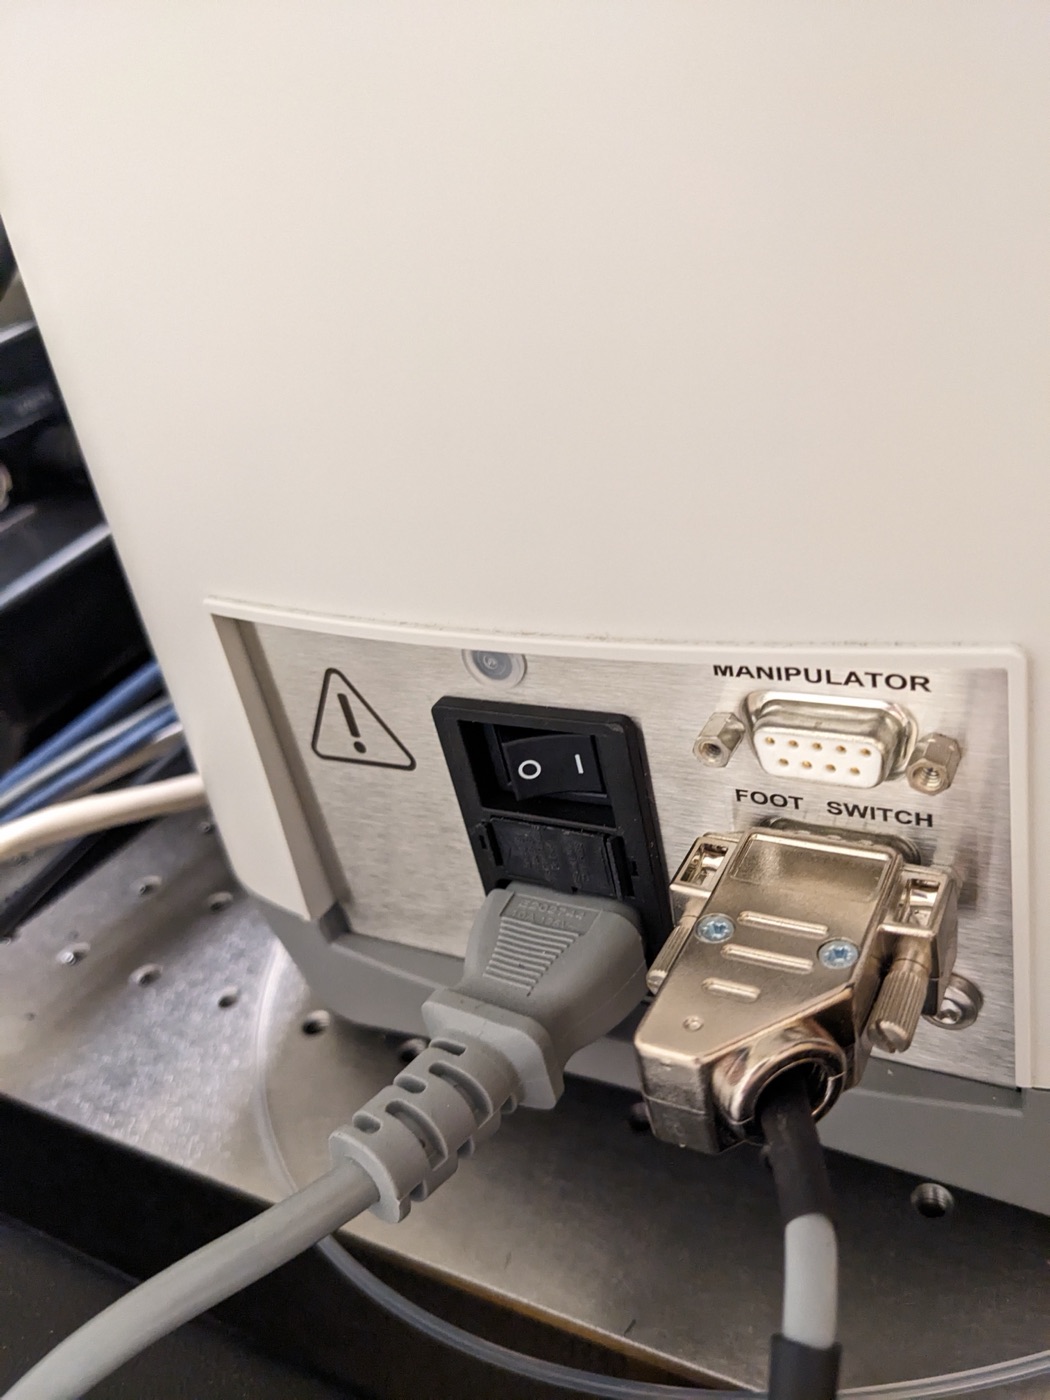
Switch on the FemtoJet with the button on the back
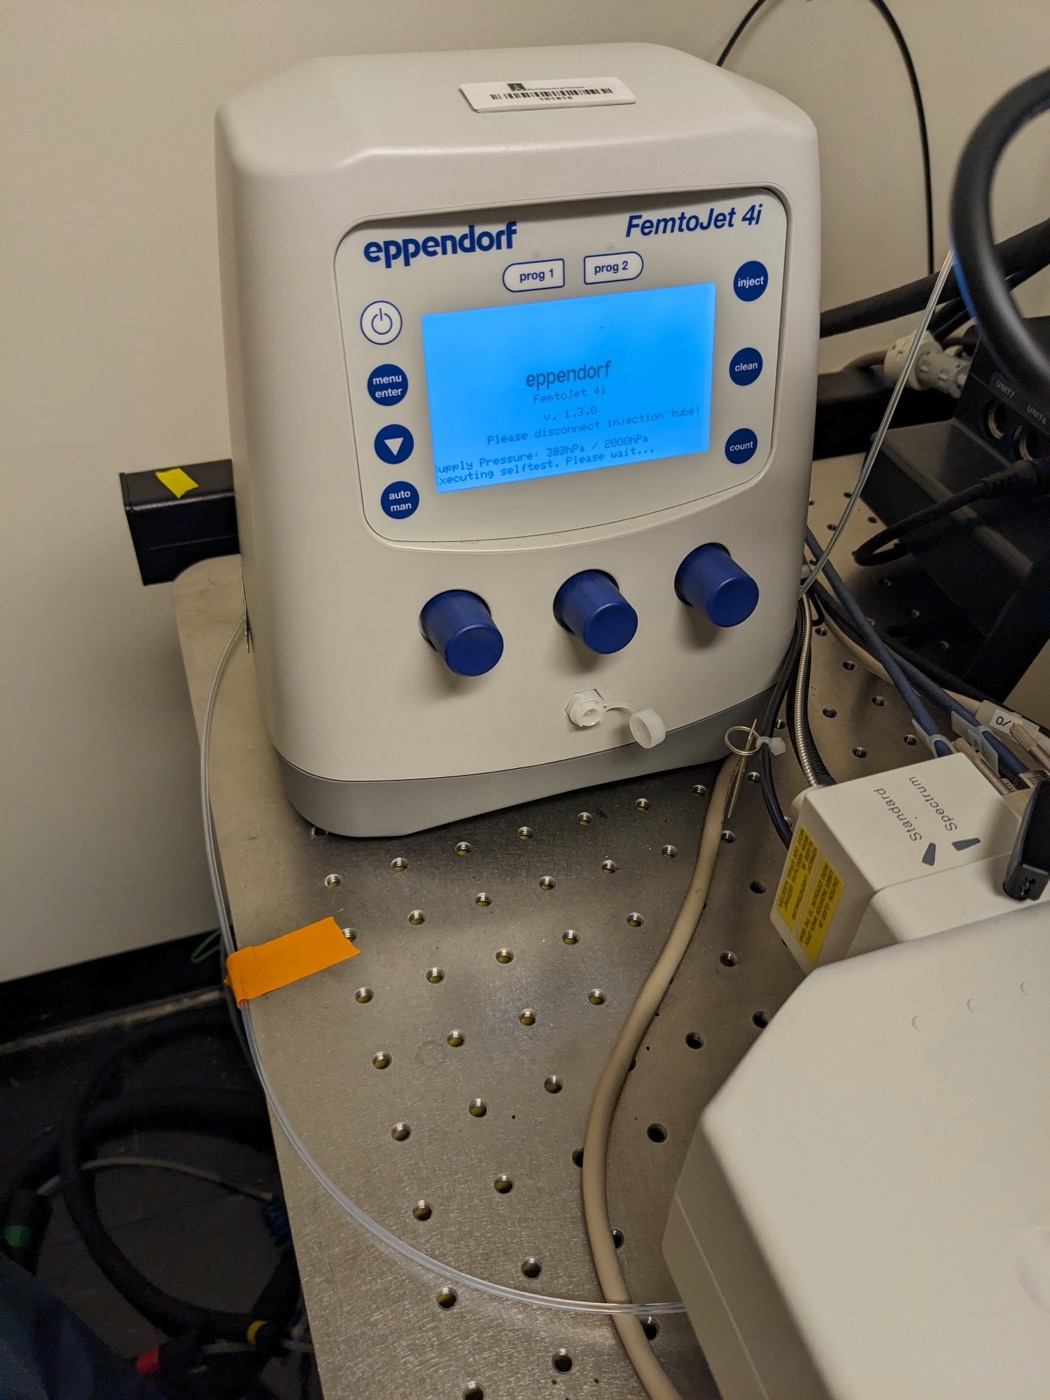
The FemtoJet starts to build up pressure automatically; make sure the tube is disconnected
Once the pressure has built up, attach the injection tube to the FemtoJet. If you see the error message below, make sure that the injection tube is correctly attached to the FemtoJet, that the needle in the needle holder is all the way in, and that the tube is screwed on right.
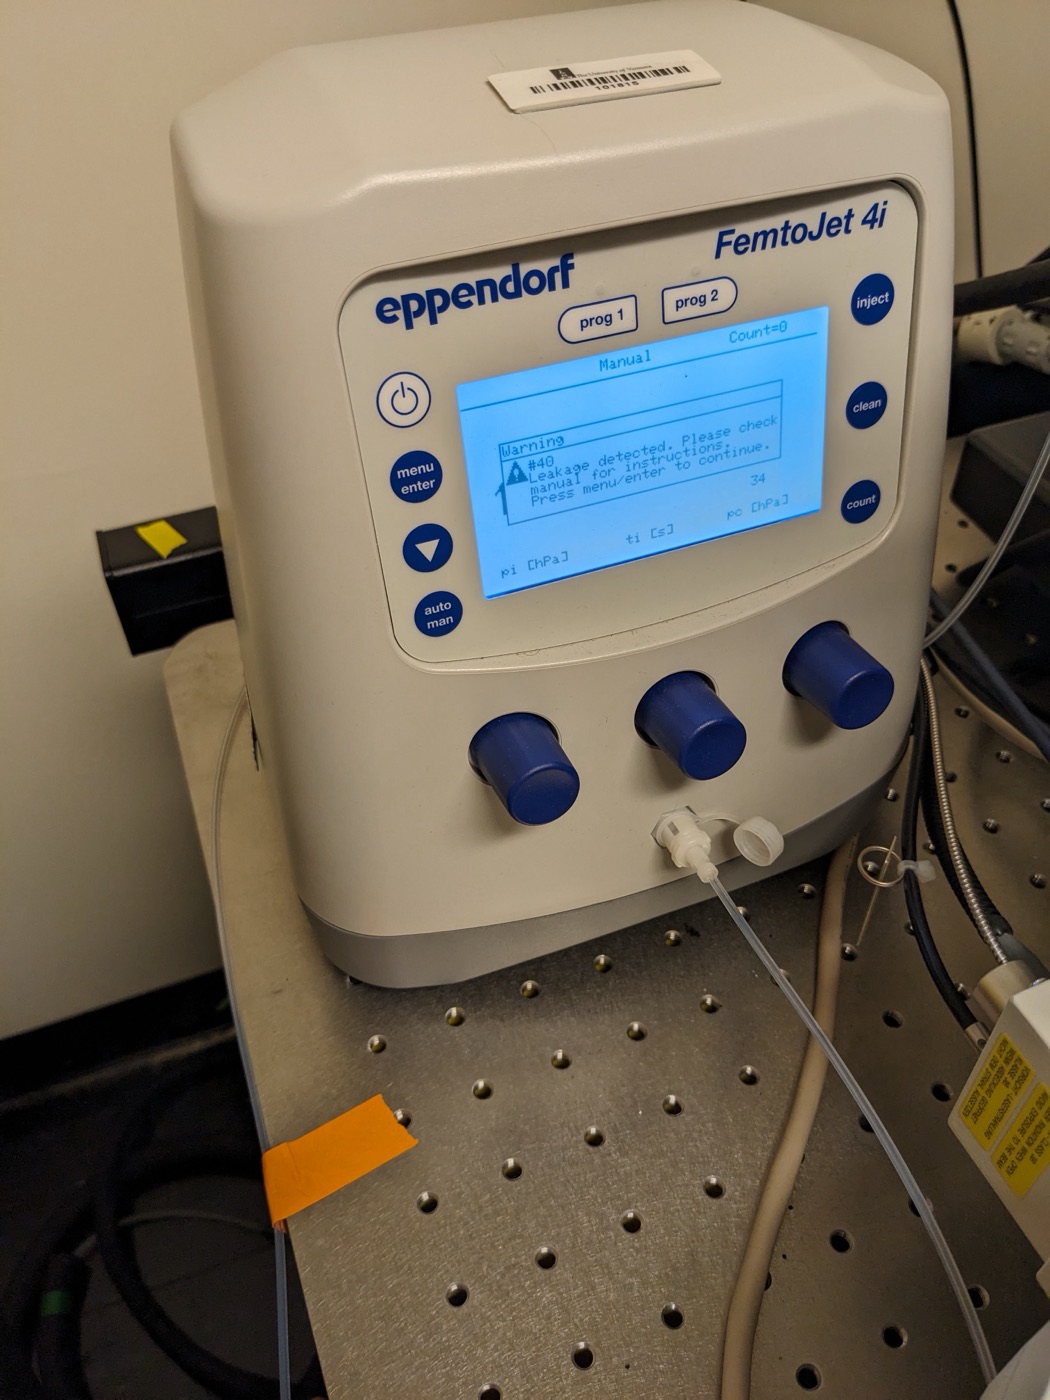
Microinjector error
Default microinjector settings: Manual, 120, 40.
Lower the needle into the sea water using the macromanipulator. Once the needle touches the water, find the needle through the microscope and lower or adjust the focus until the needle touches the bottom of the petri dish. Navigate to the scratch mark. Gently touch the scratch with the end of the needle to break it very slightly. Check with the fluorescent light that there is a good flow of solution.
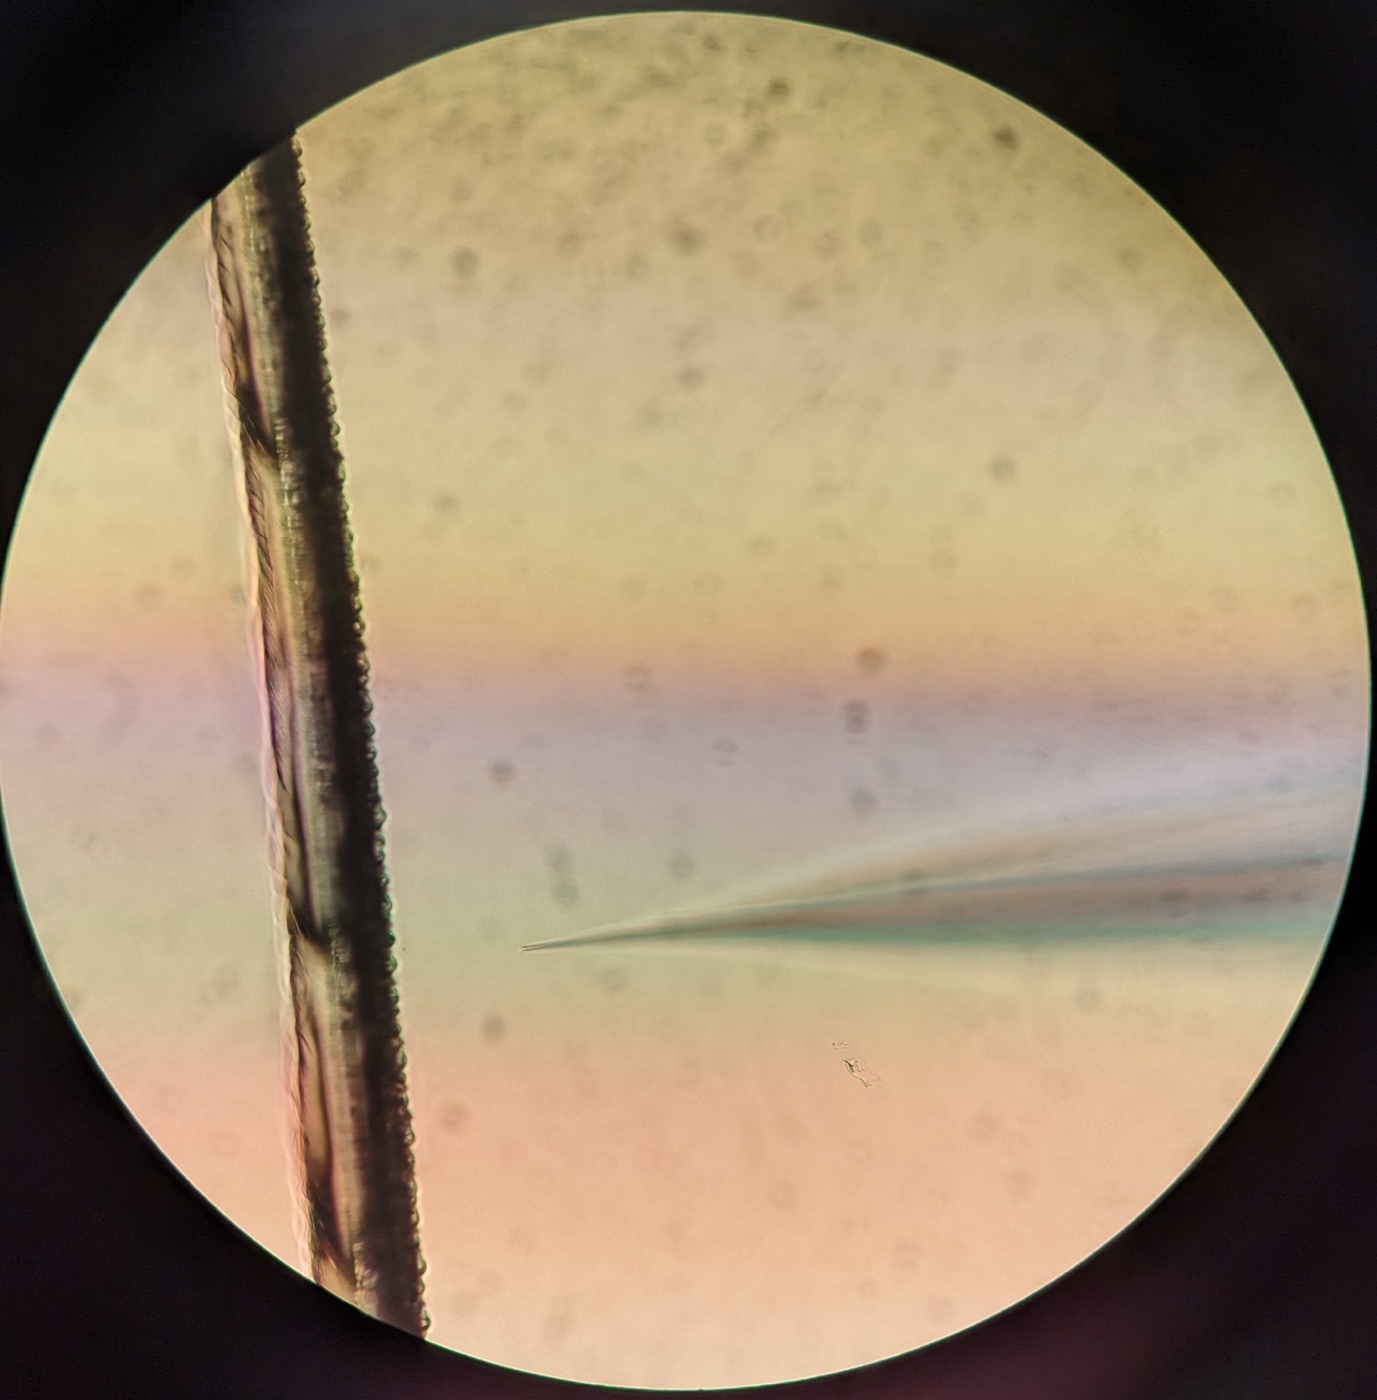
Broken needle with scratch mark
High speed of injection solution flow; this will be hard to work with
Ideal speed of injection solution flow
Rowing the eggs and fertilization
Lift the needle out of the liquid using the macromanipulator to avoid breaking the needle while rowing the eggs.
Row 10 µl of dejellied eggs in a straight line using a 10 µl pipette tip. If the eggs have been sitting in the glass beaker for a while, they tend to stick to the bottom and pipetting them up with the 10 µl pipette tip might become difficult. Use a 3 ml transfer pipette to pipette up and down near the eggs to stir them up.
Stir the eggs with a transfer pipette
Row the eggs on the petri dish parallel to and in between the two lines mentioned above (the marker line and the scratch mark) using a pipette. Row the eggs right before the injections, because fertilization problems may occur due to prolonged exposure to 3-AT sea water. Gently press the tip of the pipette to the bottom of the petri dish at the top, and move down in a line while continuously pushing the eggs out of the pipette tip.
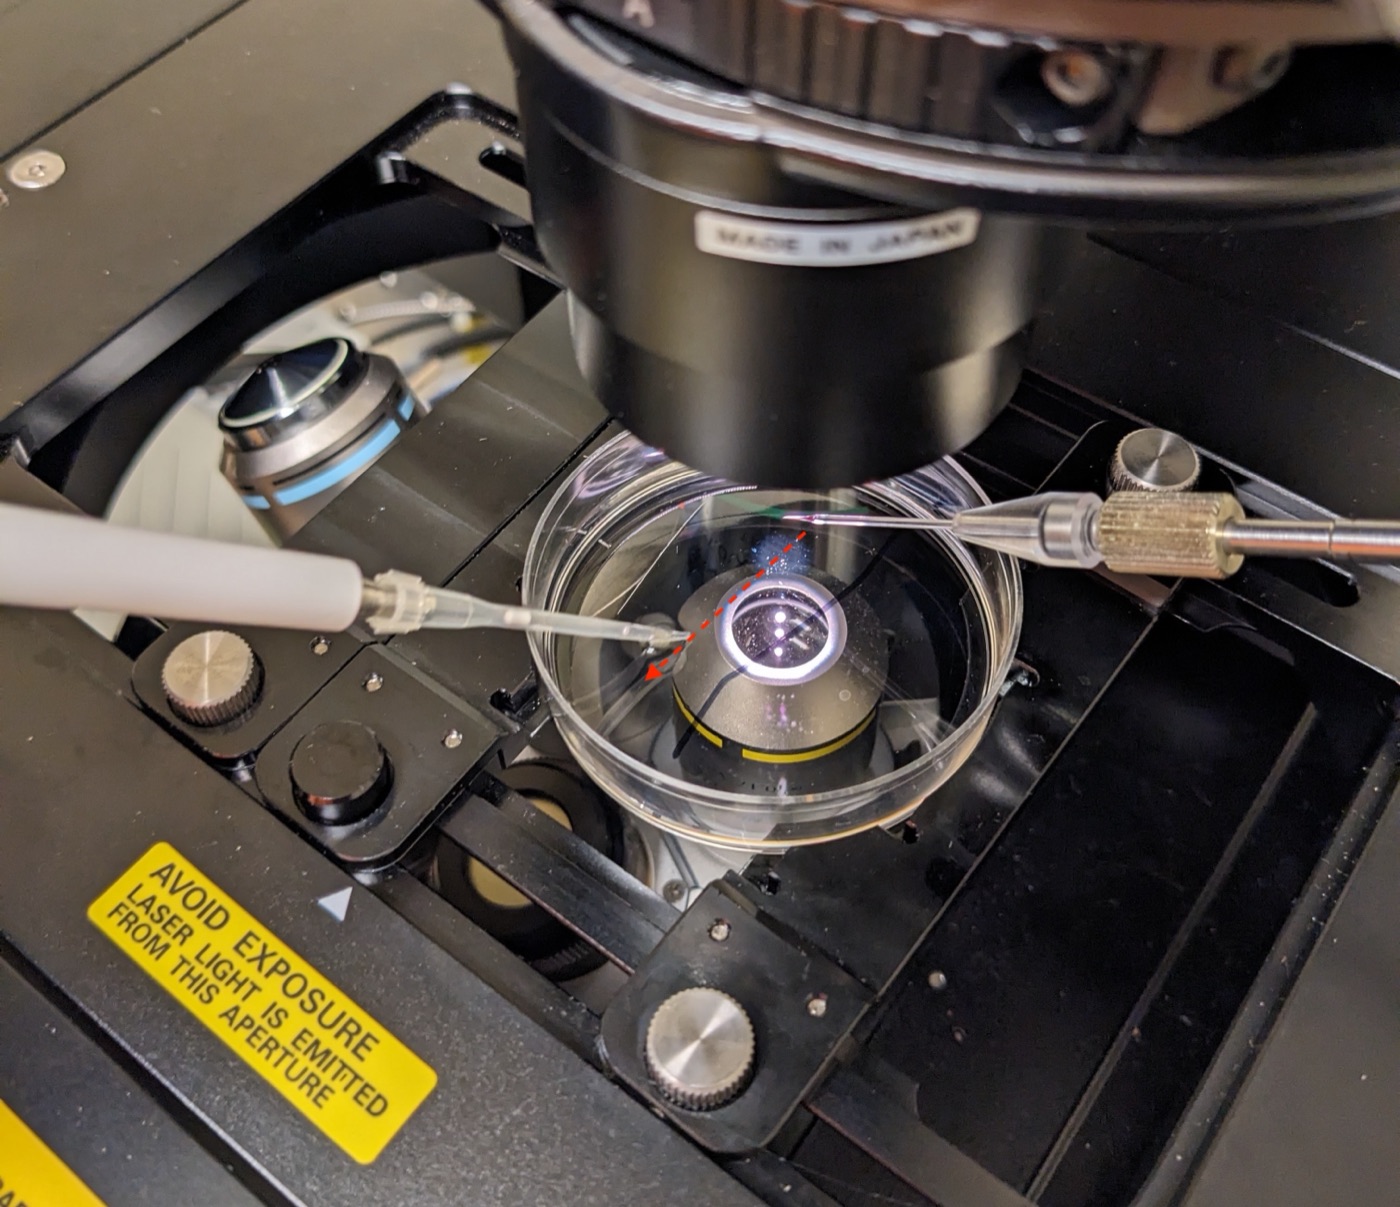
Rowing eggs in the petri dish
Find the eggs with the microscope. Lower the needle back into the sea water and gently poke an egg to make sure they are stuck to the bottom.
Dilute and activate the sperm by adding 1 µl of sperm to 100 µl of sea water and mixing with the pipette tip for a few minutes until there are no chunks left and the solution is opaque and homogeneous. Add 10 µl of diluted sperm directly on top of the top eggs. Submerge the tip and expel the sperm directly above, but be careful not to touch the eggs. Only fertilize a portion of the eggs at a time, since fertilized eggs become hardened and impossible to inject 10 to 15 minutes after fertilization. Once the fertilized eggs are injected and you move down to unfertilized eggs, repeat this step including the dilution of the sperm, as after 10 to 15 minutes the activated sperm become less fertile.
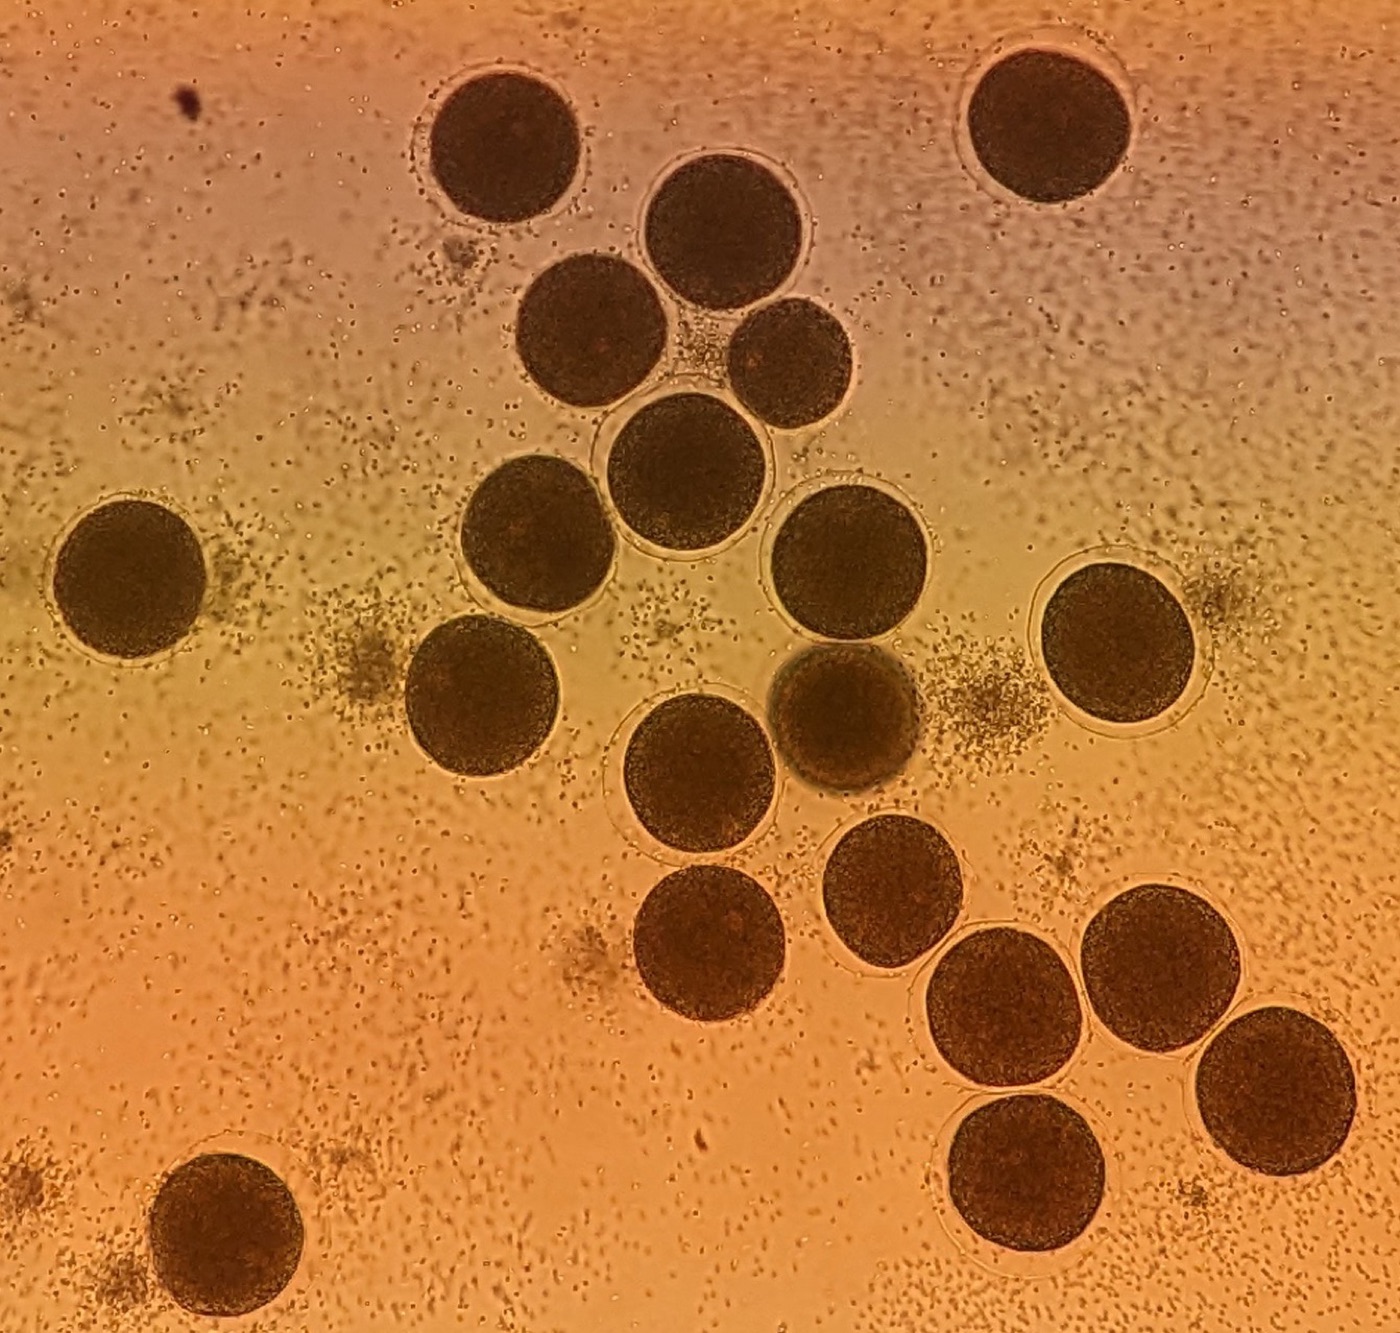
Fertilized eggs with fertilization envelope
Microinjection of fertilized eggs
Once the eggs are fertilized (the fertilization envelope appears), push the needle against a fertilized egg such that it makes a dent in the middle of the cell.
Hit the side of the microscope with your hand to make the needle enter the cell. You might need to hit it repeatedly.
You can tell that the needle has entered the cell if:
a) you see the tension of the cell wall released and the dent created by the needle disappears, or
b) you see some movement inside the cell as the flow of injection solution from the needle disturbs the cellular content.
After pressing the pedal, you should see a light area appear around the needle. This is called the injection bolus. Once the size of the injection bolus reaches 1/4 of the volume of the cell, pull out the needle. The cell should remain intact without anything flowing out of it. The injection bolus should disappear after 30 seconds to 1 minute.
Move to the next cell using the micromanipulator and the stage controller. Repeat.
Microinjection of fertilized eggs. Note: in this video the injection bolus didn’t reach the appropriate 1/4 size.
When done (fertilized eggs hardened or enough eggs injected), remove the dish from the stage and carefully aspirate out the water using a transfer pipette.
Do not let the zygotes dry. Quickly add fresh pre-chilled sea water (from the 15 °C fridge) to cover the dish. Label the petri dish (your name, date, time in hours and minutes, number of eggs injected, type of injection solution used). Incubate the embryos at 15 °C. It is recommended to put the petri dishes with the embryos in sealed boxes with a wet paper towel to minimize evaporation of water from the sea water.
Visualising larvae
Preparation of larvae
24 hours post fertilisation
Developing purple sea urchin larvae don’t detach from the bottom of the petri dish in the first 24 hours post fertilisation, so it is possible to look at them as they are under the microscope. Take the petri dish out of the incubator, take off the lid and put it under the microscope. You can check whether you have a good number of injected individuals by setting the microscope filter to TRITC and switching on the fluorescent light. Make sure to switch off the light in the room. Injected larvae will glow red.
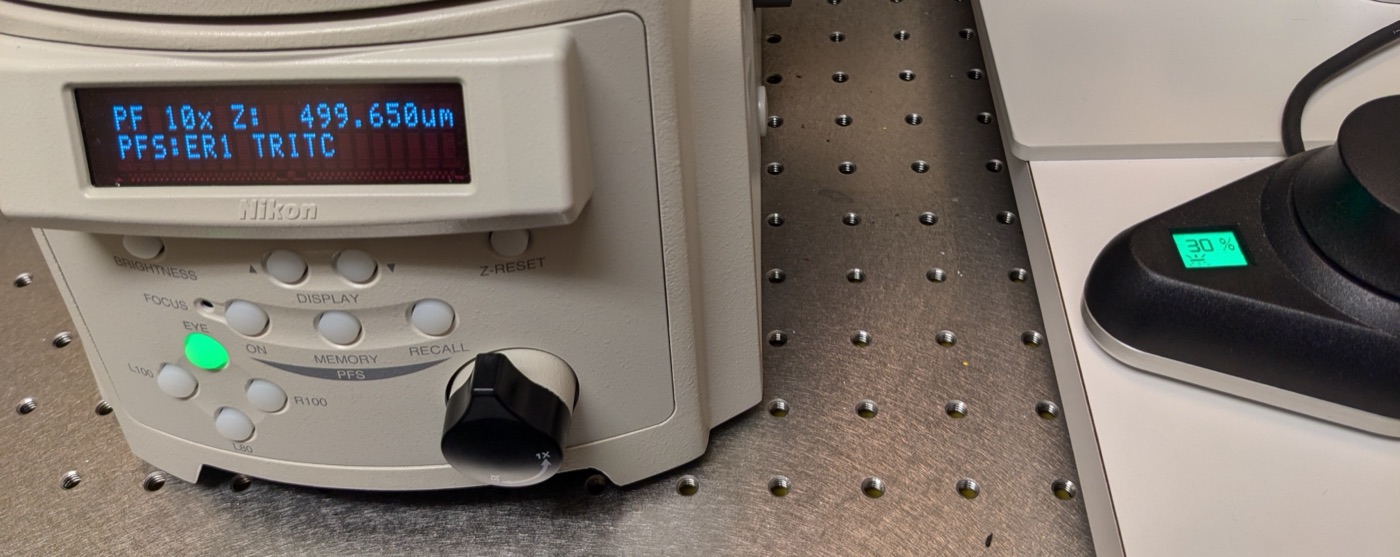
Red fluorescence
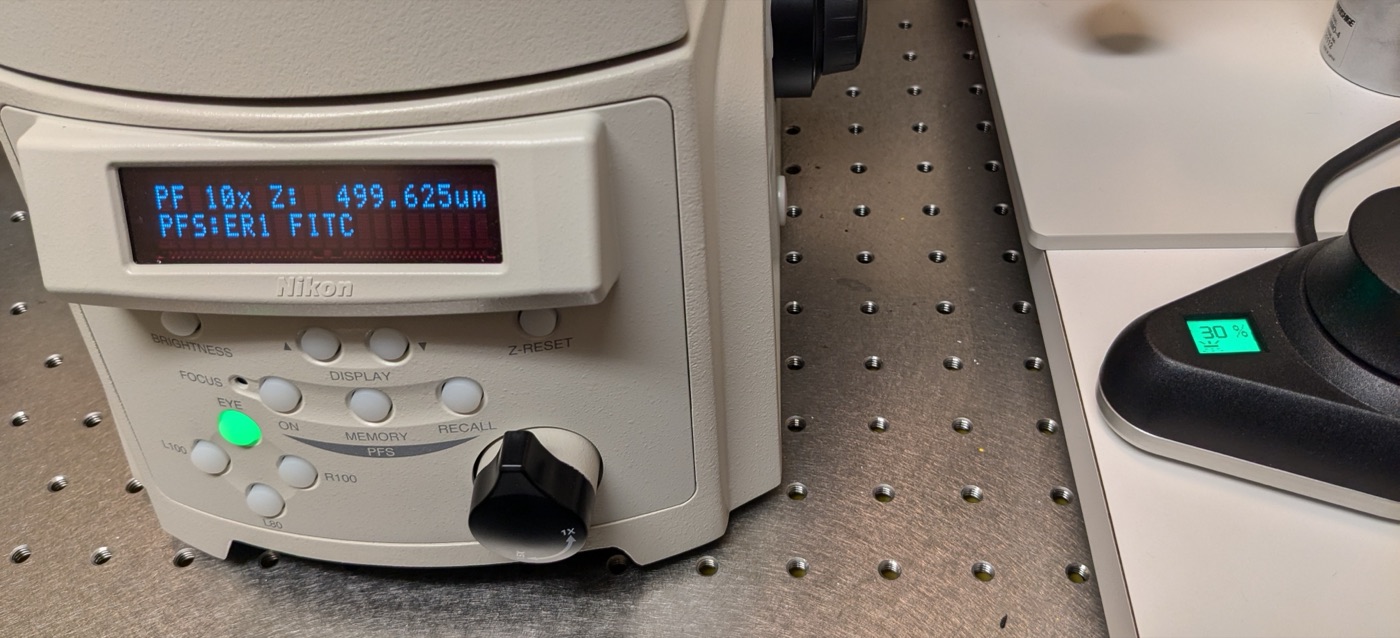
Green fluorescence
24+ hours post fertilisation
After 24 hours the larvae detach from the bottom and can move around in the water column, first due to microcurrents and later because they can actively swim, which makes looking at them in the petri dish extremely frustrating. For any kind of signal detection (either the red control or GFP), larvae need to be fixed in place.
Step 1: Pour the sea water from the petri dish into a 10 ml Falcon tube. Spin the tube in a centrifuge at 1000 rpm for 1 minute. The larvae should spin down to the bottom.
Step 2: Place two pieces of double-sided tape (3M Scotch 1/2 in × 1296 in) on a microscope slide. Pour off some of the sea water in the Falcon tube to avoid submerging the pipette. Pipette ~30 µl from the bottom of the tube onto the microscope slide. Place a coverslip on the droplet of sea water. Press gently to make sure the coverslip sticks to the tape.
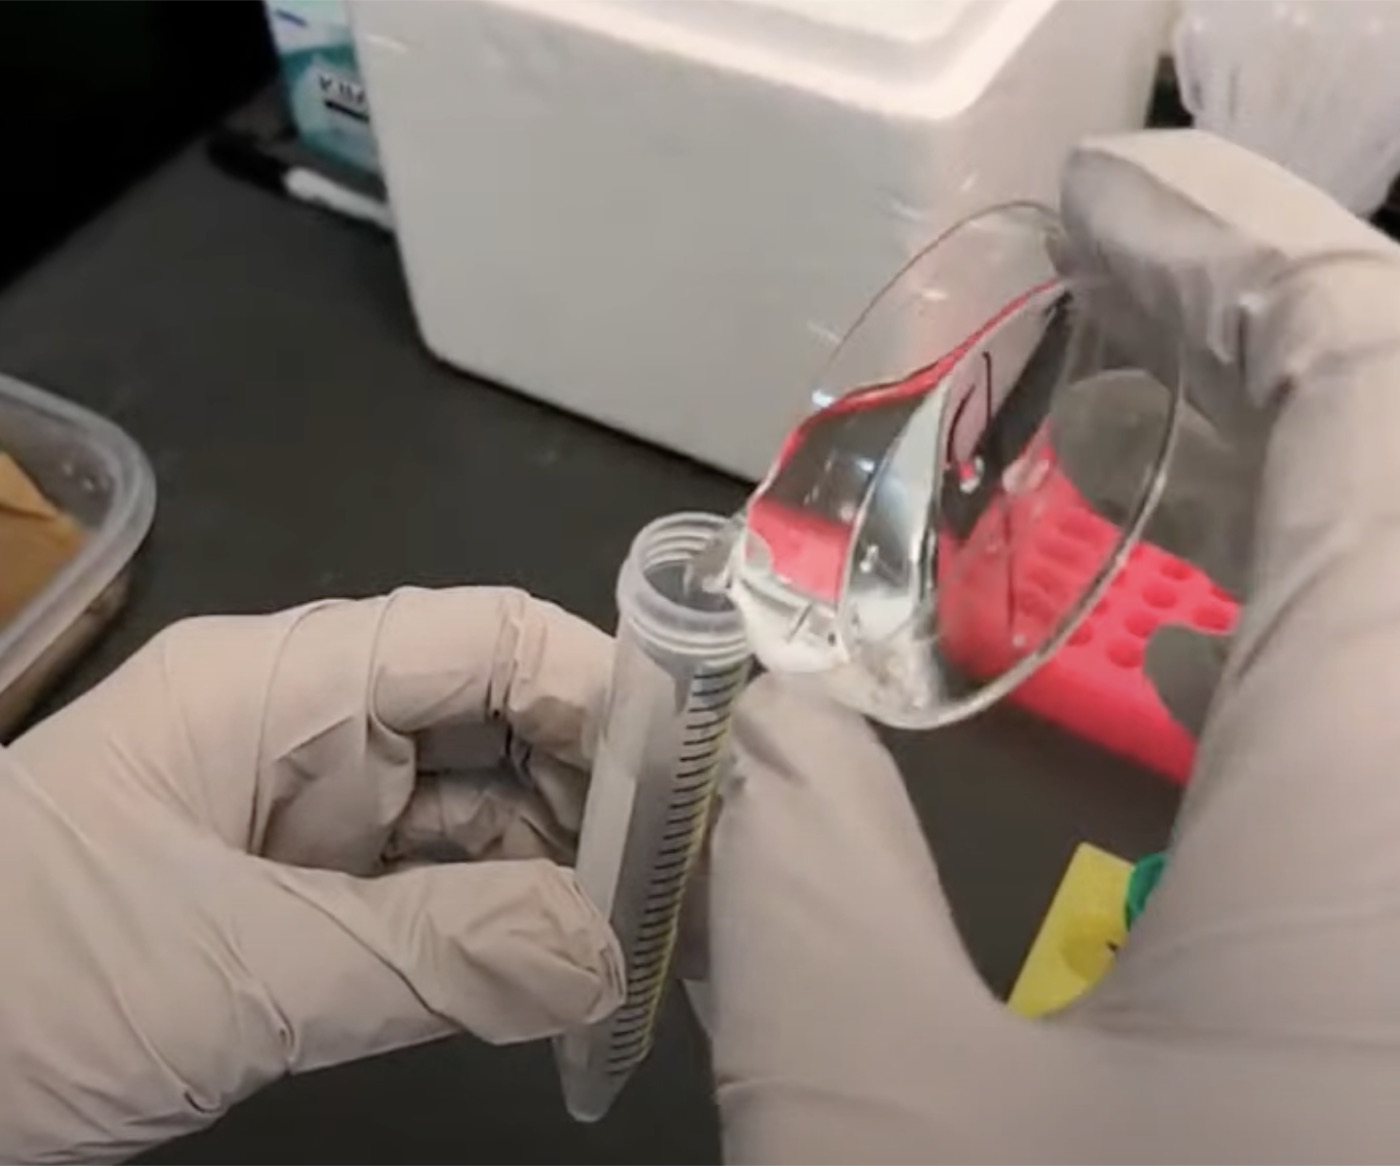
Pouring sea water into the tube
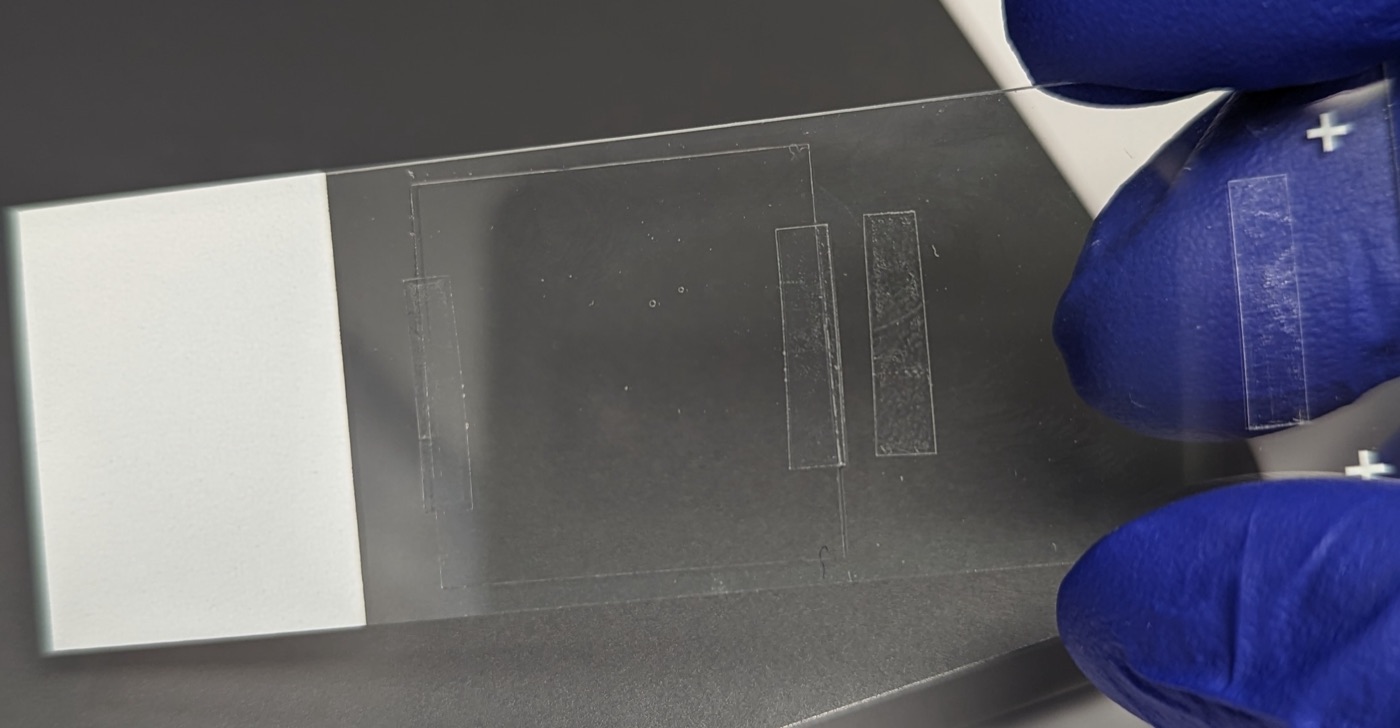
Coverslip placement
Since the sea water will dry up, you usually have around 30 to 45 minutes to image the larvae, but that should be enough.
Preparation of the microscope
Step 1: Make sure to switch on the fluorescent light source first (the big ON/OFF button, and turn the key to the ON position under “Laser Power”) before opening the NIS-Elements application on the computer. See the images below. You will get an error message if you open the application first. (Once the application is open it might show a warning message about the OKO device; just hit cancel.)
Step 2: Place the microscope slide under the microscope, coverslip facing the objective (coverslip side down when using an inverted microscope).
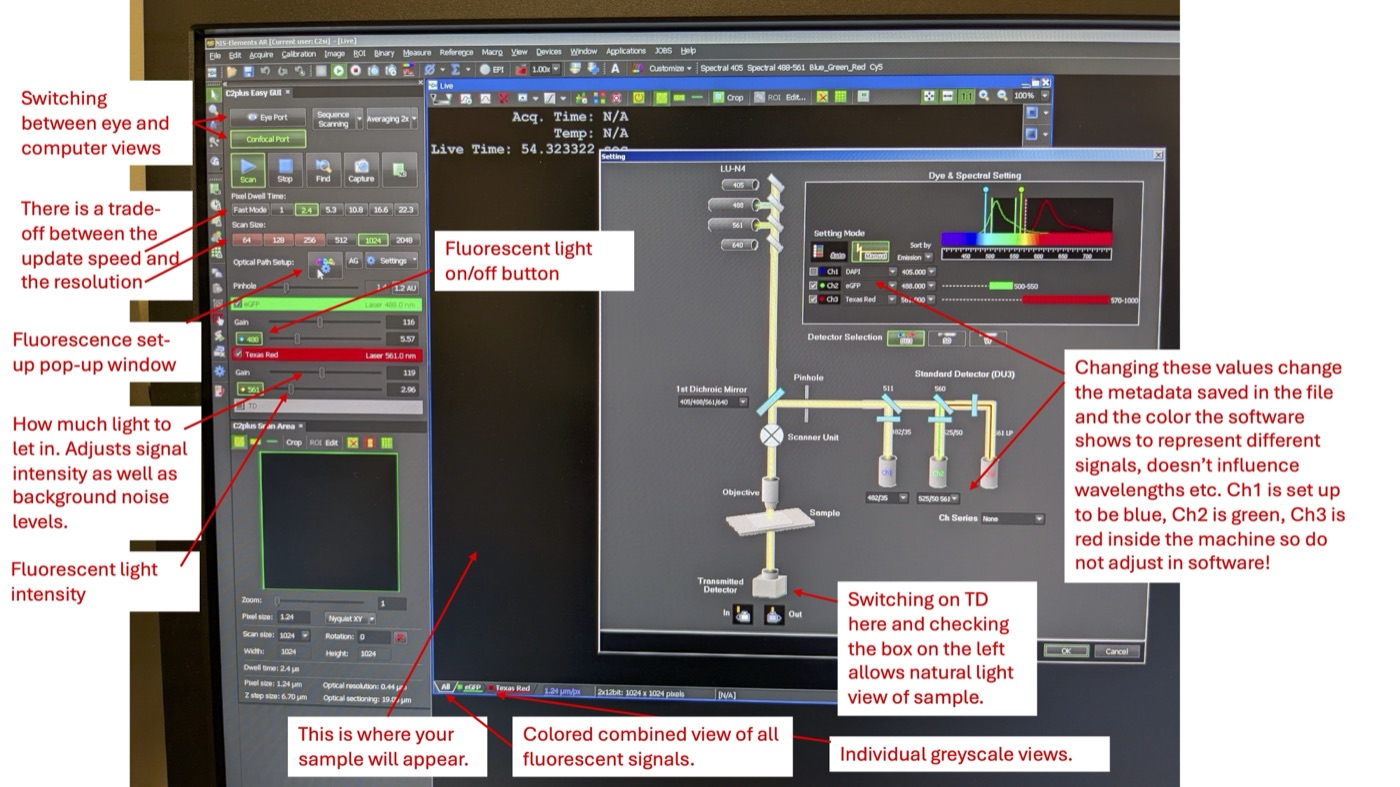
NIS-Elements software interface
Step 3: Click on the Eye Port button and use the microscope eye port to locate and focus the larvae. Then click on the Scan button to switch to the camera view. If the Remove Interlock button is red, it means that the laser is on but the shutter is in place (as indicated by the lack of light under “Shutter Open” on the laser box). Click Remove Interlock to remove the shutter. You should see the laser hitting your sample under the microscope (if any of the lasers are selected and switched on in the left menu on the screen).
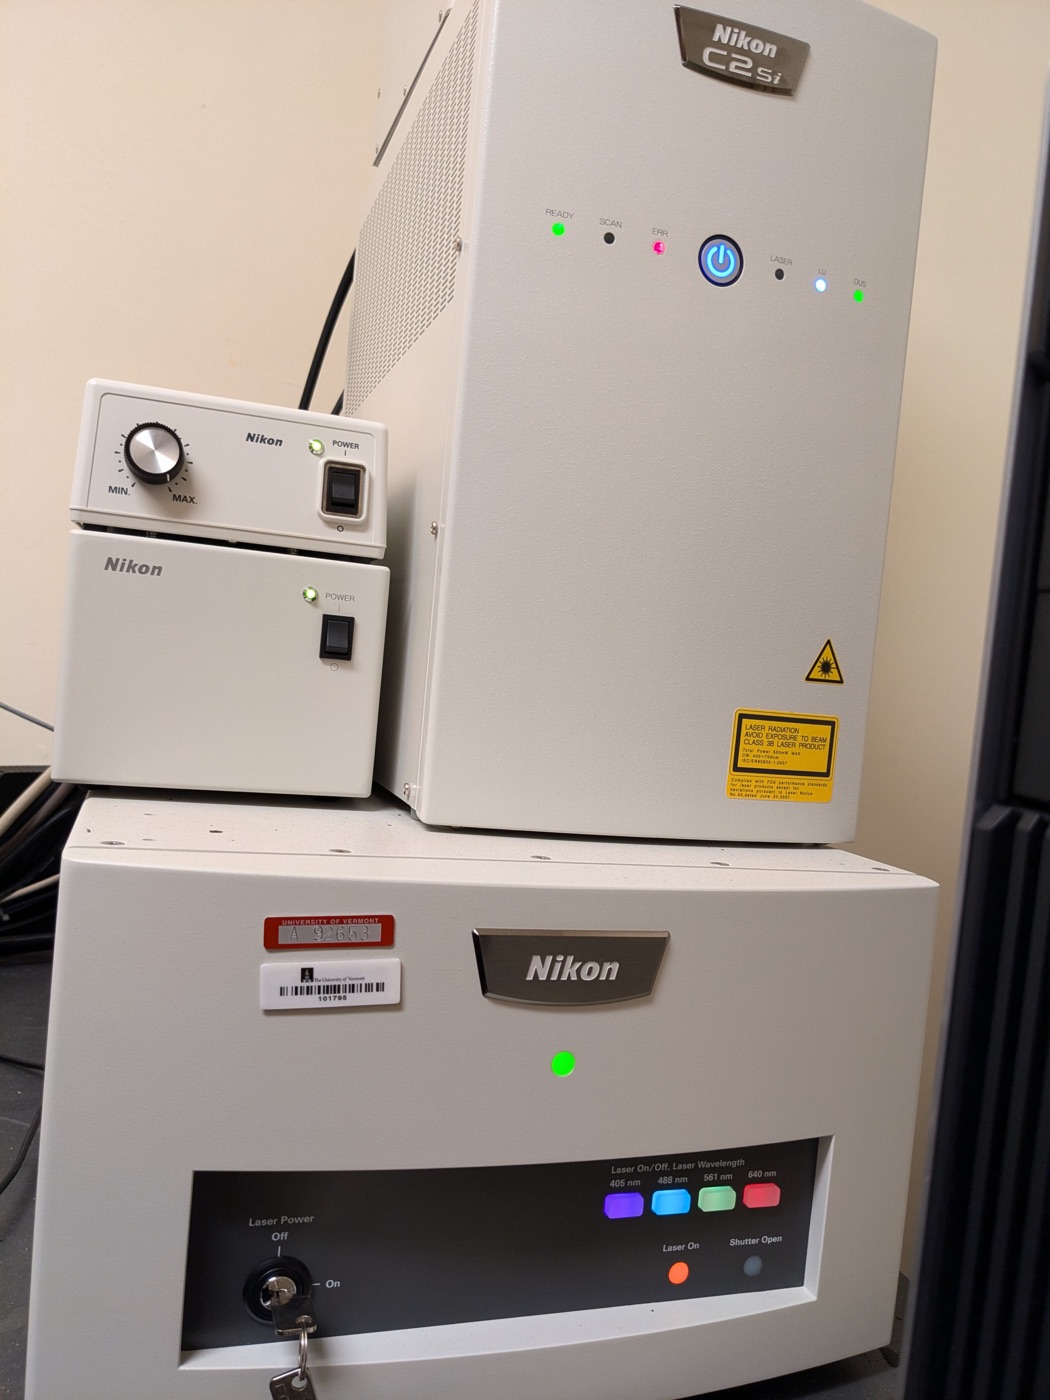
Switching on the fluorescent light; the shutter is closed
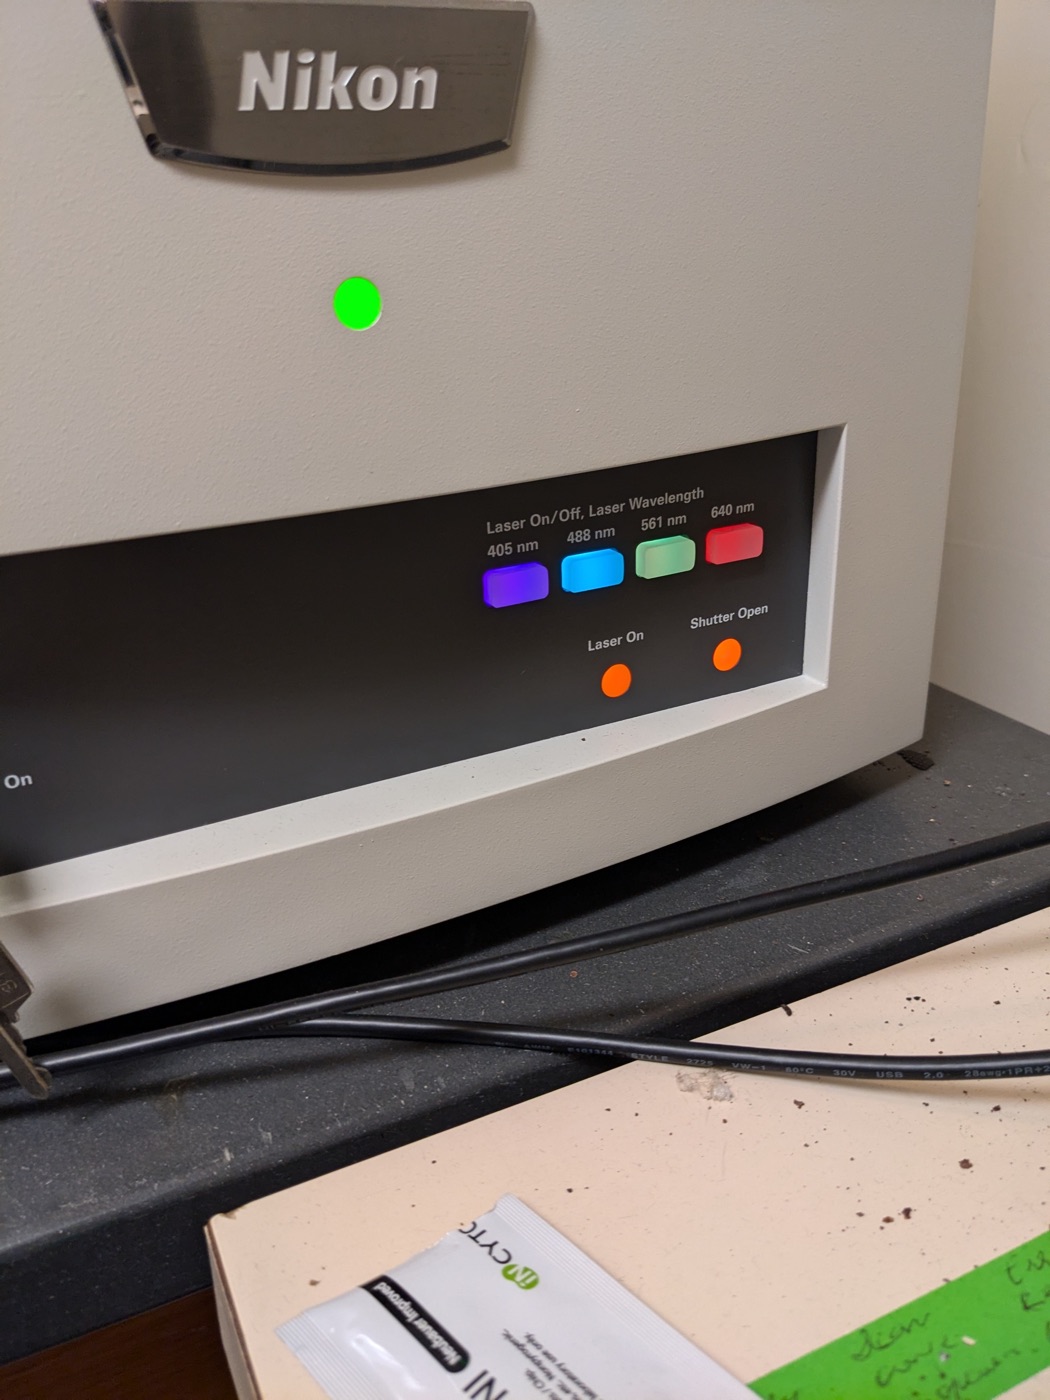
Shutter is open
Note on checking fluorescence with your eyes
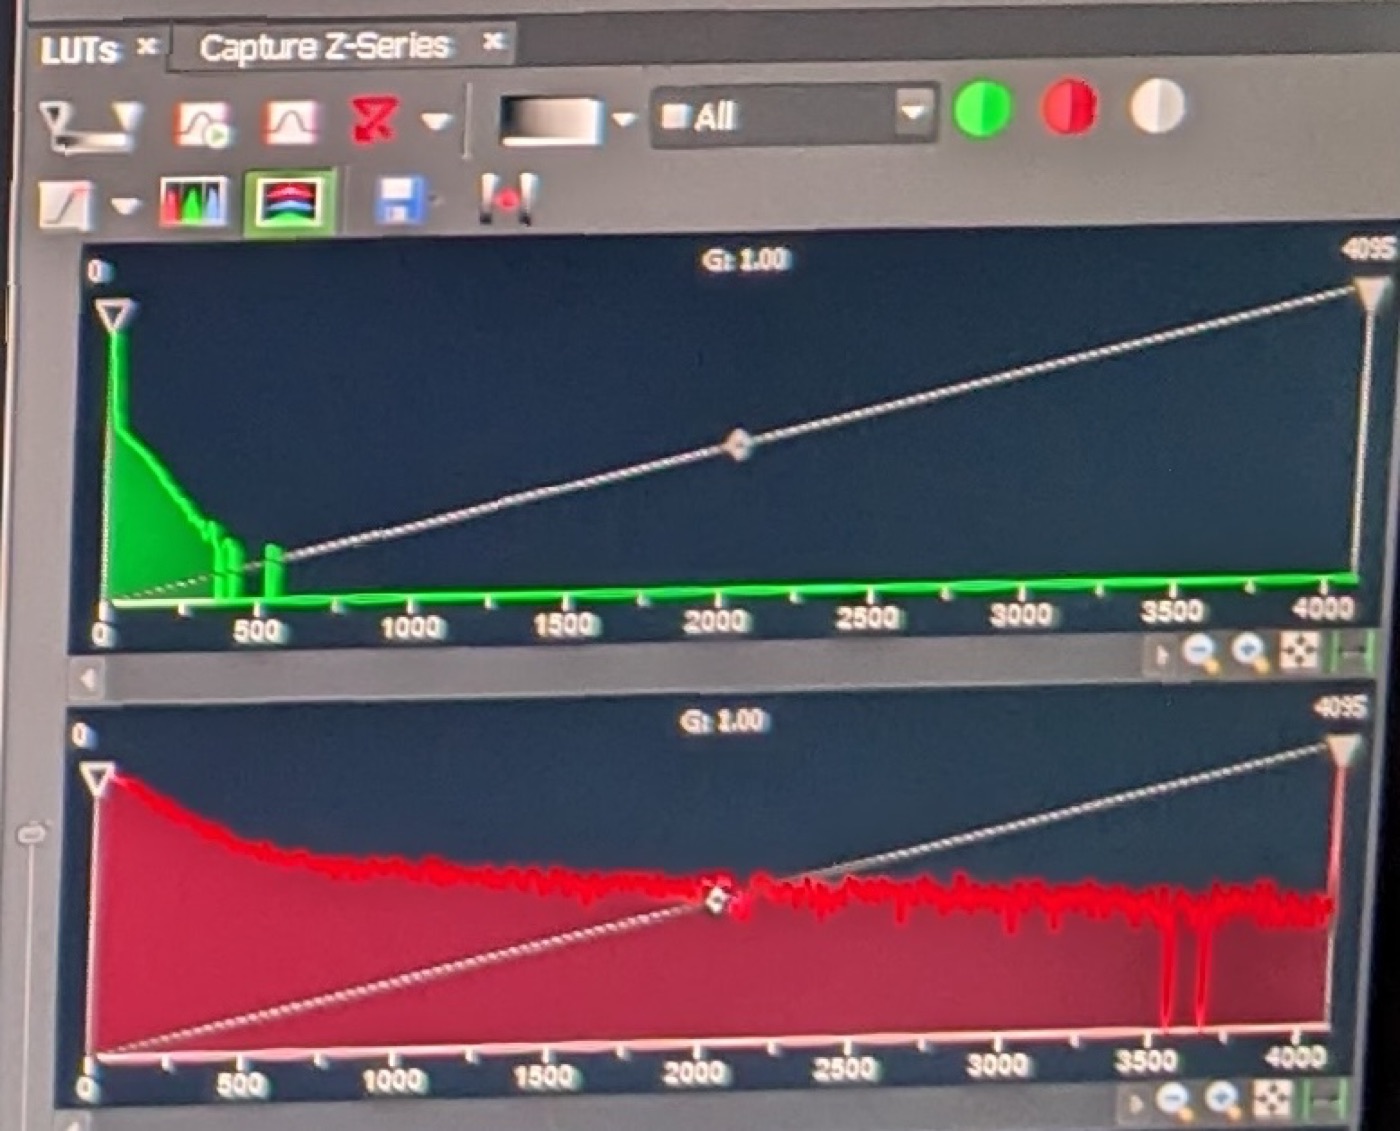
Step 4: Adjust the sliders for the different fluorescent signals such that the gain is as high as possible without the background of the sample being too noisy, and such that the distribution of pixel signal intensities looks like the examples below. Set the laser intensity low to avoid damaging the sample, but high enough for appropriate levels of excitation. In my experience, the following values achieve this:
- eGFP: gain 115, laser intensity 10.
- Texas Red: gain 120, laser intensity 2.
This is what the various pixel distributions should look like (x-axis is intensity, y-axis is the number of pixels with that value):
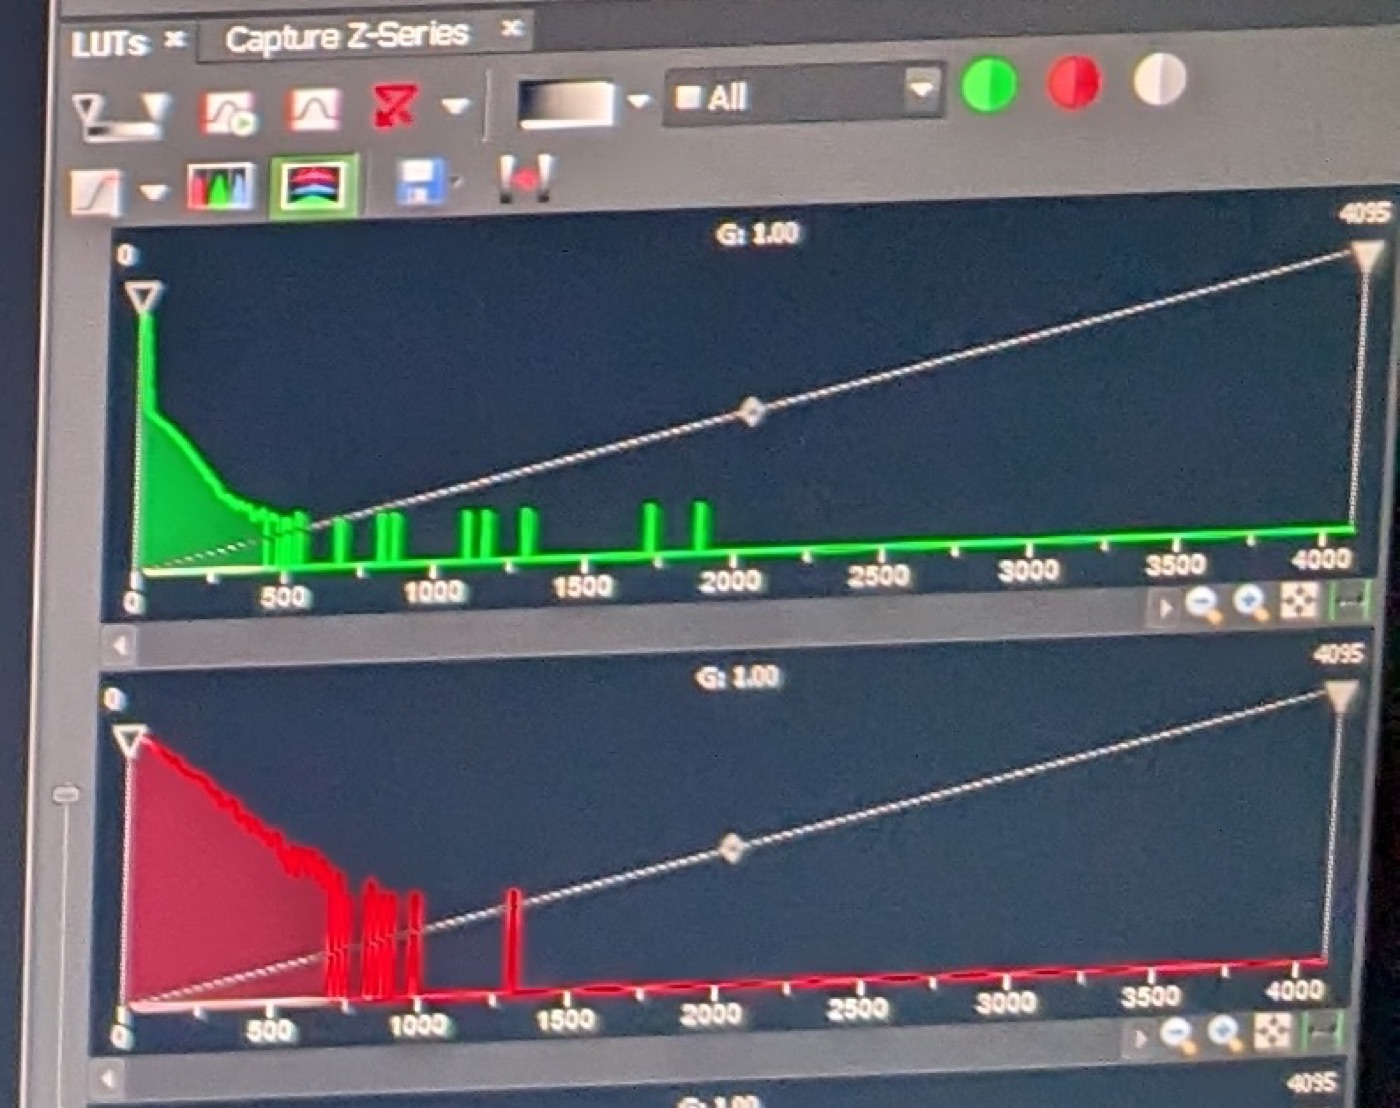
No-injection control
No-construct control injection
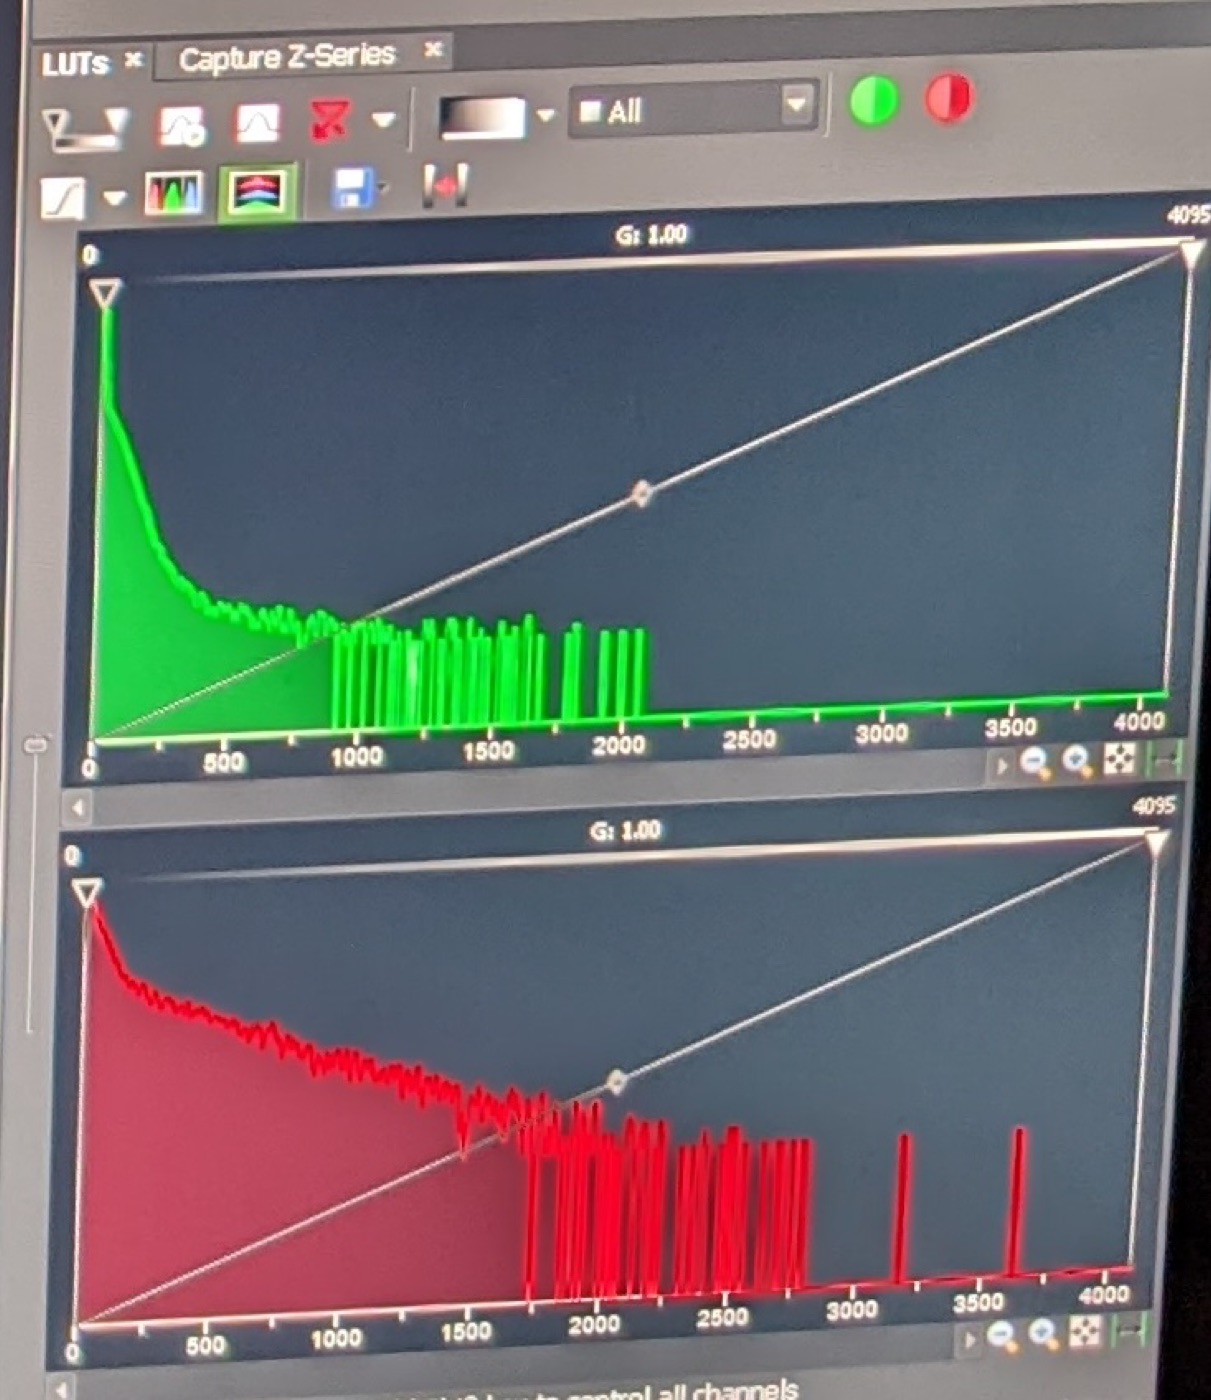
GFP expression signal
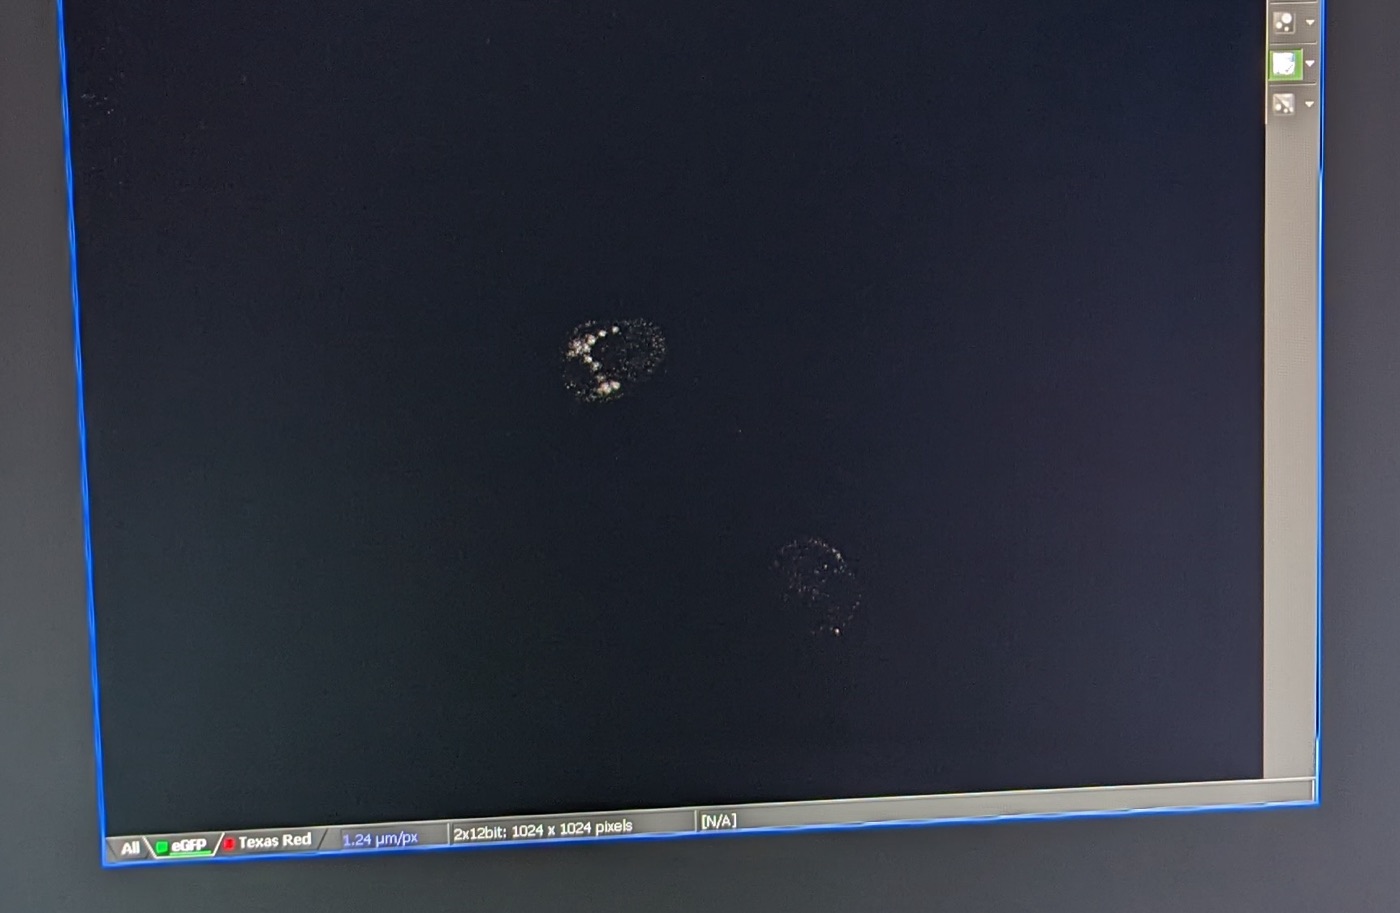
Step 5: Once you find a larva with GFP expression, save the image (File → Save). It will save the pixel values as well as the settings you used to take the image.
Example image of GFP expression, showing PMC-specific expression:
GFP-only view

Combined signals view
Good luck! :)
Khor, J. M., Guerrero-Santoro, J., & Ettensohn, C. A. (2019). Genome-wide identification of binding sites and gene targets of Alx1, a pivotal regulator of echinoderm skeletogenesis. Development, 146(16), dev180653. ↩︎
3-AT stock solution: prepare a 1 M stock solution of 3-aminotriazole (3-AT, MW = 84.08) by dissolving 0.84 g of 3-AT in 10 ml of ddH2O. This solution can be stored at 4 °C for up to 6 months. ↩︎
PS-coated dishes: prepare a 1% solution of protamine sulfate (PS) by adding 0.5 g of PS to 50 ml of deionized, distilled water (ddH2O) in a 50 ml conical tube. Shake well at high speed on a bench shaker at room temperature for 1 to 2 hours to ensure complete dissolution of the PS. This solution can be stored at 4 °C for at least 3 months (make sure to completely dissolve the gel-like precipitate before each use). Take a sleeve of 60 mm × 15 mm polystyrene petri dishes and lay out both lids and bottoms on the bench. Warm the PS solution to room temperature. Pour 1% PS solution into each dish (both bottoms and lids can be used), just enough to cover the surface, and leave for at least 2 minutes. The leftover PS solution can be reused many times within 3 months when stored at 4 °C. Place the PS-treated dishes in a beaker filled with distilled water (dH2O). Leave the beaker under running dH2O for at least 10 minutes. PS-coated dishes can be used immediately or air-dried for storage. Cover them to prevent dust accumulation. They can be stored at room temperature for 1 month. ↩︎